Tombstone Build
A Step-by-Step Look at Building a Foam Tombstone
Marsha Bryant
https://templatesintime.com/halloween/tishan.html
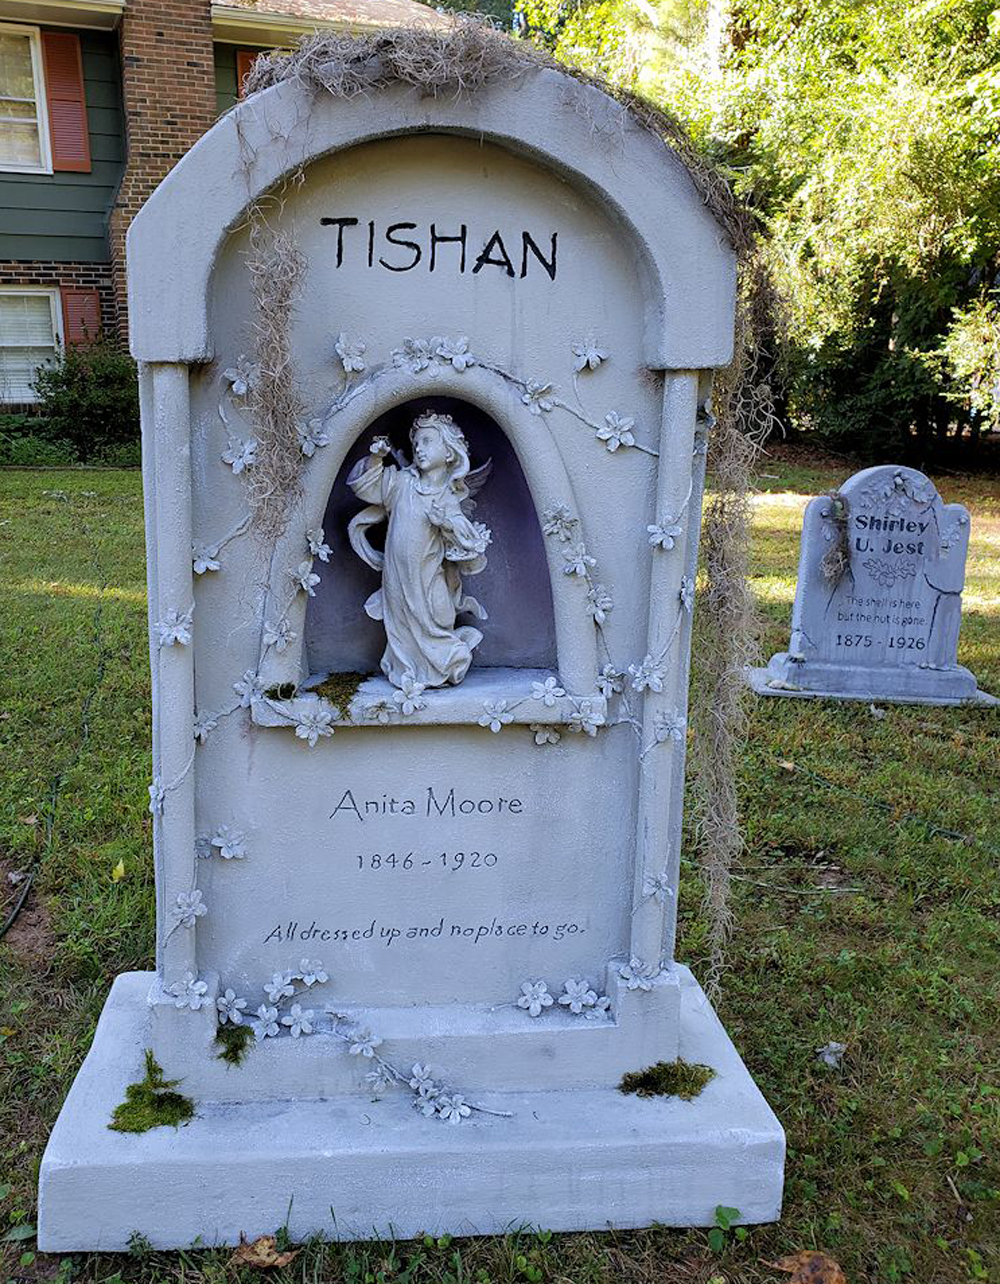
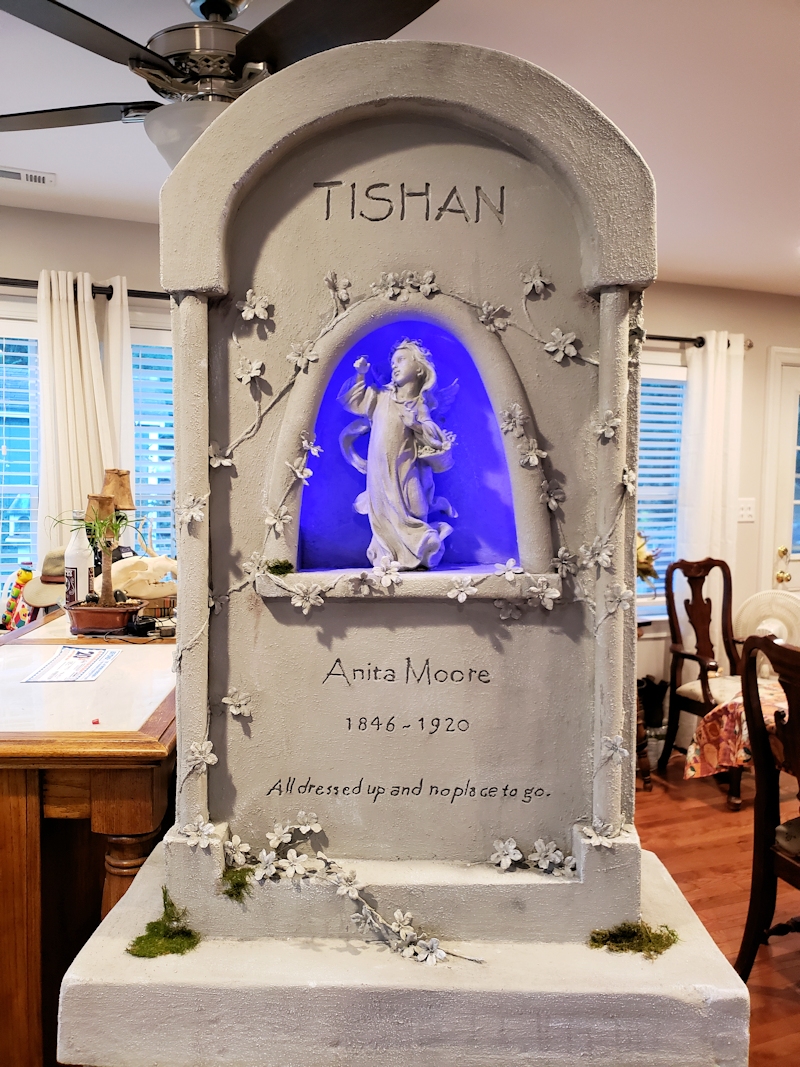
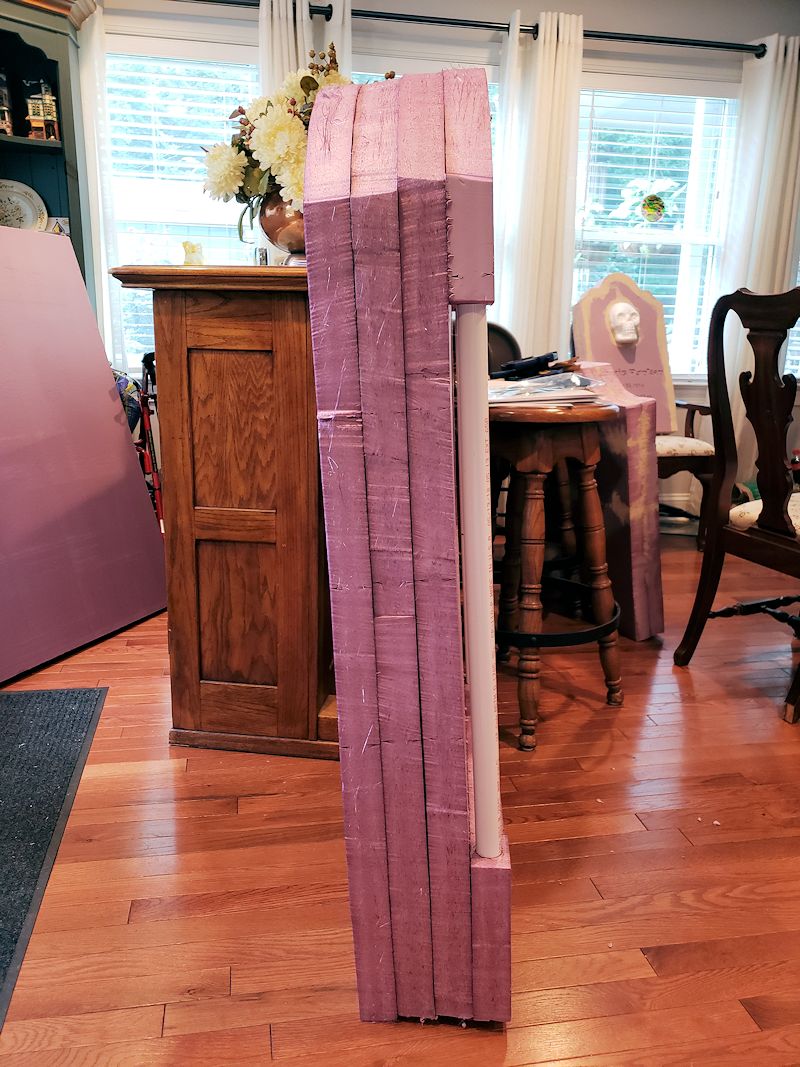
Here’s my latest tombstone that I carved with Hot Wire Foam Factory tools. Love her looks! She is 48 inches high, 24 inches wide and 8 inches deep. She is the centerpiece of my graveyard.
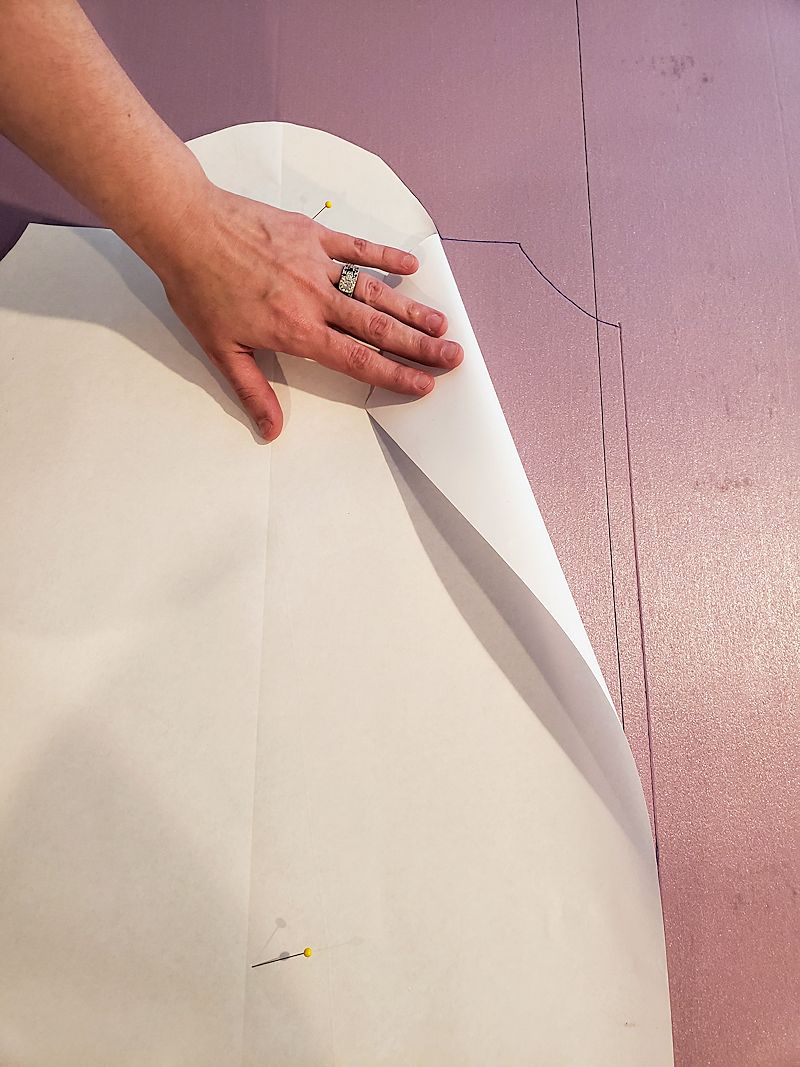
For the concept, I drew it out on paper to make sure I captured the look I wanted. I also wanted to make sure that my text would be the size I needed. Trace/draw the stone’s shape onto the foam – three times! With Tishan, I also had to cut out the top (cap) and bottom (footer) pieces for the top layer. I used 2 inch foam for this tombstone, so she is 8 inches wide!
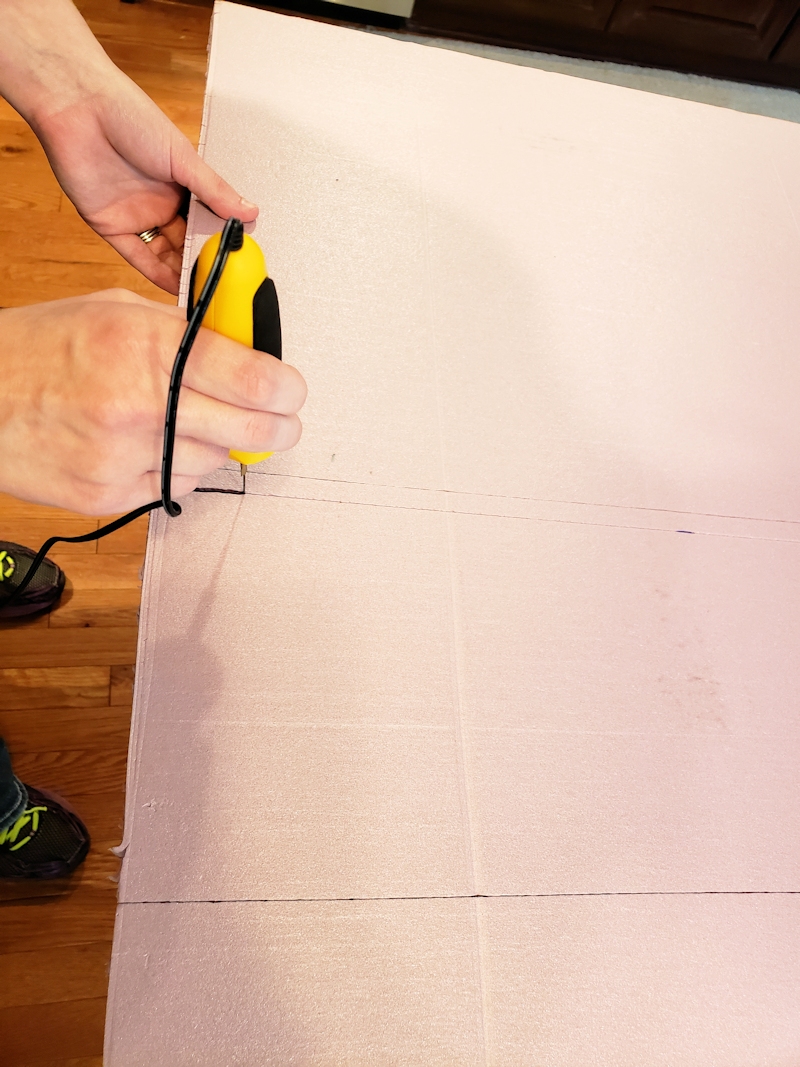
Using the Hot Wire Foam Factory 6″ Hot Knife, cut the shape. Couple of pointers: Keep the knife at a 90° angle to the foam and make sure you don’t go too fast, let the foam melt as you gently push it through. This was the first time I had ever used a hot knife. It was wonderful! Can’t believe how easy it was to cut the foam. I’ll never go back to a jigsaw!
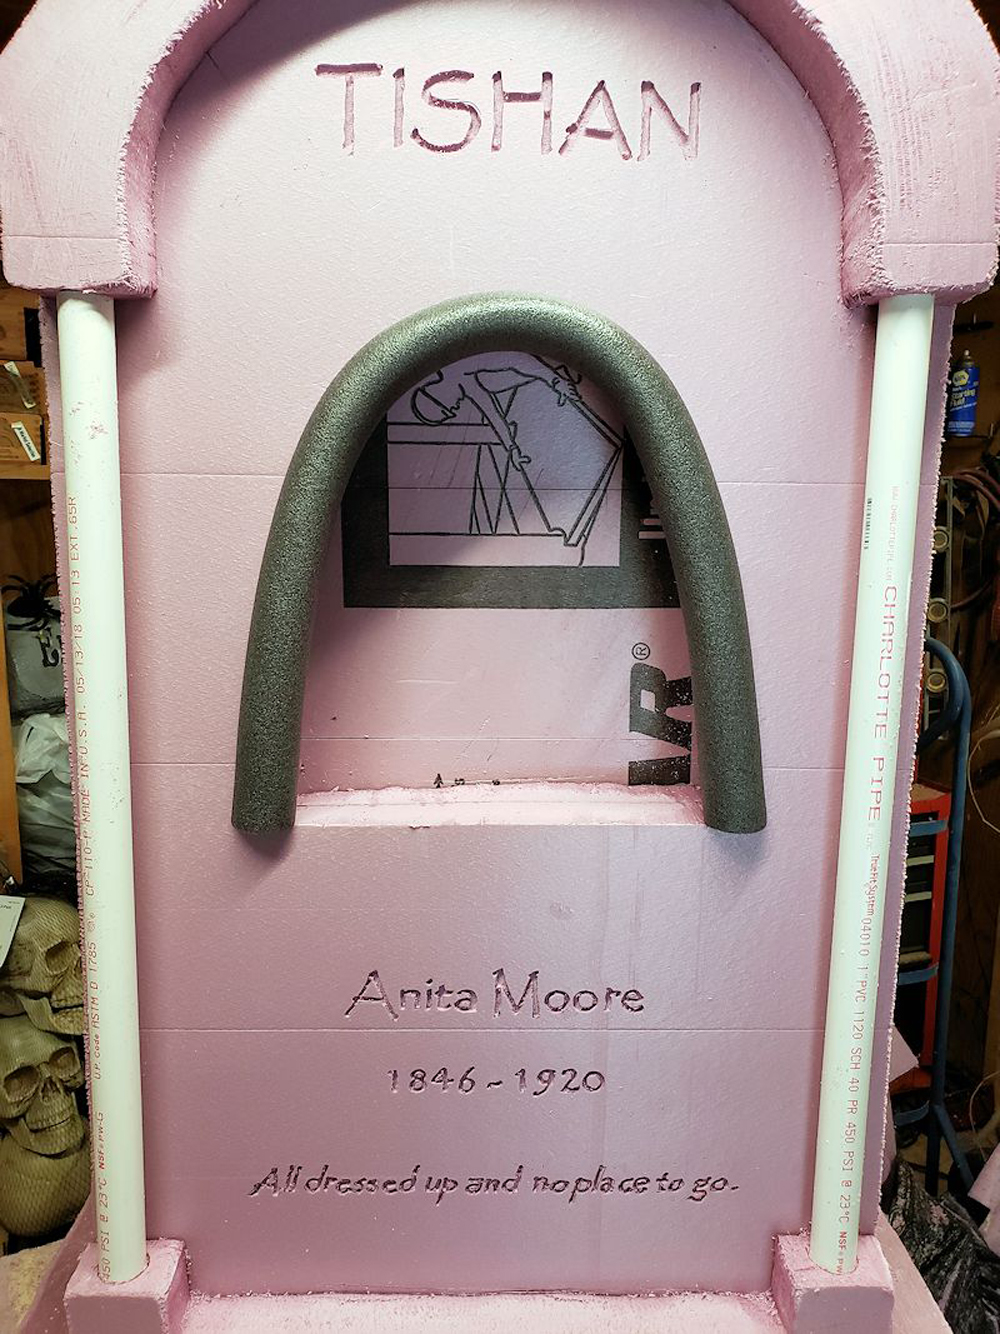
Now carve the names & epitaphs with the Hot Wire Foam Factory Precision Engraver.

When gluing the pieces together, I used 5-6 clamps to keep the pieces tight. I used Hot Wire’s Foam Foam Fusion glue. It was fabulous! So much easier than using liquid nails and it won’t damage the foam.
As you can see, I cut three pieces for the main stone, one of which has the opening for the statue. The front of the tombstone has the tombstone cap & footer cut to fit. The tools are amazing and very easy to use. The Pro 6-Inch Hot Knife produces such clean lines I could have never gotten with a jigsaw!
After the glue set, then I made the base for the stone and glued it on.
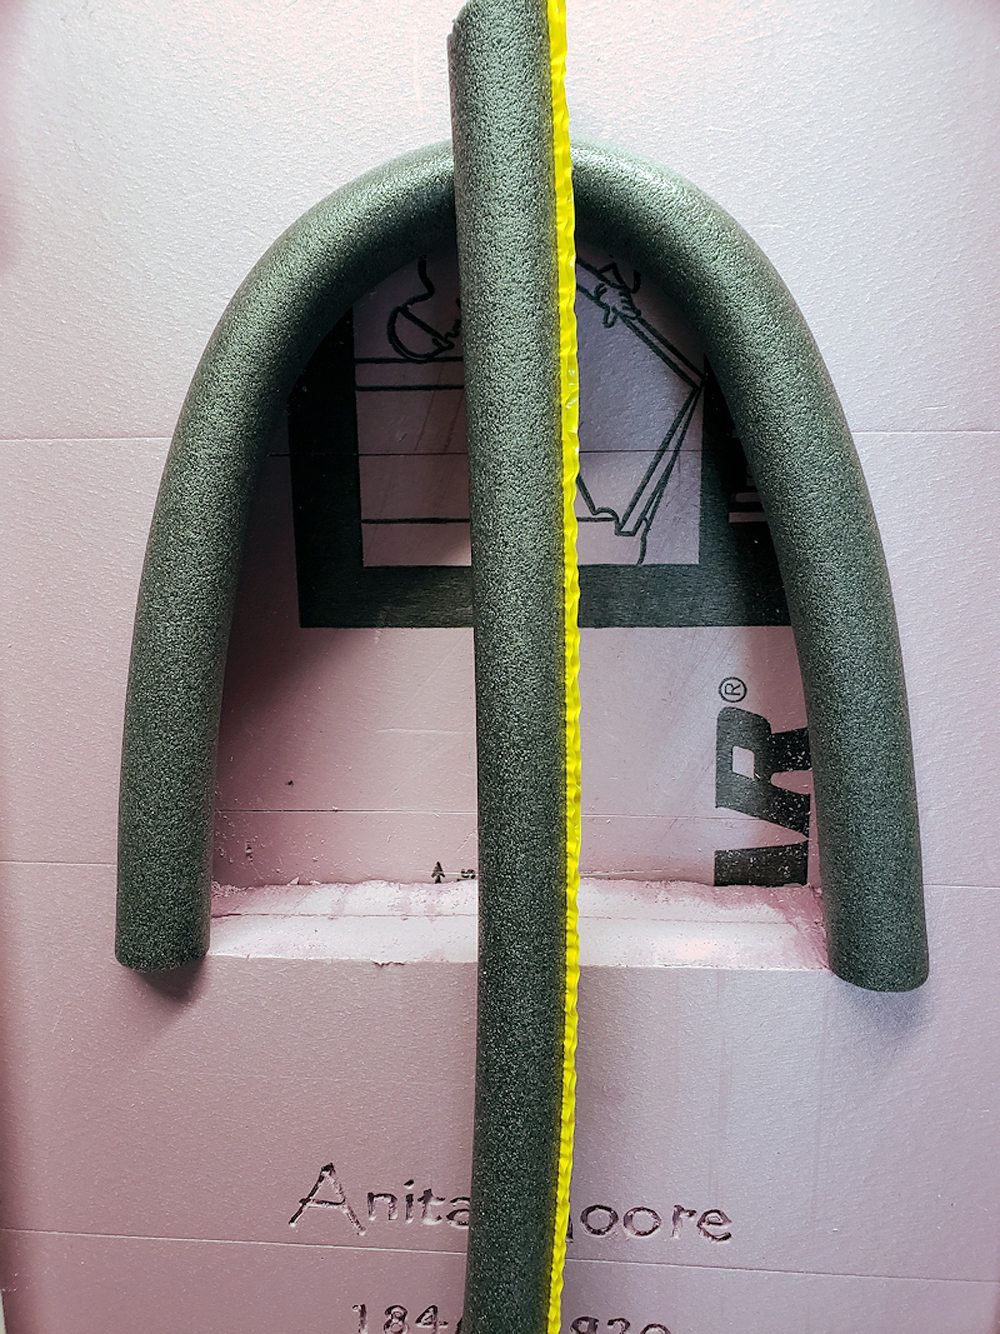
I measured out the PVC pipe for the posts and pushed them in place, after using Hot Wire’s Engraving tool to cut the slot. Next time… put the PVC in BEFORE gluing the top and bottom and prime the posts!
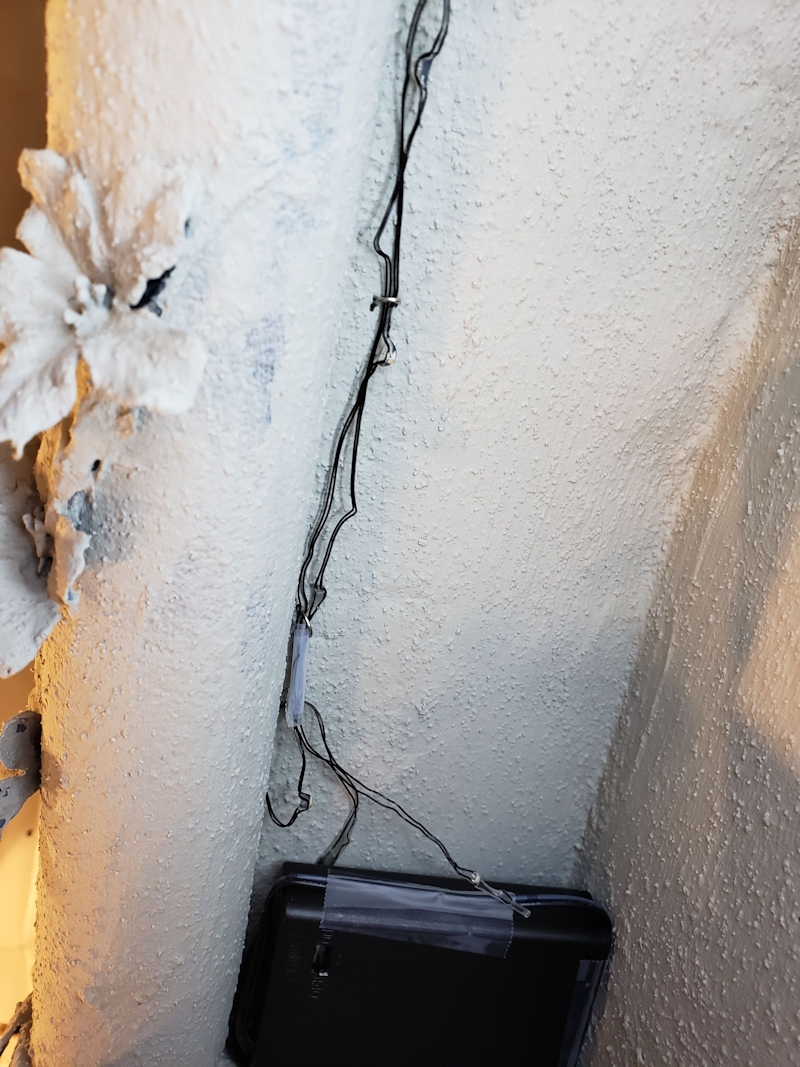
I purchased a string of mini lights that were supposed to be purple, but they were blue. Found that out after I added batteries. Good thing I like blue! I cut paperclips in half and used them as staples in order to keep the lights where I wanted them. Luckily the control box fit perfectly inside the opening.