Aztec Pyramid
By Andy Slater
www.terragenesis.co.uk
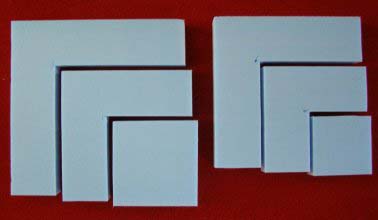
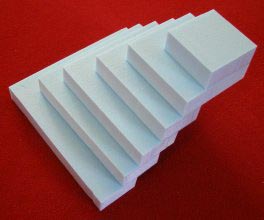
This project is made from 30mm and 10mm craftfoam and makes good use of the Hot Wire Foam Factory Scroll Table and Engraving Tool.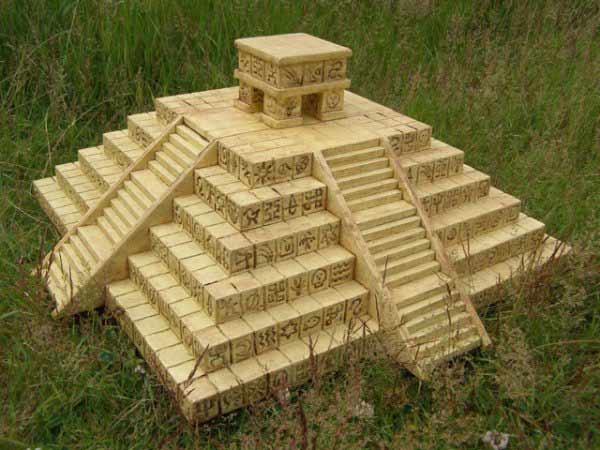 My starting point for the project was that the Hot Wire Foam Factory Scroll Table has a maximum throat depth of just under 23cm so I ran some 30mm foam though it in order to create 4 squares. Next I needed 4 squares that were 30mm smaller than those so I placed an offcut of the 30mm foam at the back of the table to act as a spacer. I then set the fence on the the Scroll table to 60mm and used it to cut each of the squares as shown in the image below left. To the left is a large square and to the right is a small square. The image below right shows the results of stacking the six pieces with the largest on the bottom and the smallest on top.
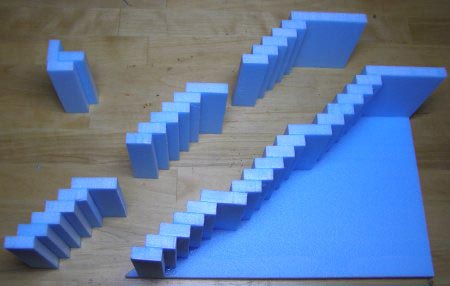 The image shows how the stair cases went together. At the top left you can see how I used an additional step to get equal spacing of the treads and risers. Note how I also included wide steps every so often to provide places for figures to stand. The flights of stairs were then attached to the side pieces, one at the top, one at the bottom, and finally the one in the middle to fill the gap. This allowed me to make adjustments such that everything fit together neatly with no significant gaps (it doesn’t actually matter if the steps are not perfectly level).
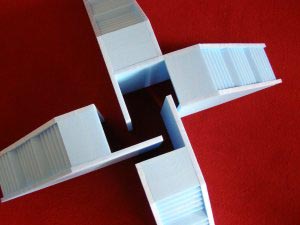
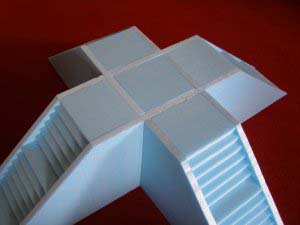
The stair sections were assembled as shown in the images above.
The next step was to add in the corner pieces. These were decorated prior to assembly using the Hot Wire Foam Factory Engraving Tool.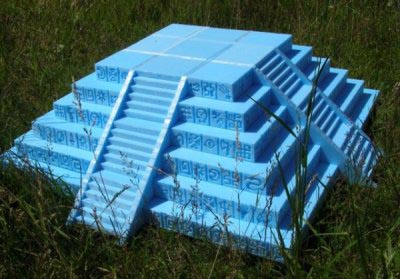
Lines were then engraved on some of the horizontal surfaces and a temple structure was added to the top. The model was then lightly sanded with medium grade sand paper to knock off the sharp edges and to lightly scratch the smooth flat faces of the foam to provide key for paint.
A couple of base coats of yellow household emulsion where then applied and allowed to dry. This will fill small gaps however if there are any larger gaps to be dealt with then a little lightweight decorators filler will do the trick.
The final step was to apply numerous thin washes of dirty brown paint with the model propped at various different angles in order to catch the wash in the details, followed by a light dry brushing of sand coloured paint to catch the raised details and edges.
Copyright © 2007 Andy Slater