Village Display How-To: Water Effects
Ken Shirley
Video – Using the Hot Wire Foam Factory Sculpting Tool to create water effects for a village display:
~CAULK~
Caulk is highly underrated and is so easy. First, go to any home improvement store and buy CLEAR caulk. (When first applied, it may appear to be white caulk, but it will clear up after drying a few days.) Some containers even say CRYSTAL CLEAR. That’s even better. After you prep your landscape by sculpting out waterways, creeks, etc., on your insulfoam base, you’ll want to paint the terrain and the bottom of your waterway. (This is a whole other seminar.) For this process, always use water-base acrylic or water-base enamel paints on insulfoam as they will not erode the sculpting you may have completed in your insulfoam landscape. After the paint is totally dried, you are ready for caulk application. Merely squeeze out the caulk via a caulking gun, being generous and covering all of the painted bottom of your waterway and maybe even some of the side terrain, depending on how raging your water is to be. Take a popsicle stick, or the like, and spread the caulk to even it out on your design. Peak the water by tipping the caulk with your stick. Once it dries, it will hold its configuration better than most products.
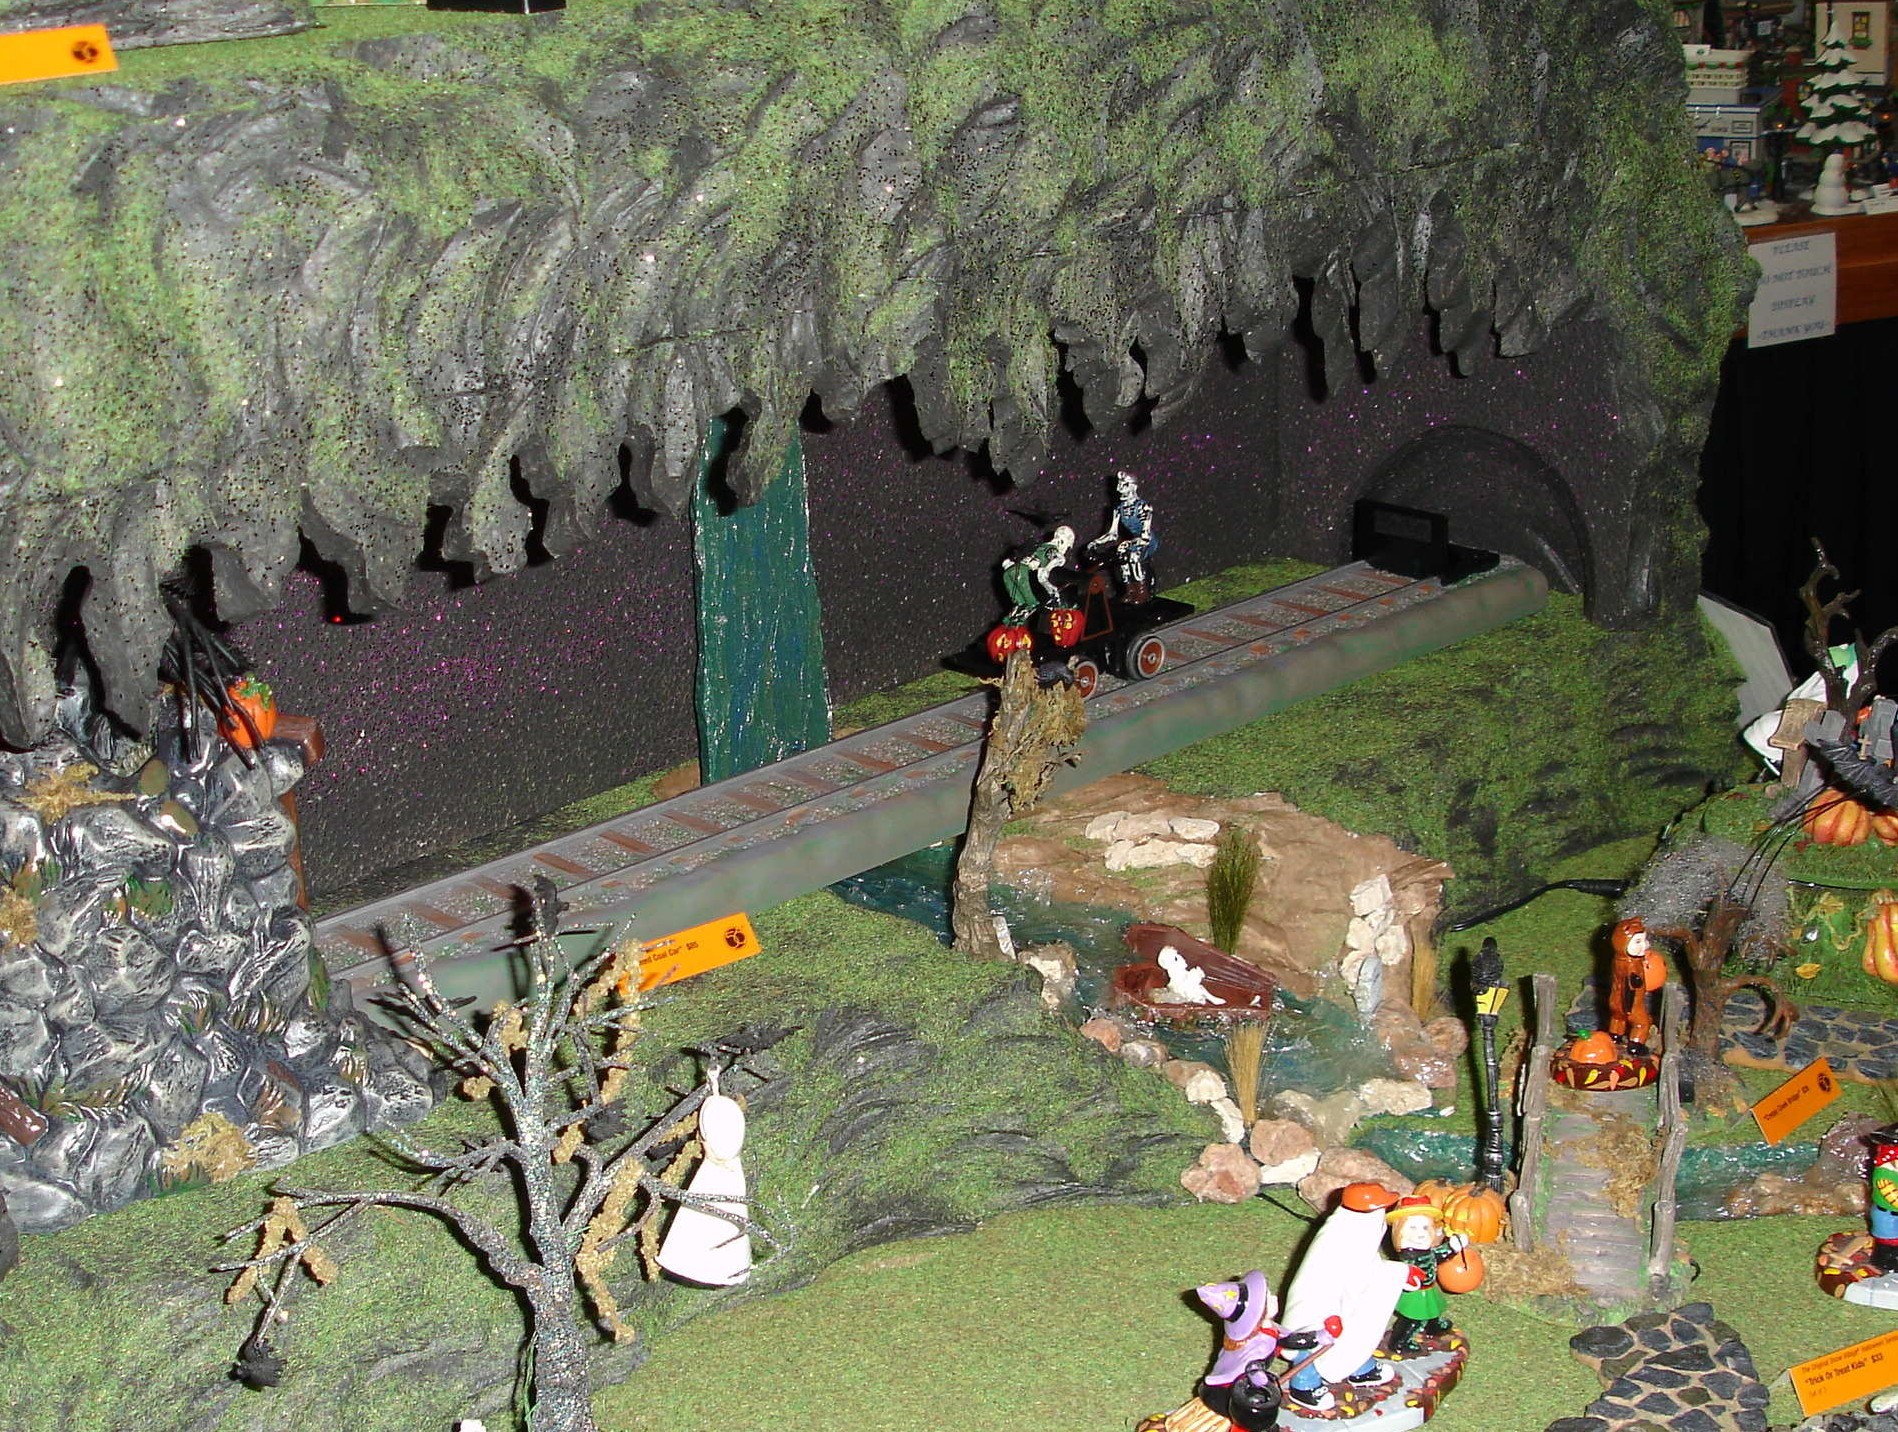 A Halloween Village display is pictured above. The stream bed was painted green with blue and brown streaks to give it that murky look.
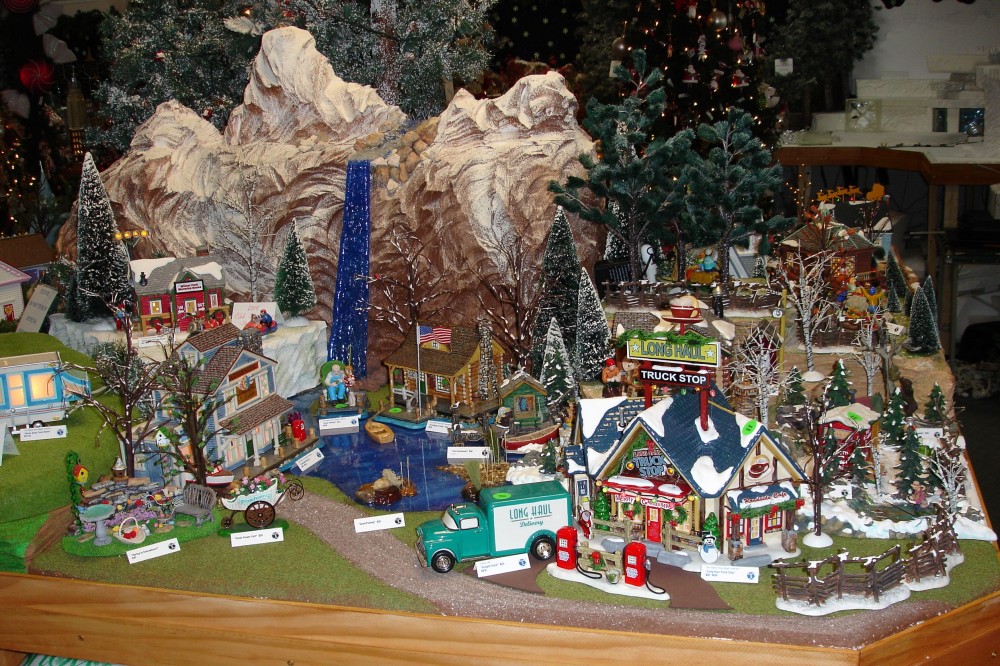
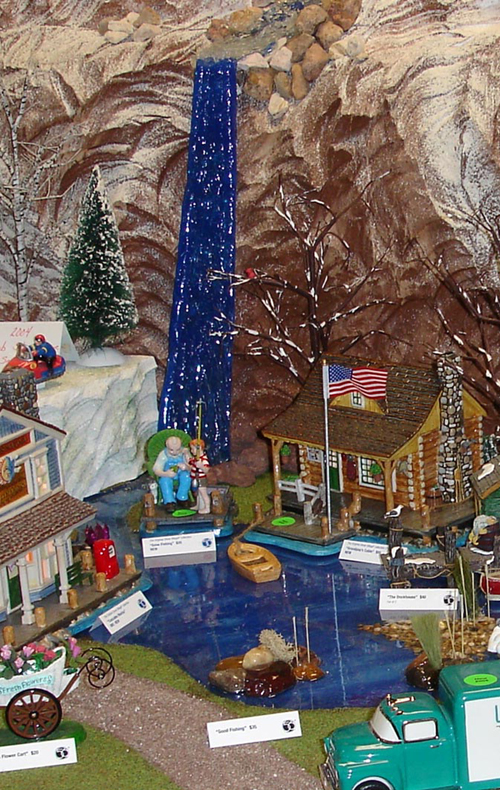 The photo above shows how you can use caulk to create connections between resin waterways as well. You’ll see from this mountain waterfall (resin) going into a placid mountain lake (resin) that there is raging water from the mountain at the top of the falls and a splash when the falls hit the lake. The raging water and the splash were created using caulk. (Notice that this picture was taken before the caulk had dried and cleared.)
For the top of the falls, merely hot glue rocks or pebbles where you wish the water path to be. Then, paint the rocks/pebbles the same color as your water. When dried, cover with caulk and peak as desired to give any effect of raging or placid water. At the bottom of the falls, caulk was merely applied at the junction of the resin falls and the lake and then peaked to create the effect of splash. One of the many beauties of clear caulk is that it will take on the color of whatever was painted beneath it. You don’t need to colorize it or paint it. There are other products on the market such as Water Effects by Woodland Scenics, Water Gels, and Decorative Snow. Others will advocate candle wax or paraffin. The three commercial items listed don’t hold their shape as well during drying and sometimes become cloudy. Candle wax and paraffin have to be heated and cared for and can become very difficult if not done properly. They are a seminar in themselves. Thus, for slopes, raging waters, even waterfalls, I find that caulk is ideal in that it is easy, cheap, holds its shape and looks great.
~RESIN~
Resin provides the village landscape with a freshness and unparalleled beauty – and no, it doesn’t have to be hard. The best resin on the market is EnviroTex Lite. This product has only a couple of mandates to produce beautiful and lasting water displays. It comes in various amounts but is consistent in that it has a bottle of resin and a bottle of hardener. When mixing, you will want to ensure that you have EQUAL parts of both. If you don’t, or if you don’t blend them thoroughly, it will never set and will always have a sticky finish. The key is to have two clear, throw-away containers that are smooth on the inside. Pour equal amounts of the resin into one and hardener into the other, and then combine the two. Stir (don’t whip) until they become one. You will know when this occurs because the initial mixing will render a waxy look; when the two solutions are completely mixed, they will render a clear look as the liquid streams off your stir stick.
When properly mixed, you may add color using acrylic paints. I use metallic acrylic paints because they give a better sheen to the finished resin. A word of caution on mixing colors – go easy. Resin colors very fast, so only put in a couple of drops of acrylic paint initially and add more as needed. Too much paint will darken the resin. Resin, like caulk, will also take on the color of whatever is beneath it, so if your base has the color you desire, you could just mix the resin in clear form and allow the village base color to come through. After your solution is mixed, there may be air bubbles in the mixture. Don’t worry about it just yet – it is no big deal.
Now you are ready to pour into your waterway. If you have prepared your water area with any rocks, etc., and would like them to have a wet look, pour the resin over them first and let the resin fill your pool after running off the rocks. The rocks (or whatever else the resin touches) will have a permanent shine. After your resin is successfully in your water area, you have about ten minutes to smooth out any lingering air bubbles. They will usually burst and go away with a careful stroking of your stir stick. After ten minutes or so, the resin starts to gel and you will be unable to “play” with it. Note that resin will eat into insulfoam. Thus, there are three ways to prepare your surface, depending upon the final effect you wish to obtain. You may:
(1) line your water area with plastic wrap and then pour the resin into the lined area
(2) completely paint the water area with water-base enamel paint and, after it is totally dried, pour the resin into the area, or
(3) pour the resin directly into the insulfoam-carved area and let the chemical reaction begin.
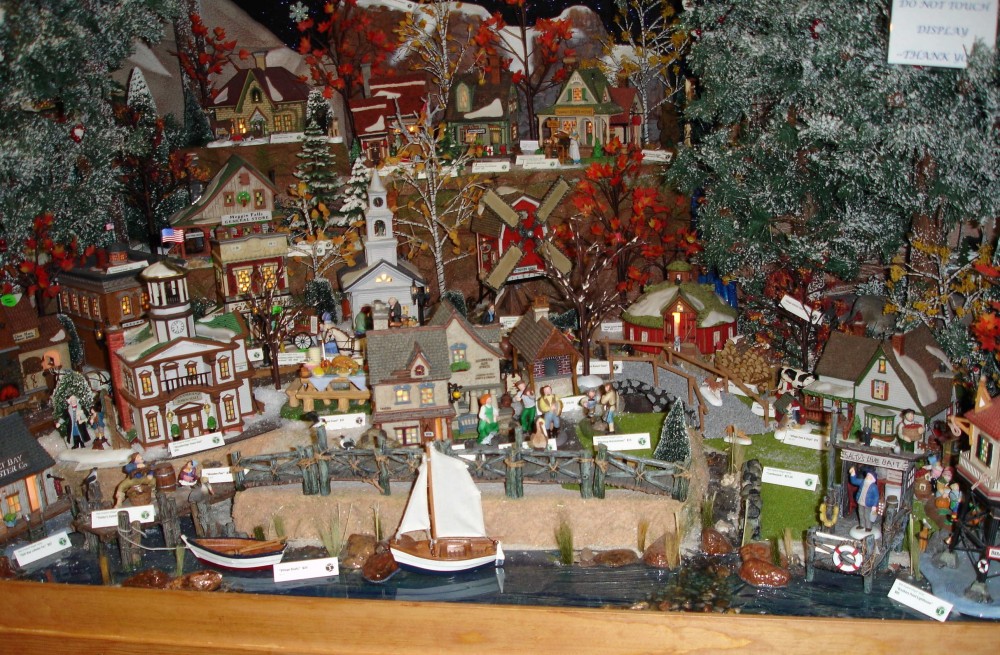
An example of each: Below is a harbor scene from New England Village. I painted the harbor a sandy beige color, allowed it to dry, and then stretched plastic wrap over it, pleating it to create the effect of waves coming to shore. I colored the resin with a deep blue so that it would be blue water coming to shore over a sandy beach front. (After the resin dries overnight, you can simply peel off the plastic wrap and fit your “water” into the carved-out insulfoam.) Even though I painted the insulfoam with enamel, I lined the harbor with plastic wrap because it helped to produce an appearance of waves.
The picture below is of resin poured directly into the water area. I had painted the area with shades of blue to give the lake a moving effect and had placed rocks and grasses in place. Then, I poured clear resin into the water area, coating the rocks, and let the color of the lake bottom come through.
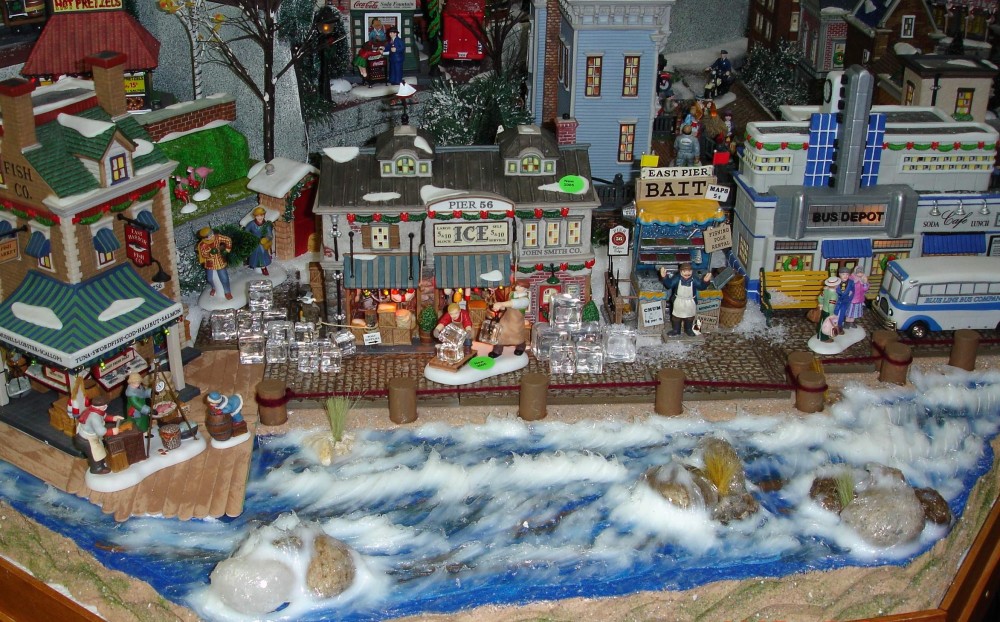
 The next picture is what happens when you purposely pour resin onto insulfoam without its being totally sealed. This is a beach scene for the summer side of Snow Village. I used Krylon Spray Paint in two shades of blue on the insulfoam. As you may know, Krylon will slowly eat away the insulfoam. The differing shades of blue will give you the look of increased depth of the water without actually having any more depth in your insulfoam base. After the Krylon had dried, I poured blue-colored resin directly into the water area. A lot of bubbles and turbulence will be realized, but the effect of waves and foamy surf coming to shore is the end result. (A word of caution: Since the resin will soak into the insulfoam, place foil or a board under the insulfoam so that you won’t ruin your display base in the event the resin soaks all the way through-depends upon how much insulfoam you have as your bed.)
EnviroTex Lite will set up overnight. I like it because it has no restriction on depth of the pour. Another product on the market (by Woodland Scenics) is called Realistic Water. Its main drawback is that you can only pour 1/8″ at a time and must let it dry between pourings. This is too restrictive for me when carving out water areas – although I did use it years ago successfully to paint over some resin that didn’t set up correctly. I merely painted a thin coat over the other resin and it dried to a hard, smooth finish. It also requires no mixing and takes color well. But, again, the depth of pour is very limiting. I hope this long paper will be of value when you are looking at planning waterways. Water has always been a part of all my displays, whether professionally, or in my private home. One can always have great water by simply purchasing mountain streams and waterfalls by Department 56 from your favorite village store. Any way you can add water is an improvement over a waterless village. Hope all your water projects go swimmingly well!