Sign Making Tips & Tricks
1. The Design:
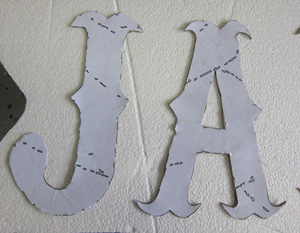
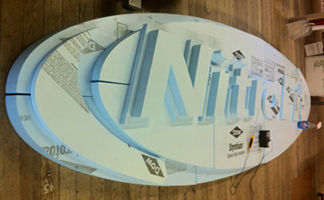
With the Hot Wire Foam Factory tools it’s easy to make beautiful 3-D signs. Use a computer, transfer type, or in-house artist, to create your lettering. Enlarge it to the desired size with a projector or at your local copy shop. If it’s bigger than 11″x17″, you might have to tile your art together. Pin the enlarged copy onto a 1/2″-2″ thick piece of flat foam. Trace the edges of the letters with a ball point pen, leaving a visible indent of the letters on the foam. You might want to darken the indents with a water-based felt pen before cutting.
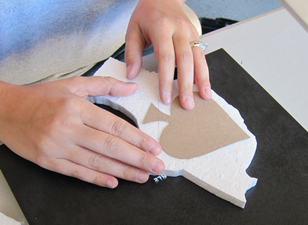
Another method for lettering or shapes is to print them and cut them out, then use spray tack to adhere them onto thin cardboard. Cut out the letters or shapes from the cardboard and use a spray tack to adhere the cardboard to the foam. Spray the cardboard with the spray tack very lightly – you won’t need much and you’ll want to remove the cardboard from the foam once you are done cutting. You can now cut out the letters or shapes with the cardboard as a guide and keep the cardboard templates for later use.
2. Cutting & Texturing:
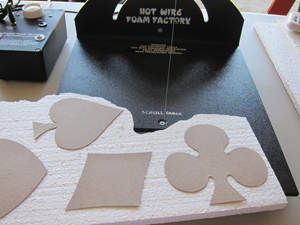
Use the Hot Wire Scroll Table, 3D Pro 16″ Table or Hot Knife to cut out the letters or shapes for your sign. Note that narrow, straight letters are the hardest to cut out, while thick and curvy letters are easier.
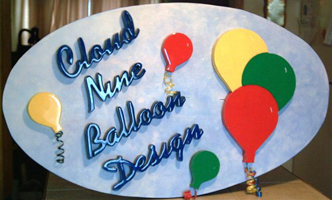
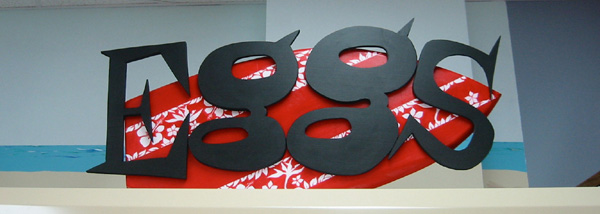
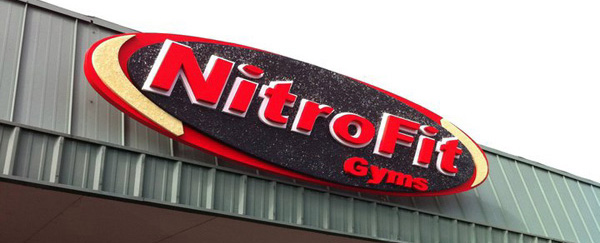
After your letters or shapes are ready, cut out the foam base-plate that you will be gluing your letters onto. People have used anything from simple rectangles to ovals to animal shapes as their base-plates. Use the Hot Wire Engraving Tool to enhance any details. Use the Sculpting Tool to smooth out the edges and for any freehand sculpting needed on your design. Use sandpaper for a finished look.
3. Painting & Coating:
Use a couple of coats of outdoor latex paint and your sign should last for many years. If the letters are a different color than the base-plate, paint them separately before gluing them on. Be sure to seal the back too. Test paints and coatings on scraps of foam before painting or coating the sign. If the sign will be hung where it might be handled, use our All-Purpose Foam Coat for a hardened finish. If the sign will be hung outdoors, you might want to finish it with our Exterior Foam Coat.
Our newest coating product is our Styroplast, which is a sprayable and brushable encapsulant with a fast set time that is designed to provide an impact and fire resistant shell for numerous substrates including EPS/Styrofoam, insulative foams, and wood. It is a two component slow cure polyurethane coating that offers superior hardness and greater moisture resistance than epoxies and resins. For more information, see the product pages here: available in quarts and gallons.
4. Assembly & Mounting:
Lightly trace the sign pattern onto the foam base as a guide for gluing on the letters. Use our Foam Fusion Glue to adhere the letters. Many glues that claim they are made for EPSFoam will melt foam over time, while our Foam Fusion is solvent-free. After the glue has dried, give your sign any finishing touches it may need with additional paint or Foam Coat.

TIP: Pin several pieces of foam together before cutting to make extra sets of letters. Or cut the letters out of a thick piece of foam, then slice them into multiple letters or shapes.
TIP: Use letters that are connected to each other to save some time gluing.
TIP: For a wood grain look, stroke the foam longways with a wire brush or use the Engraver to create the fine grain lines.