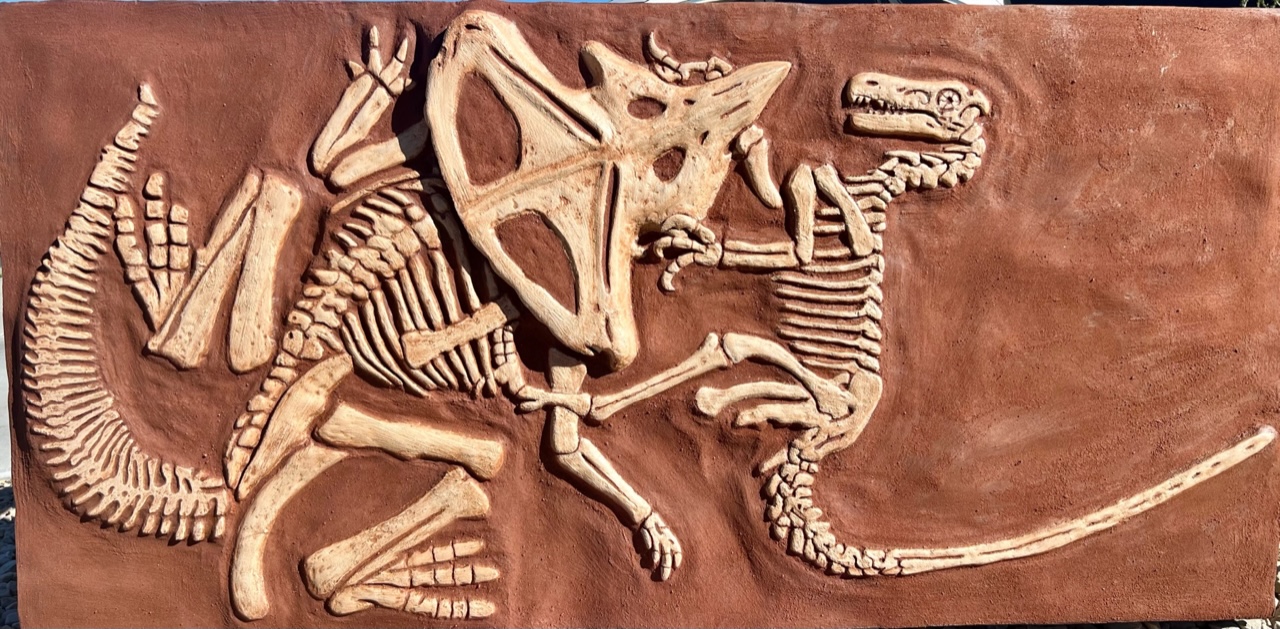
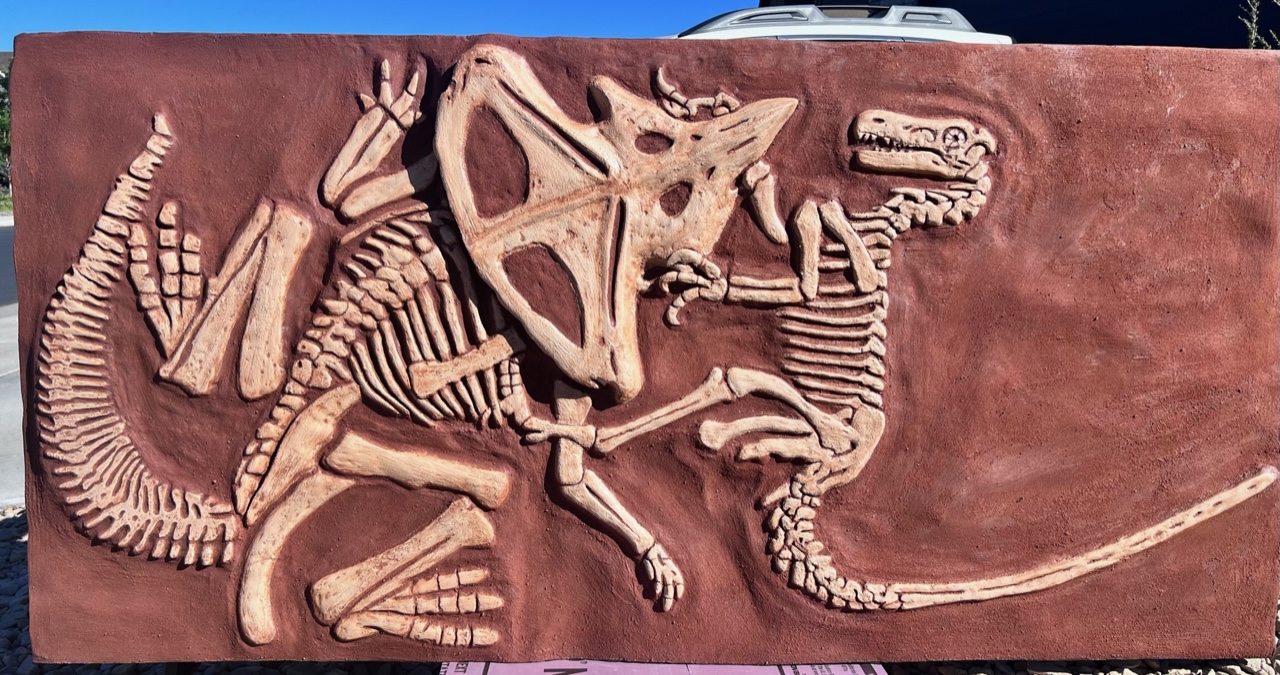
Protoceratops & Velociraptor Fossil Slab
Anthony Rukcic
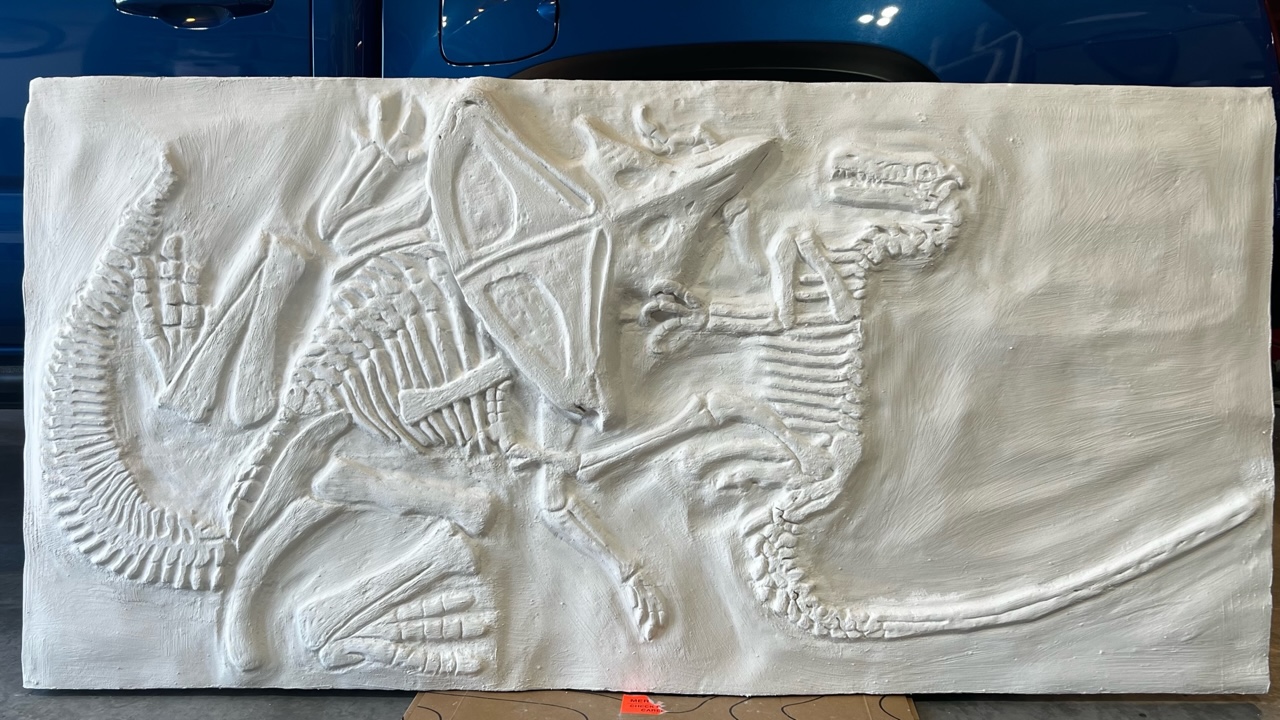
Anthony was inspired by an actual fossil find to create this realistic fossil slab art piece out of pink XPS foam. The piece features a protoceratops and velociraptor in what almost looks like fighting positions.
“I saw this and thought it would be a cool wall piece. If you Google protoceratops fighting a velociraptor, you can see the original images. This was a fossil that was excavated in Mongolia in the 70s. A couple places in the US have a replica for sale, which is 38”x79”x 12”and costs about $10,000!!! I don’t have that kinda cash, but it would be an awesome display piece, so I figured what the hell… I’ll try making it.
(DISCLAIMER- The one that can be bought, is 12” high when laying flat because the protoceratops skull is full sized. Since I want this to be wall decor, I went for how the image looks as a straight-on view. The rest of the dimensions are the same 38”x79”)”
“Starting off with 2” thick 4’x8’ foam board , I masked off the size of the replica piece with tape, then used a movie projector hooked to my phone and got the image to proper scale on the foam.”


“From there, I used 1” masking tape to mark my depth on the 2” foam. (I basically wrapped the edge of the foam board all the way around. I didn’t want to cut/carve below 1”).”
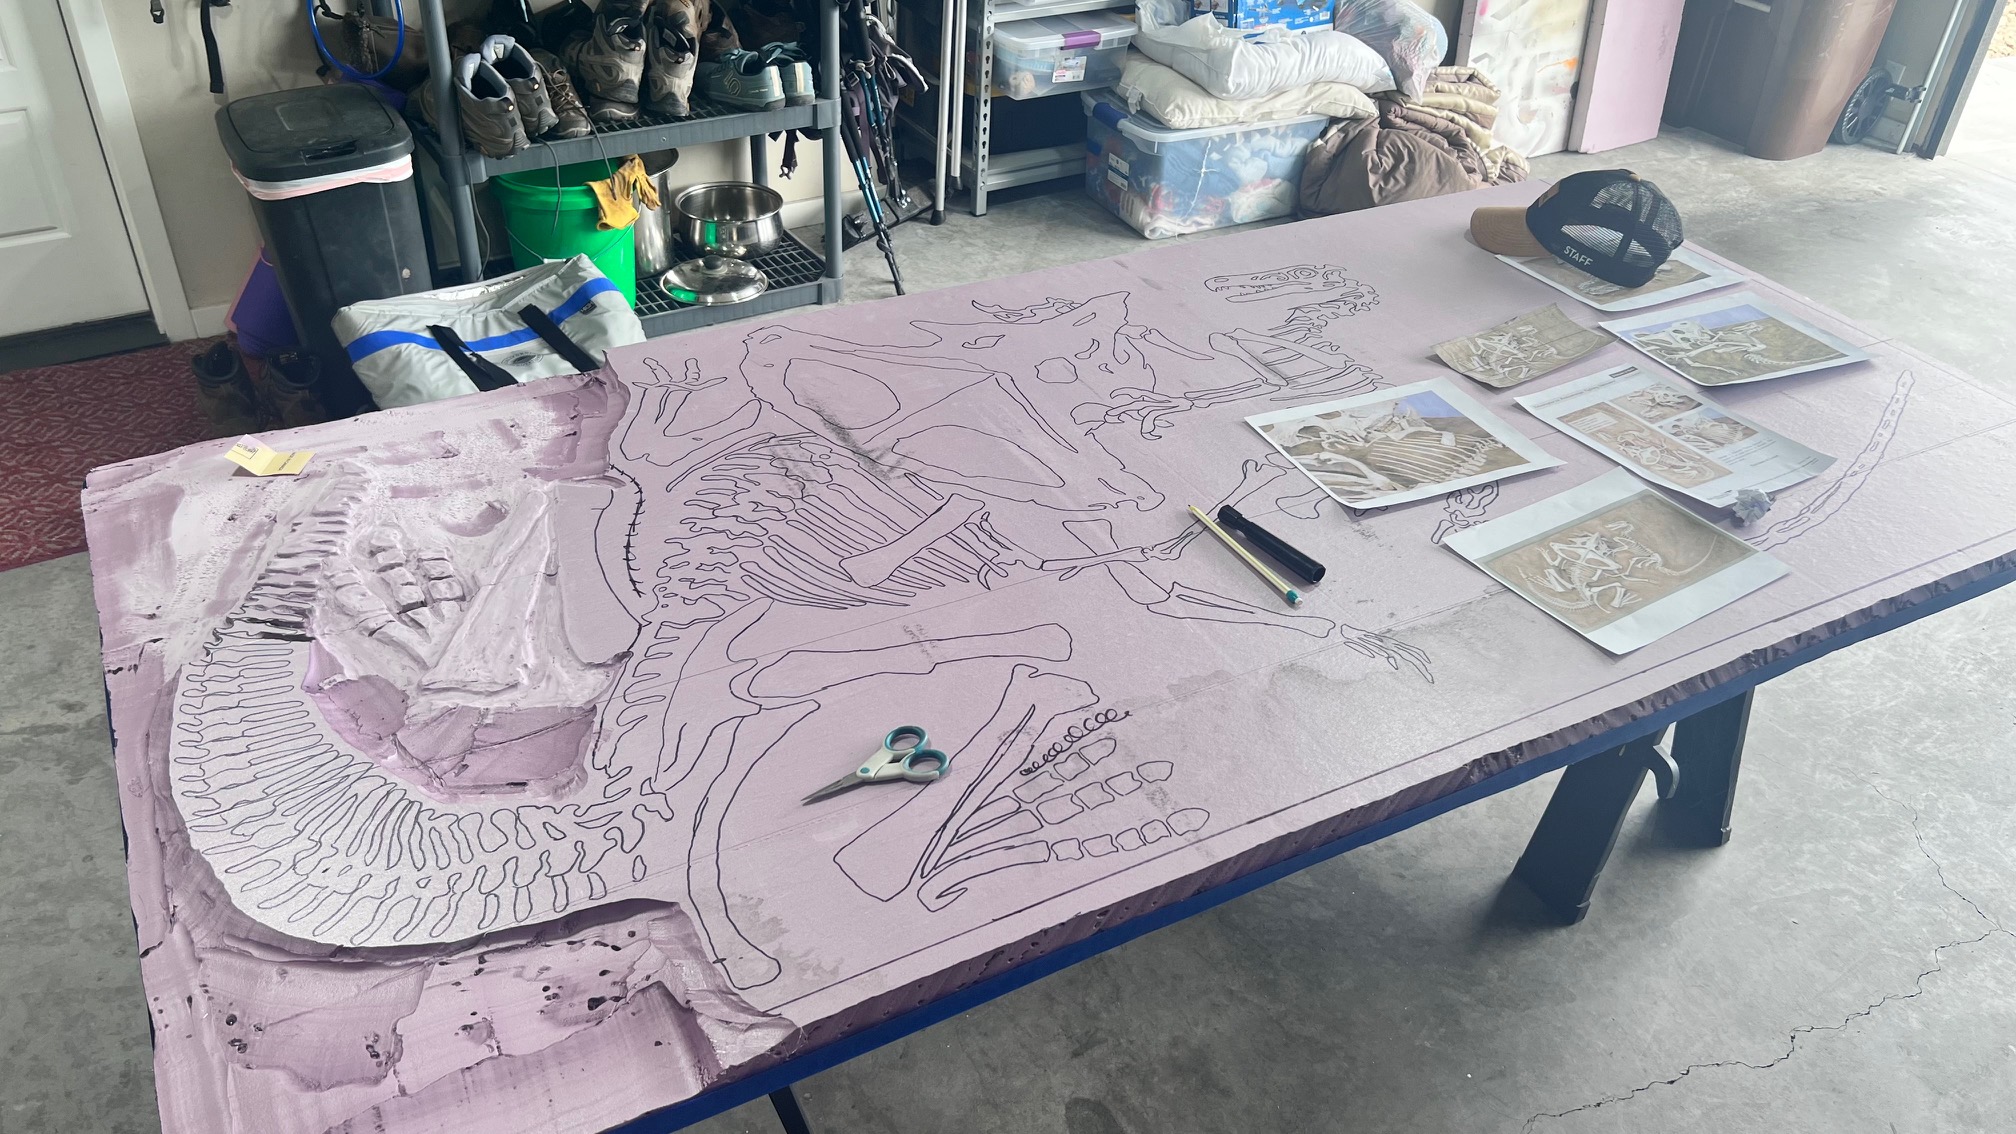
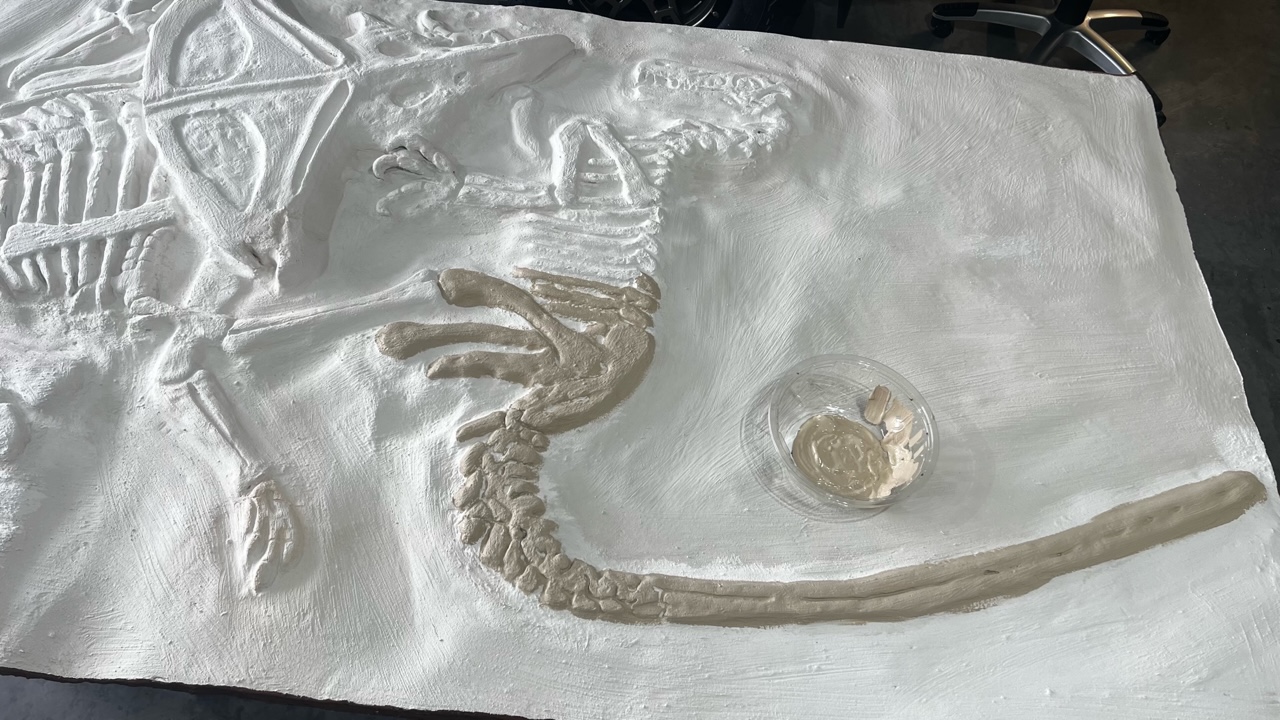
“From this point forward, I was just removing 1” depth from the foam and leaving the skeletons in place. I used the HWFF Industrial Hot Knife with a shapeable blade to carve out big sections, then used the HWFF Freehand Router for closer carves next to the bones. Then it was Dremel time, with an assortment of cone bits and sanding wheels.
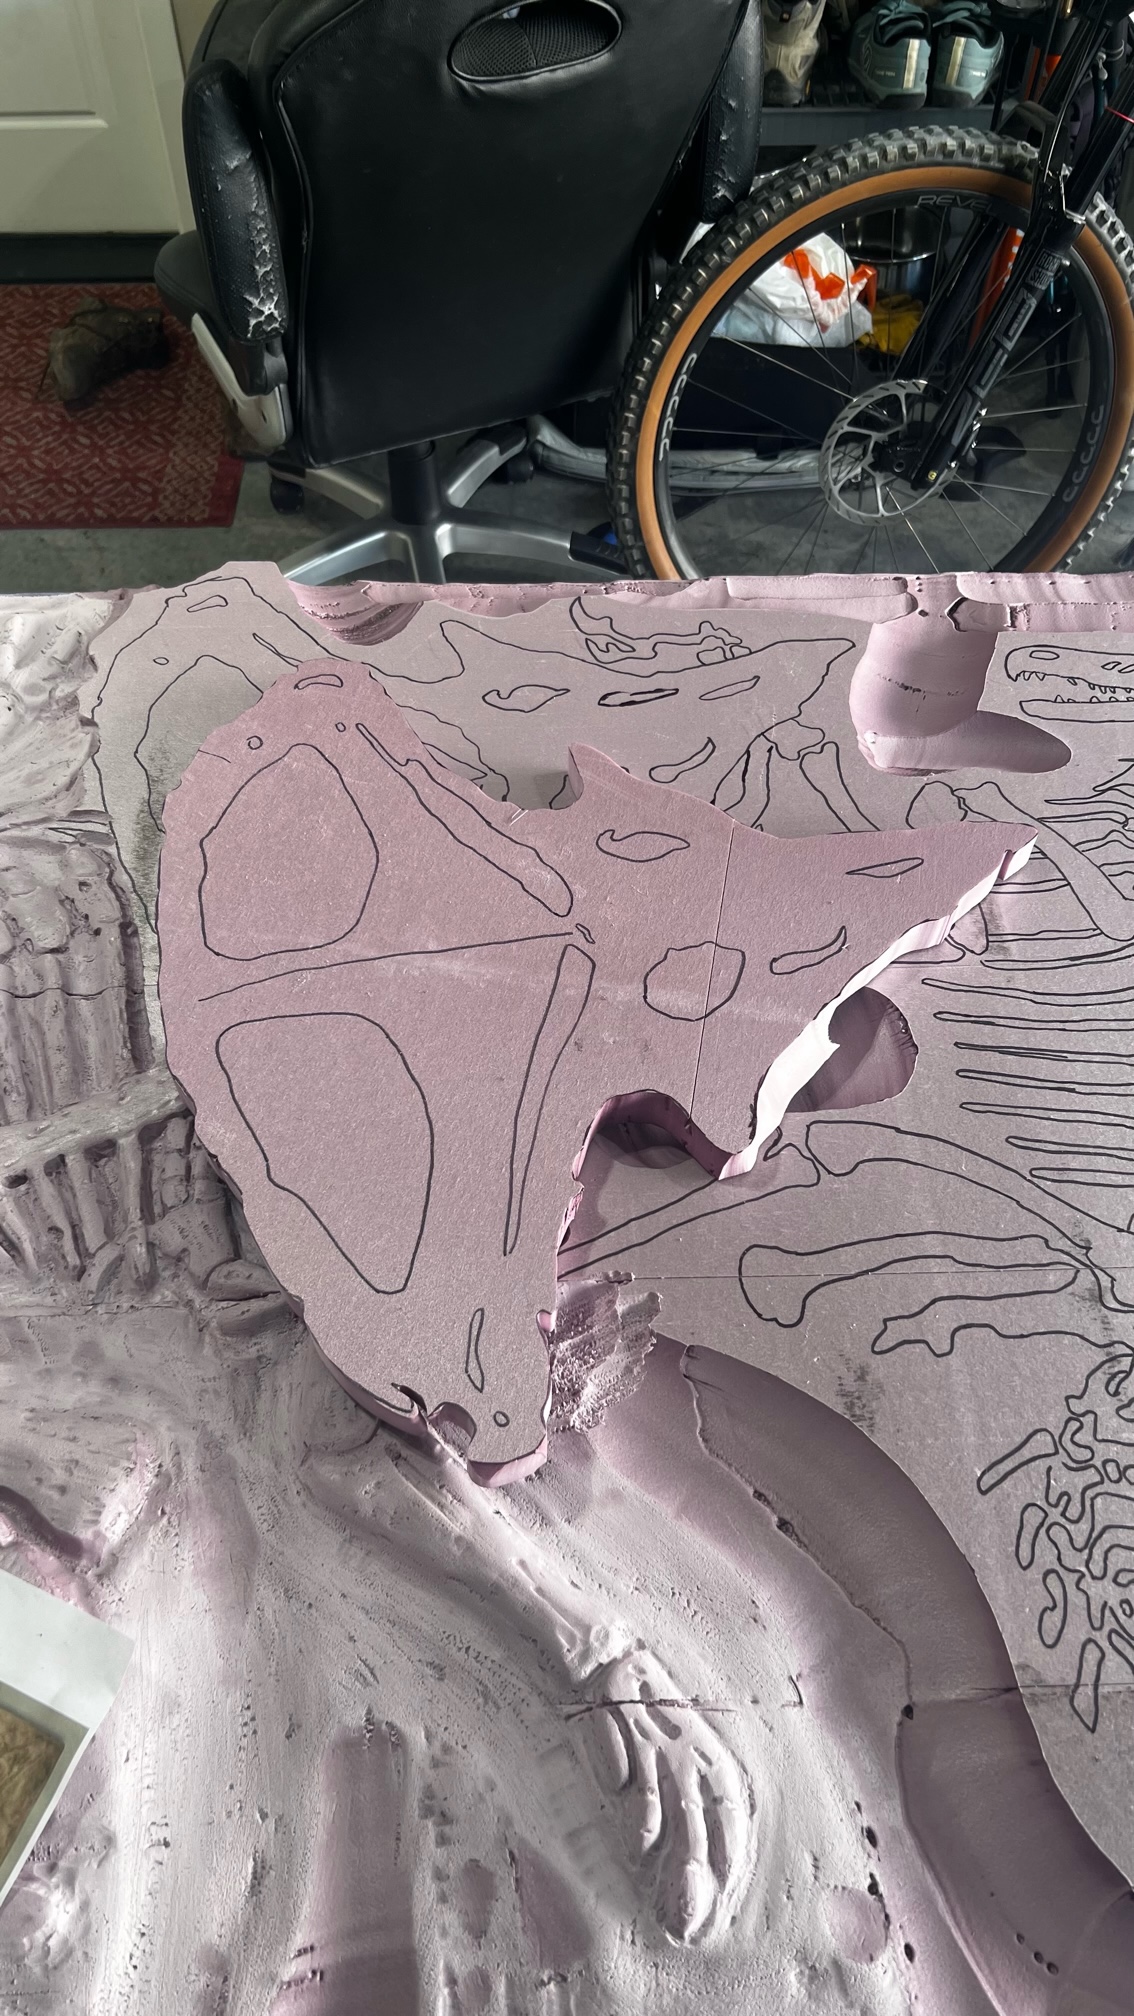
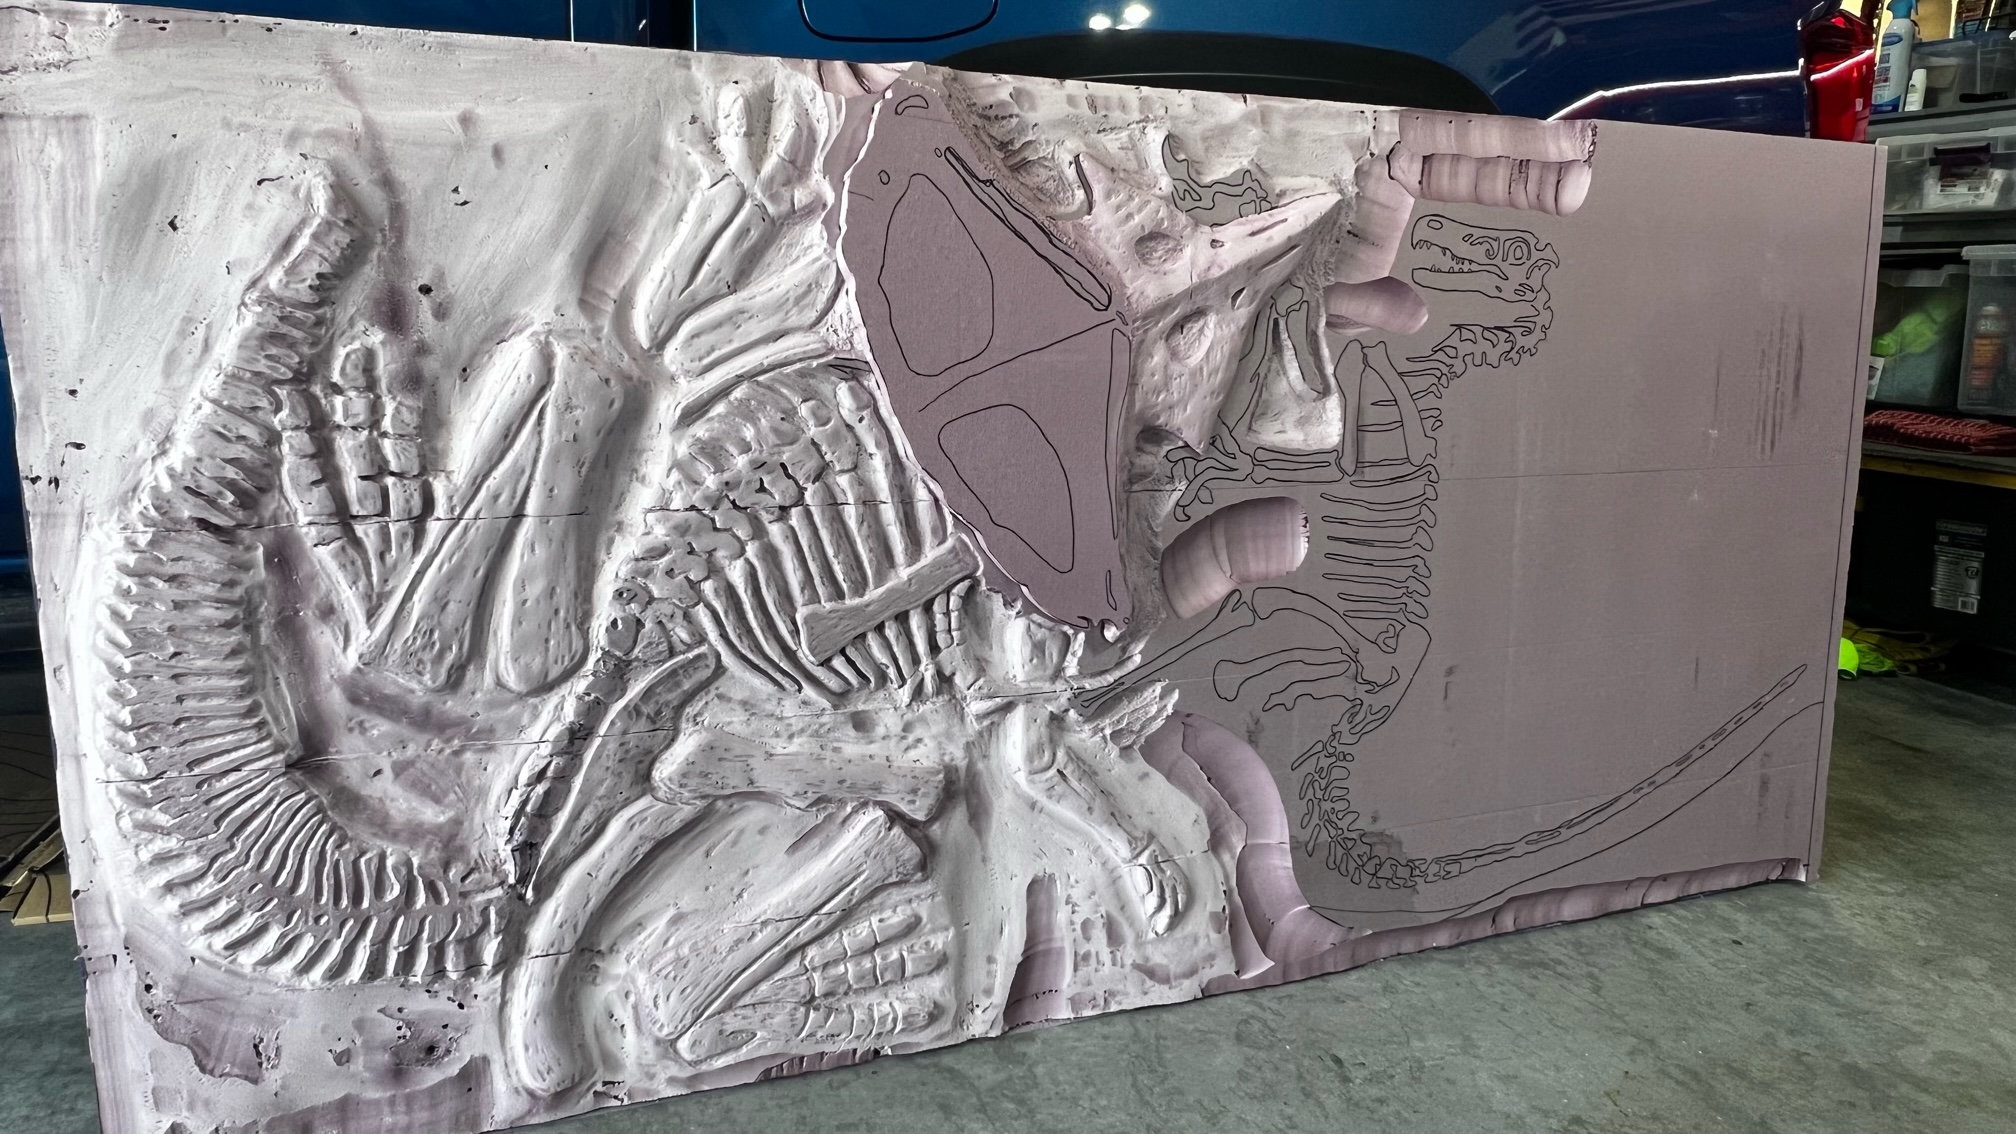
The protoceratops head had to sit higher, so I traced its outline on a 1” thick piece of foam board and cut that out with the HWFF Sculpting Tool. Once that was cut out, I shaped it with a drywall rasp, then used a couple 1/4” wooden dowel rods to keep my alignment for the heads to the main foam board.”
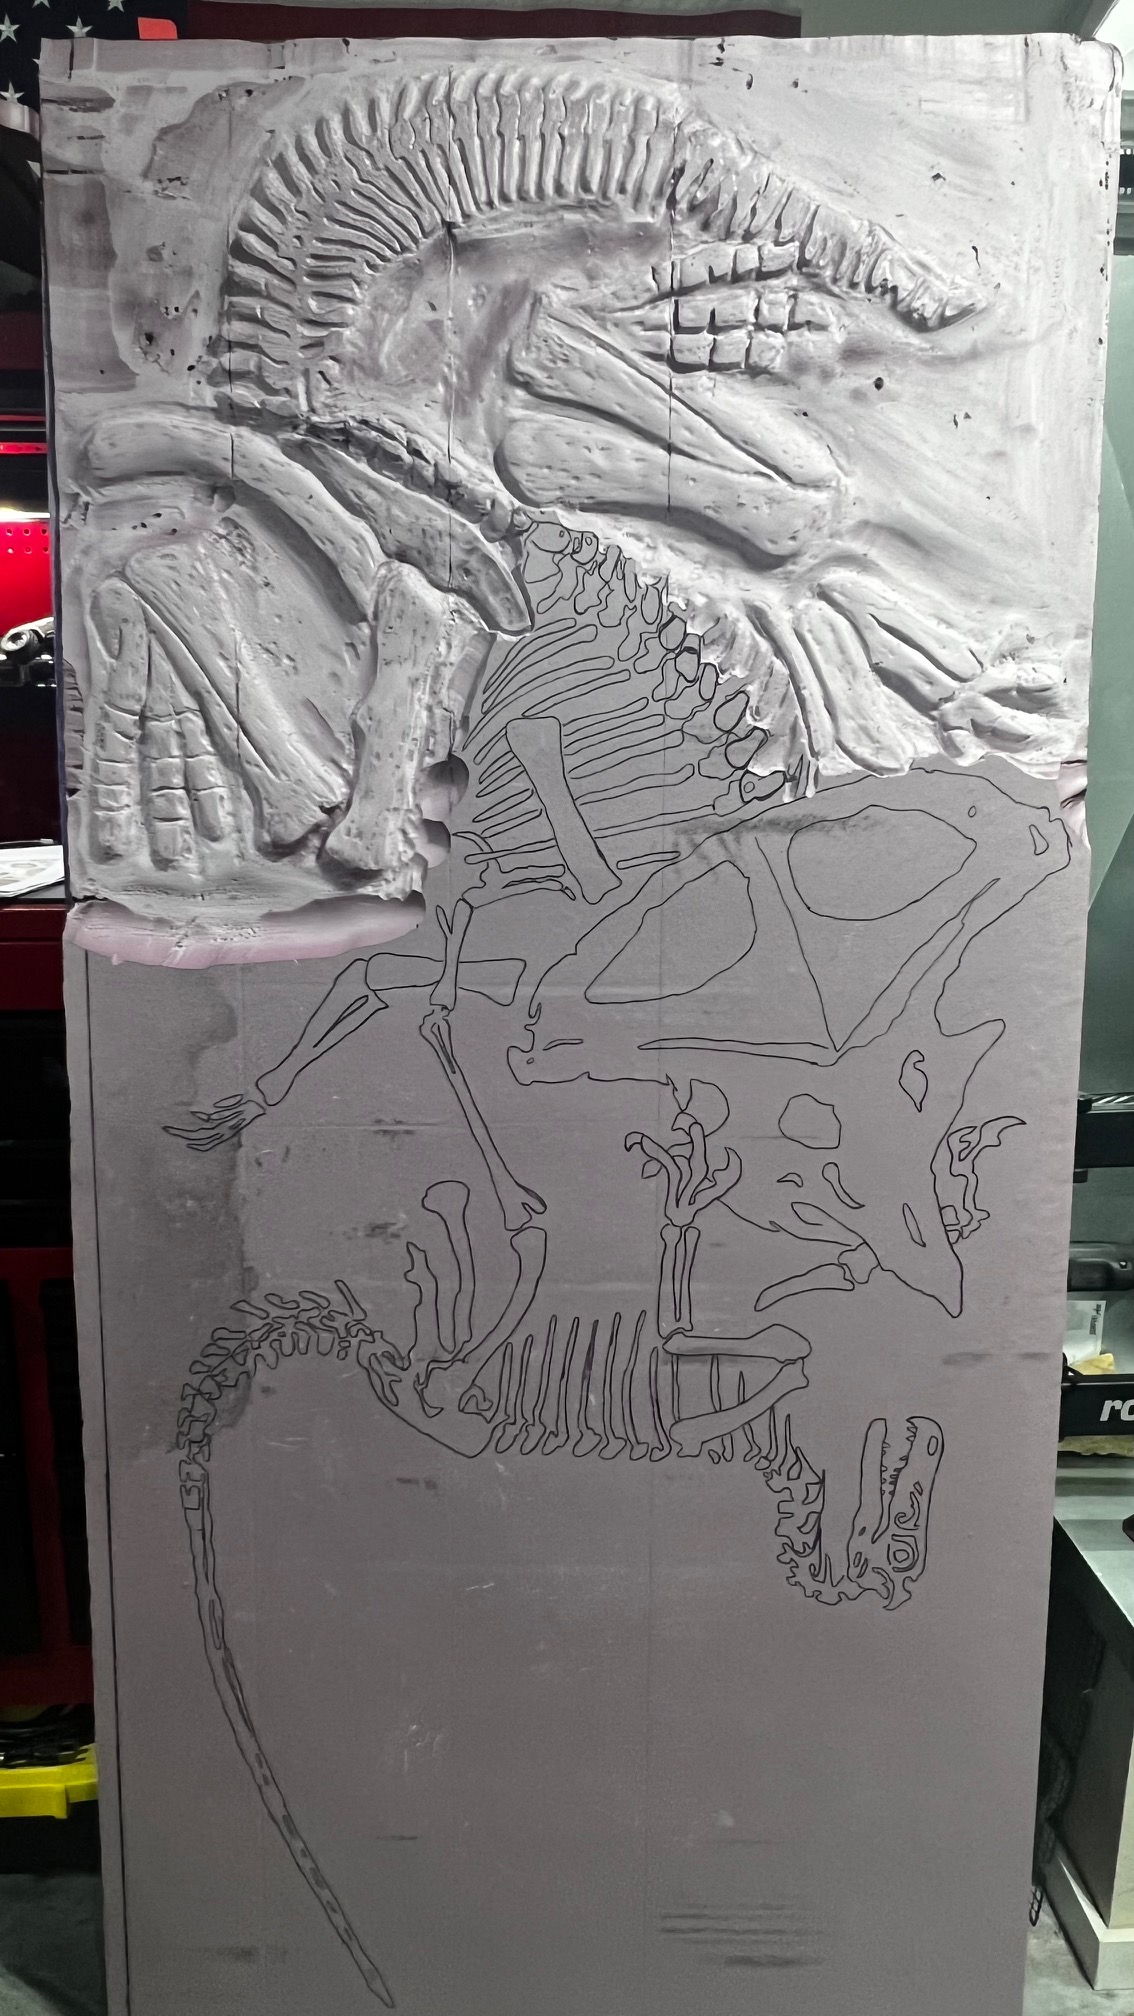
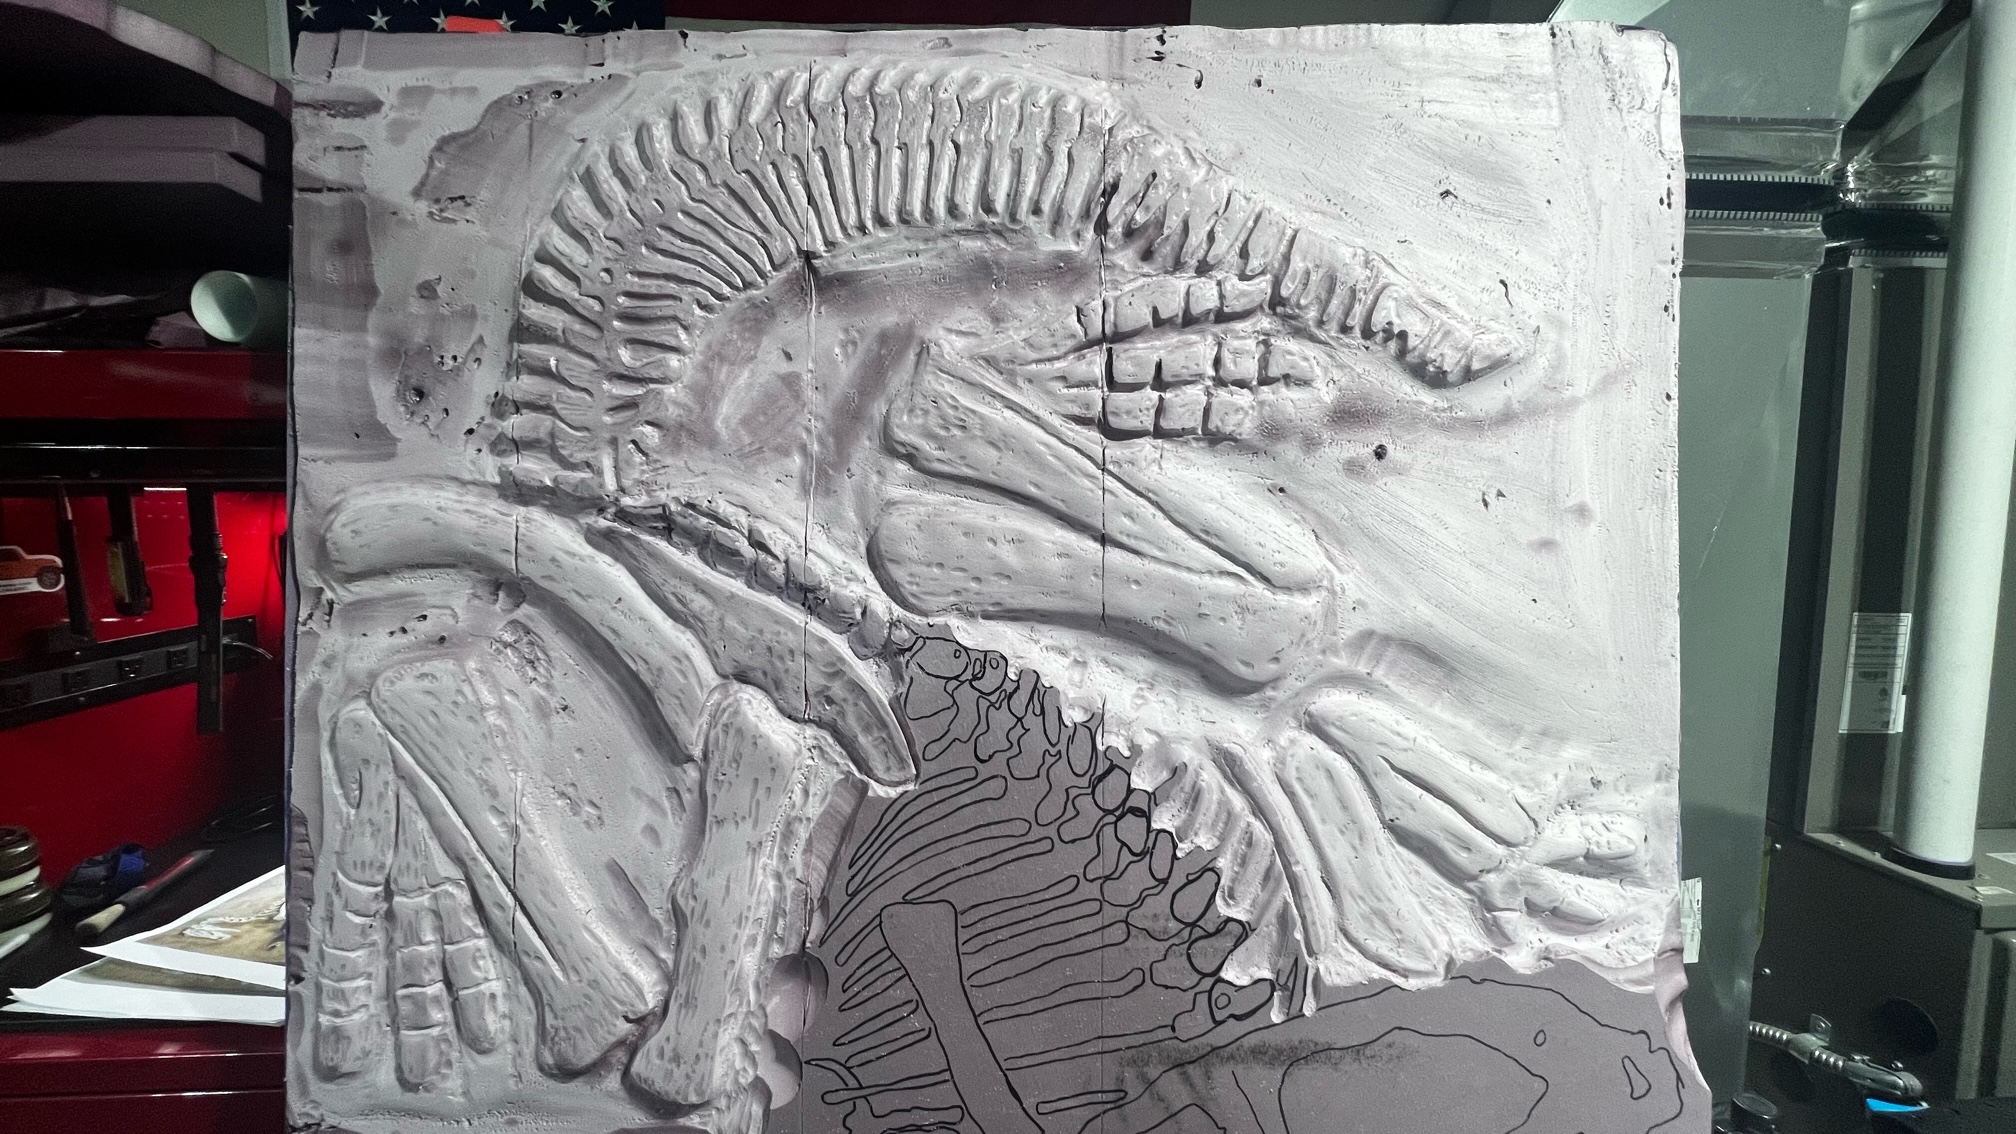

“Once everything was carved as close as possible, final shaping was done with sandpaper and emery cloth.”
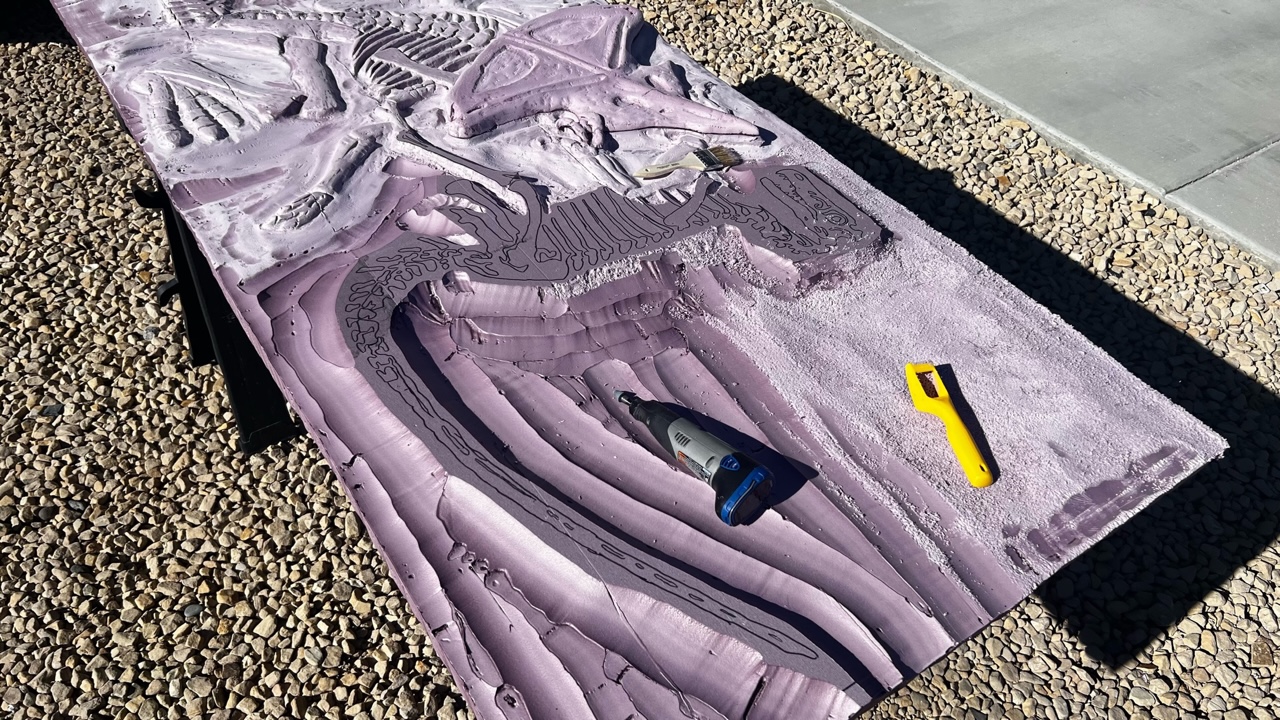
“Now comes the biggest choice… how to coat it. I used Styroplast for my last project, and even though it does a good job of showing detail and giving a smooth finish, I wanted something that gave a “rough” texture. I went with HWFF All Purpose Foam Coat. Very easy to use and change the viscosity during application; just spray the foam with a water mist if you want to apply it a little thinner. For the area all around the bones, I put the Foam Coat on thicker. For the bones themselves, I applied it a little thinner. When it dried, it looked legit.”
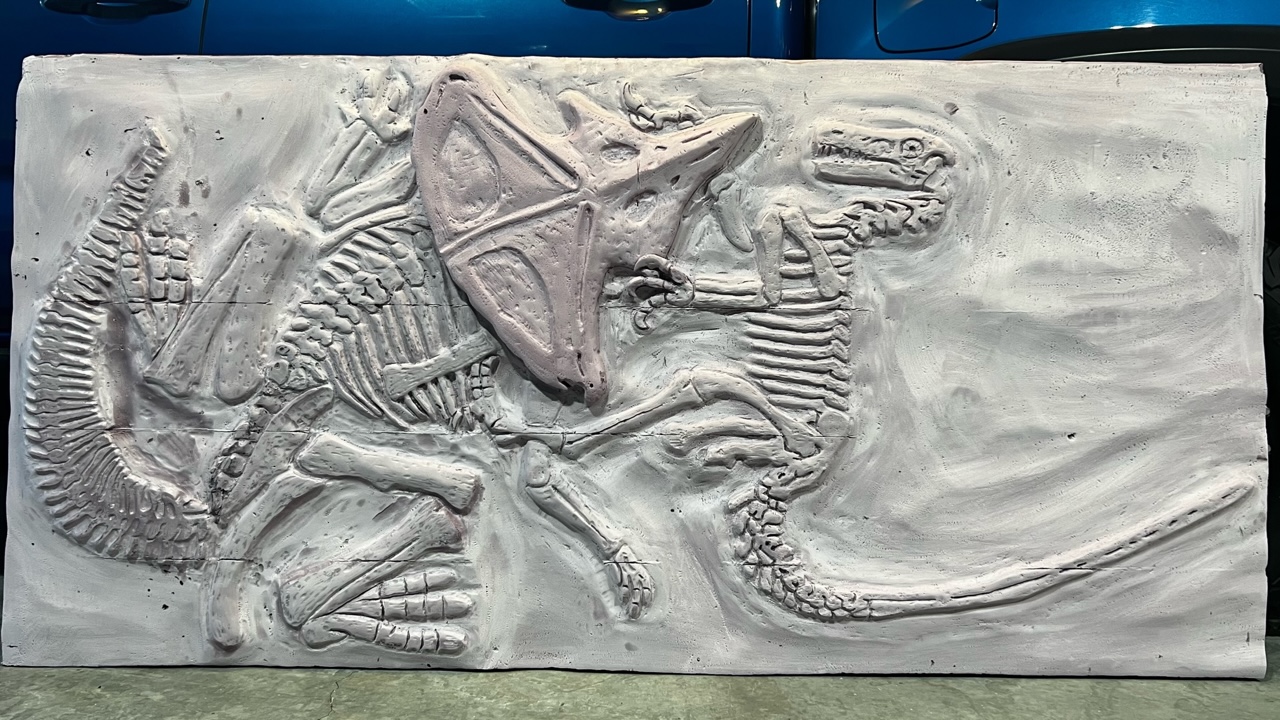
“Now for the step that can make or break the sculpture.. painting and detail; and I REALLY wanted to try something different, so for the “ground” I used Anita’s Earth Brown and painted the bones in the Folk Art paint color “Linen”.”
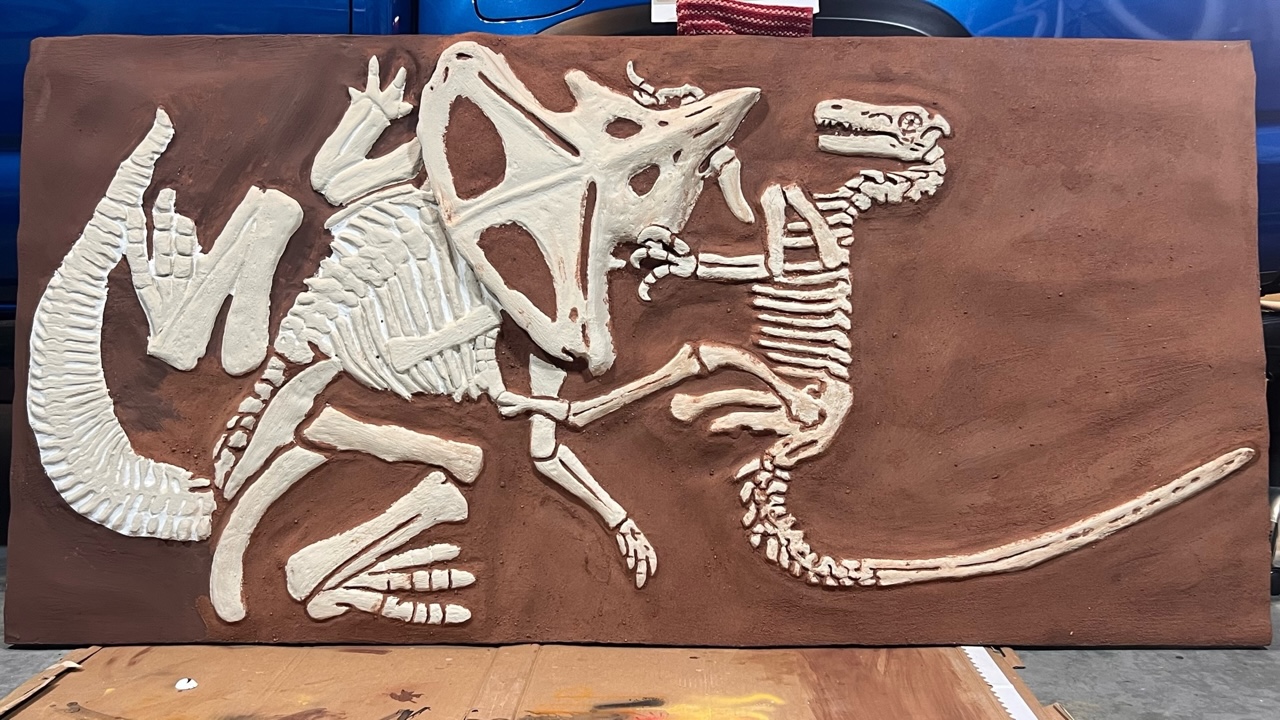
With a base coat of Earth Brown color surrounding the bones, (Here comes the “different“! ) I then brushed on Elmer’s glue and used real sand! Not store bought sand, but actual sand from Fisher Valley that is outside of Moab, Utah. I also applied glue to all the nooks and crannies, then sifted sand into them. Once I had the sand wherever it was needed, it was time to go in and weather the bones. For the weathering, I used Apple Barrel Nutmeg paint, which matched the sand perfectly. I brushed all the bones lightly, then used a damp grout sponge to wipe off excess paint on the high spots. It left the rough texture of the Foam Coat a darker brown and makes for a very realistic bone look.
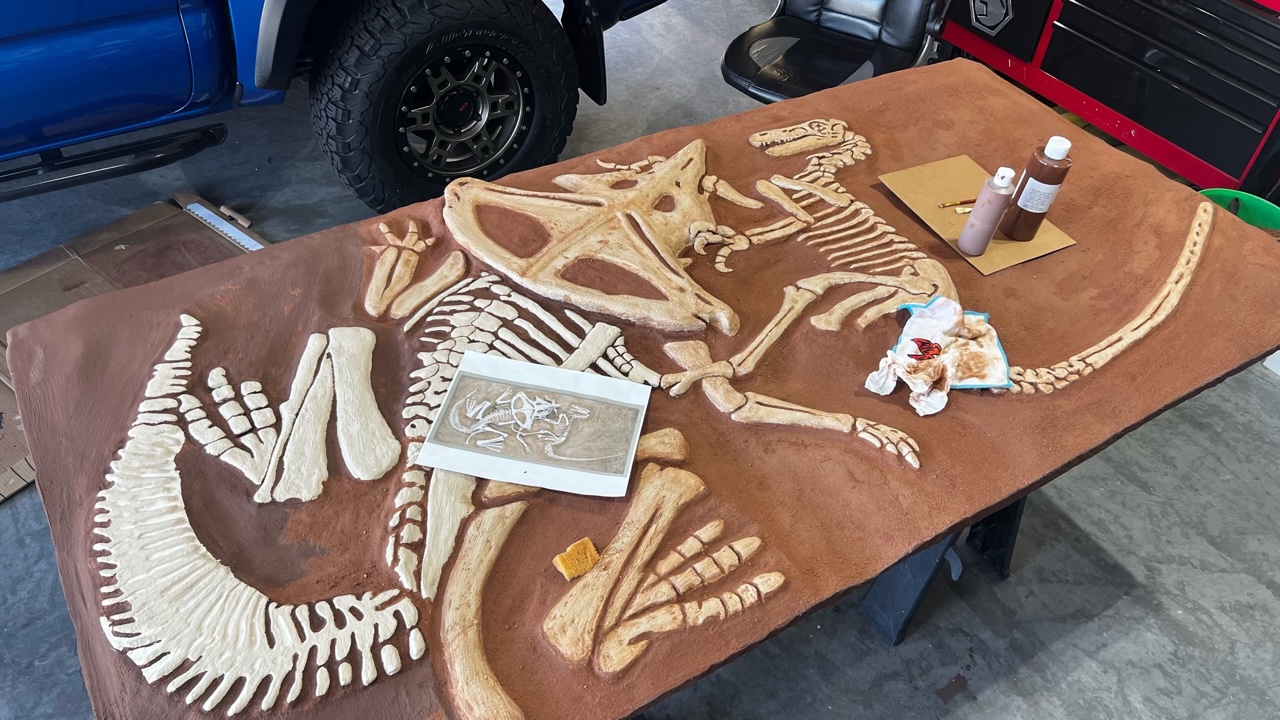
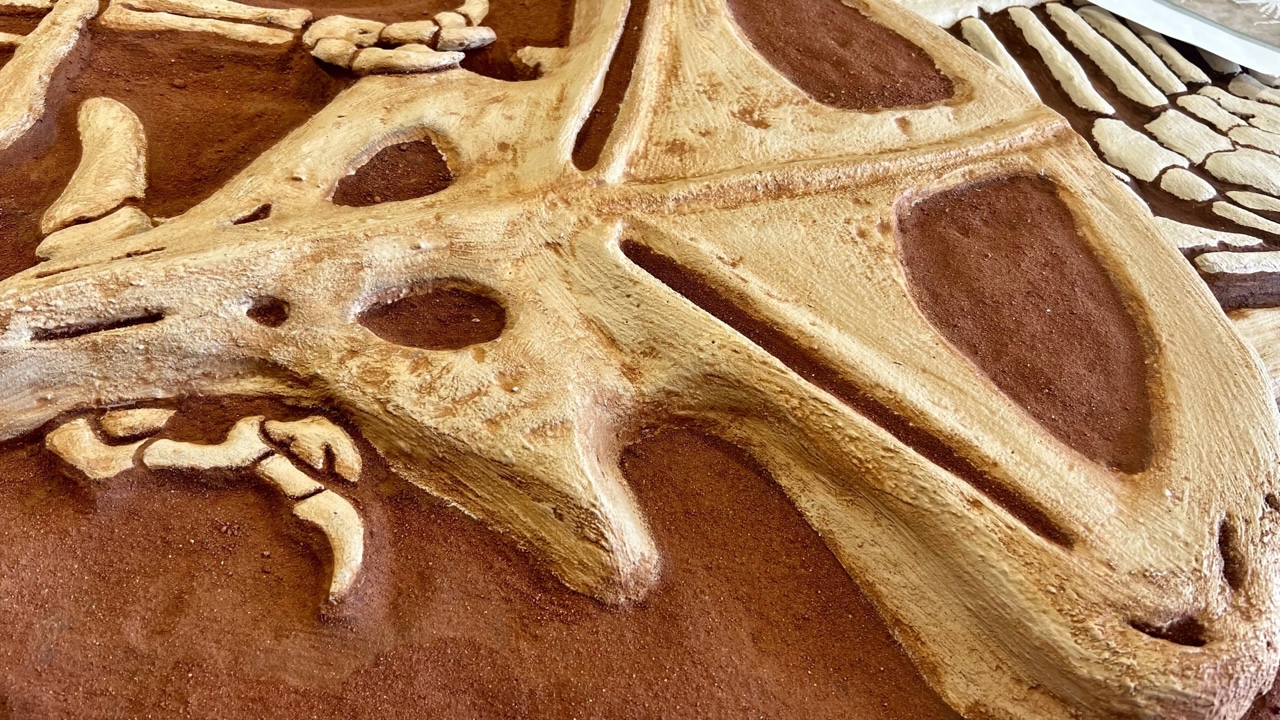
“Once it was all done, I applied 2 cans of Rustoleum Matte clear. It locks the sand into place and keeps it from being rubbed off. As for back of the piece, it’s just a very thin layer of Foam Coat painted in Earth Brown and cleared.
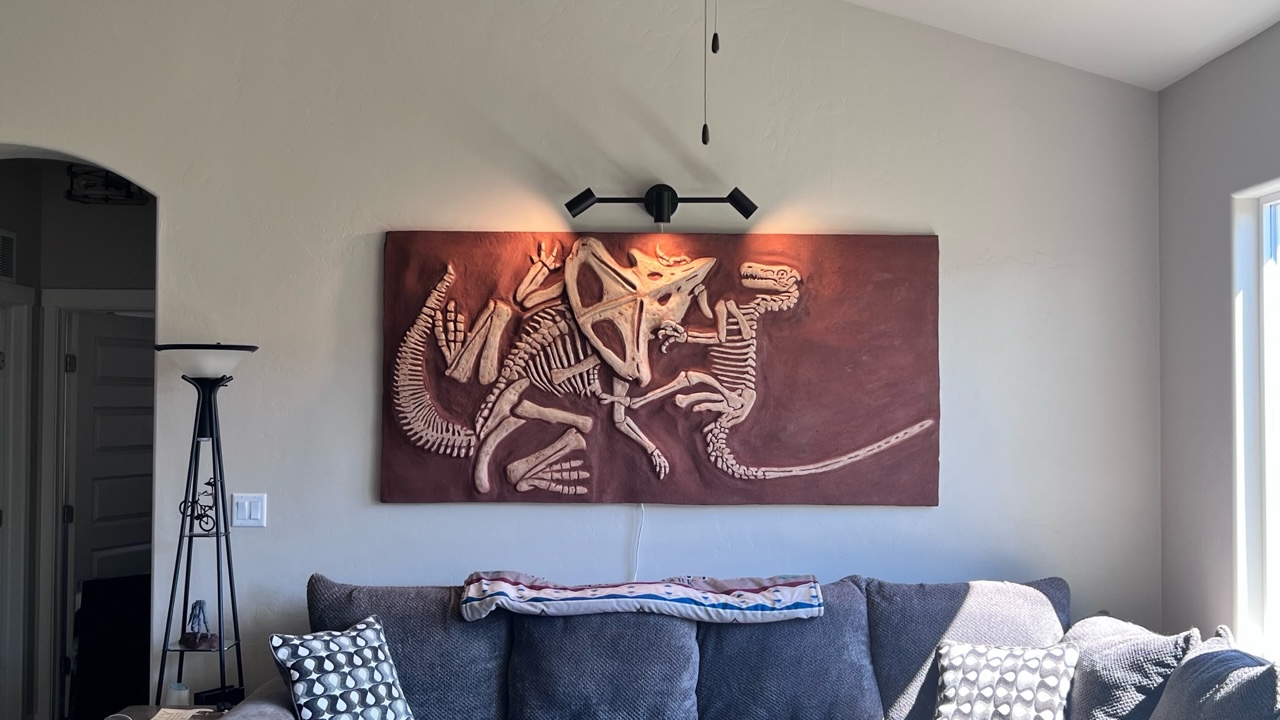
For a hanging system I used four 3/4” dowel rods, 1” long embedded in the foam , equal distance apart. I then used D rings screwed into each rod and picture wire strung between each pair, so the foam has two hanging points.
“Thank you for the outstanding customer service. We had issues with some of the tools that were purchased in 2013 and you guys stepped up and did a outstanding job taking care of us. I will be a customer for life and always promote your products when I can.”