Bronze Mermaid Statue
A detailed tutorial on how to sculpt Styrofoam to make a bronze mermaid statue
Mike Walker
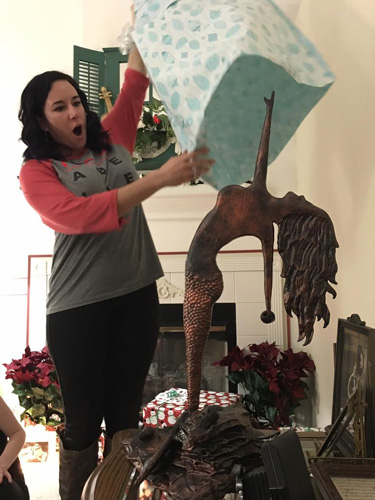
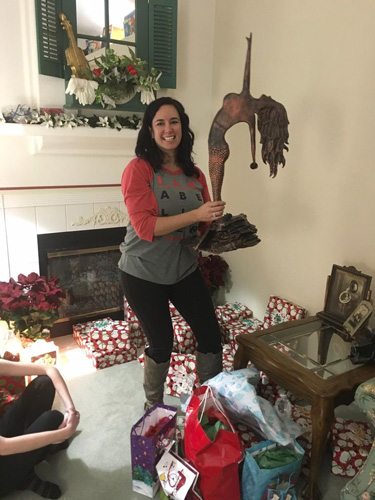
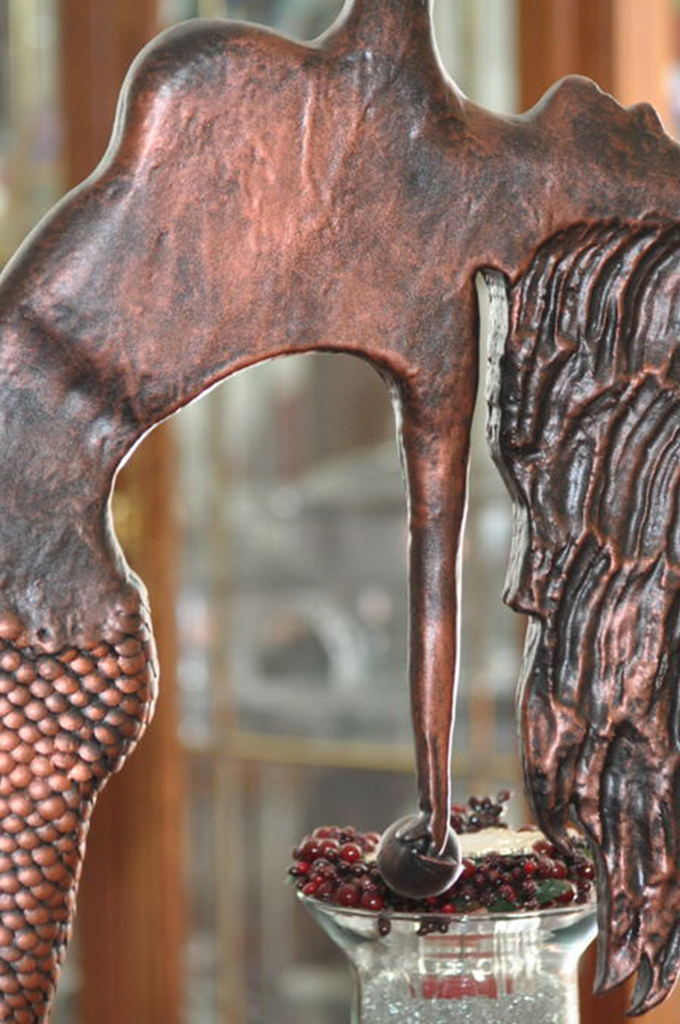
I wanted to make a special gift for my brother’s girlfriend (we’ll call her Miss S), who absolutely loves mermaids. As you can see from a couple of photos at the end, Miss S was very surprised and happy about the gift!
Supplies and Tools
• Rigid Foam Insulation Board (1-1/2 in. thick)
• Wood Filler or Spackle
• Sand Paper (fine and very fine grits)
• Small Files/Emery Boards
• Miscellaneous Sea Shells
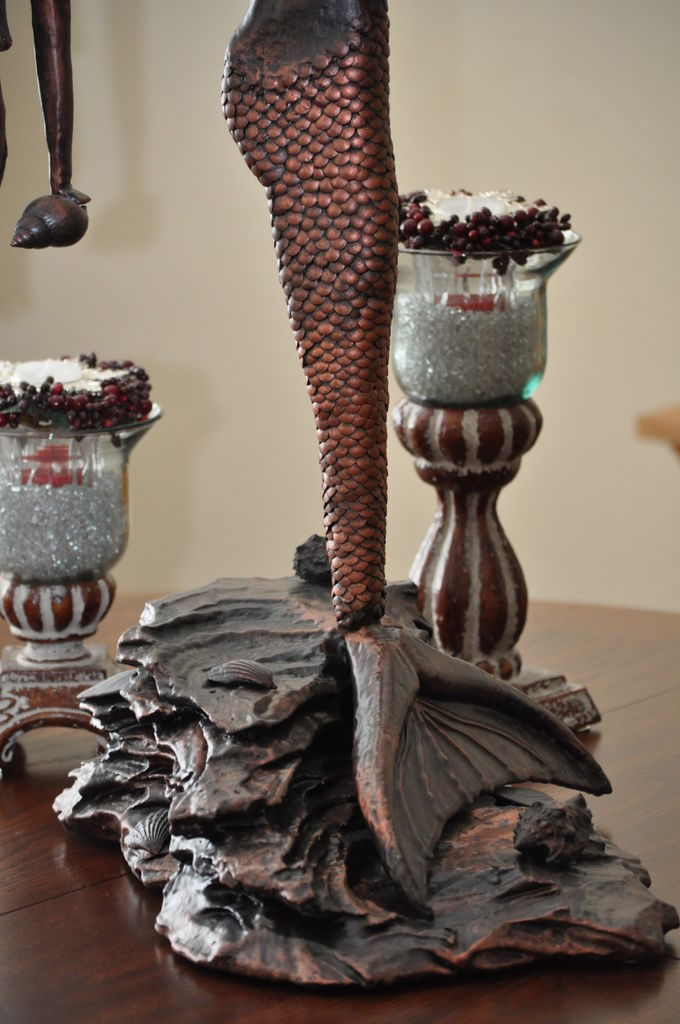
• 5/16-inch Steel Thumb Tacks (the project used 1100 of them to make the “scales” on the tail)
• Doll Stand
• 3/16-inch Metal Rod
• Adhesive for Foam
• Glue
• Styroplast Foam Coat (this is a two part system that, when mixed, creates a hard plastic coating once it cures)
• Optional: Dremel with sanding discs (this was needed to sand/smooth areas of the dried Styroplast. After two coats, it’s pretty tough.)
• Oil Rubbed Bronze Spray Paint
• Acrylic Craft Paint- Copper
Getting Started
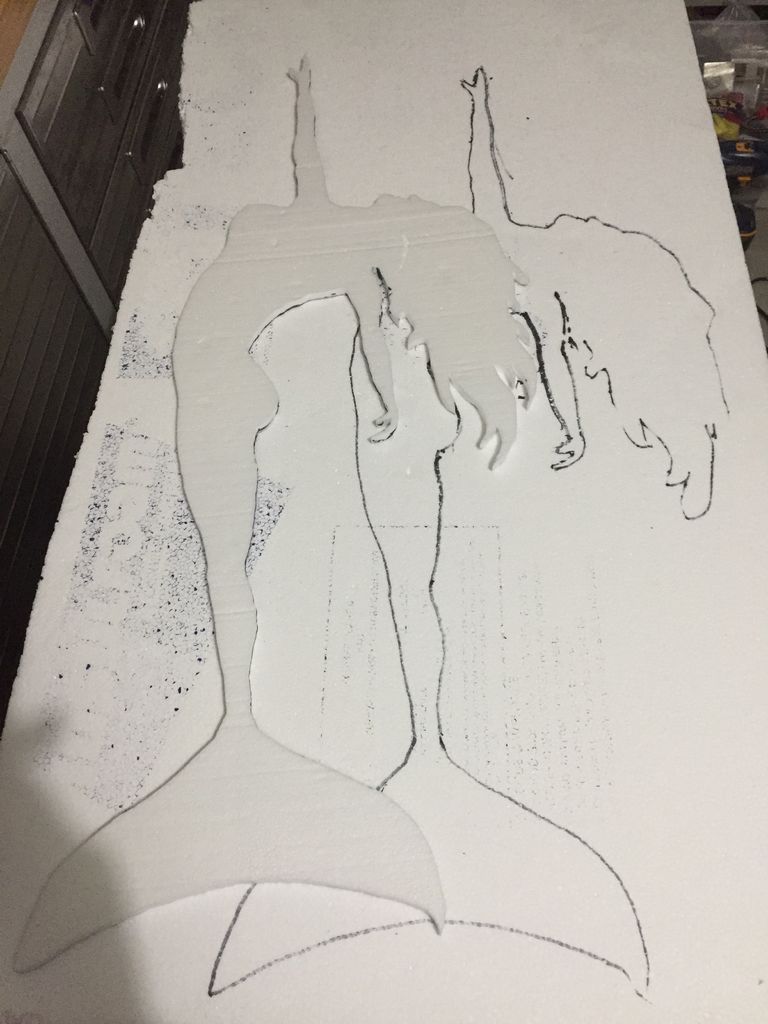
I chose a generic mermaid silhouette from the internet, then drew it by hand onto a thin piece of foam, changing various features to my liking. After cutting it out (I used hot wire tools for cuts during the entire project) to make a template and to ensure I was happy with the look, my daughter pointed out the silhouette’s tail was oriented similar to a fish’s tail rather than a mermaid or mammal tail.
I proceeded to trace the template onto a piece of 1-1/2 inch foam and cut it out. I then cut off the bottom portion of the tail (I believe they’re called the flukes), so I could work on it separately from the body and orient it correctly when it was reattached.
Type of Foam
This type of foam is not conducive to creating major detail and I knew that going into this project. It was never going to have a detailed face, etc.; however, I also didn’t want something that looked primitive or like it was made from a block of foam. As you can see from the photos, I decided some tapering in the face/neck/hair, narrowing the waist area to add a little shape, rounding most of the edges, and tapering/rounding the arms for a more natural look would give me the appearance I wanted. These were achieved with cutting away foam with a hot wire sculpting tool and sandpaper.
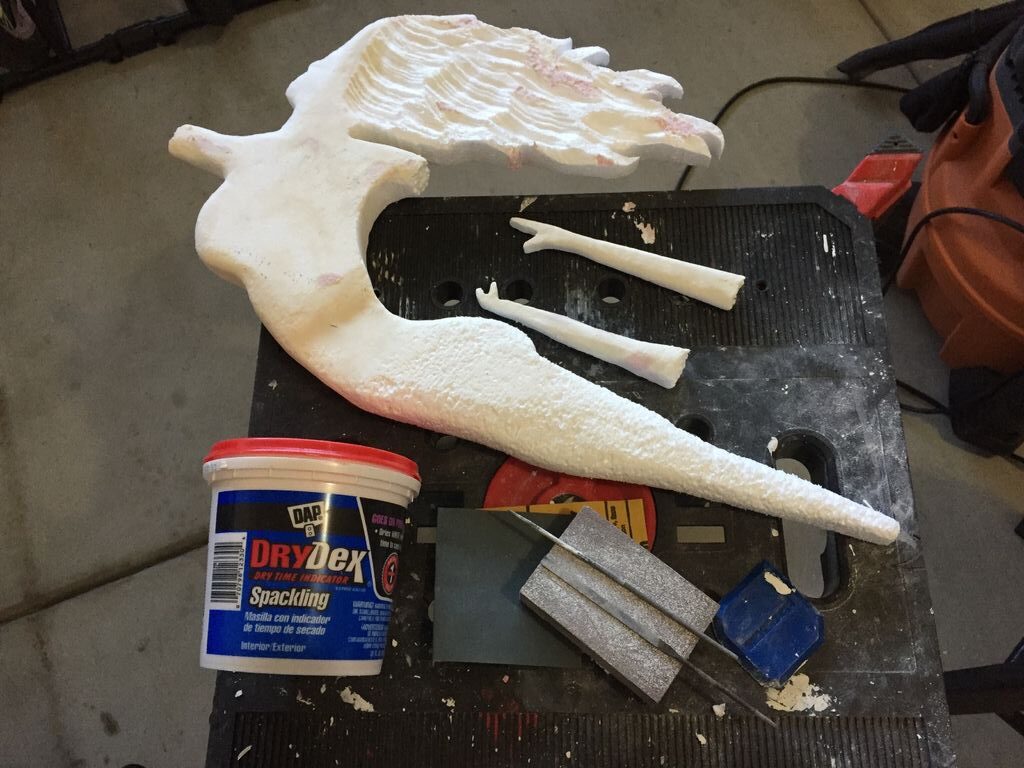
This foam (EPS- made of small, compressed balls of foam) also ends up having lots of nooks and crannies. Throughout the entire process, I continuously had to Spackle, use wood filler, and sand to create smooth surfaces or make small little repairs. If everything is smooth and one of the little balls that make up the foam falls out while sanding, you’re left with a little hole or indentation (this equals more filler and sanding).
Embracing Mistakes
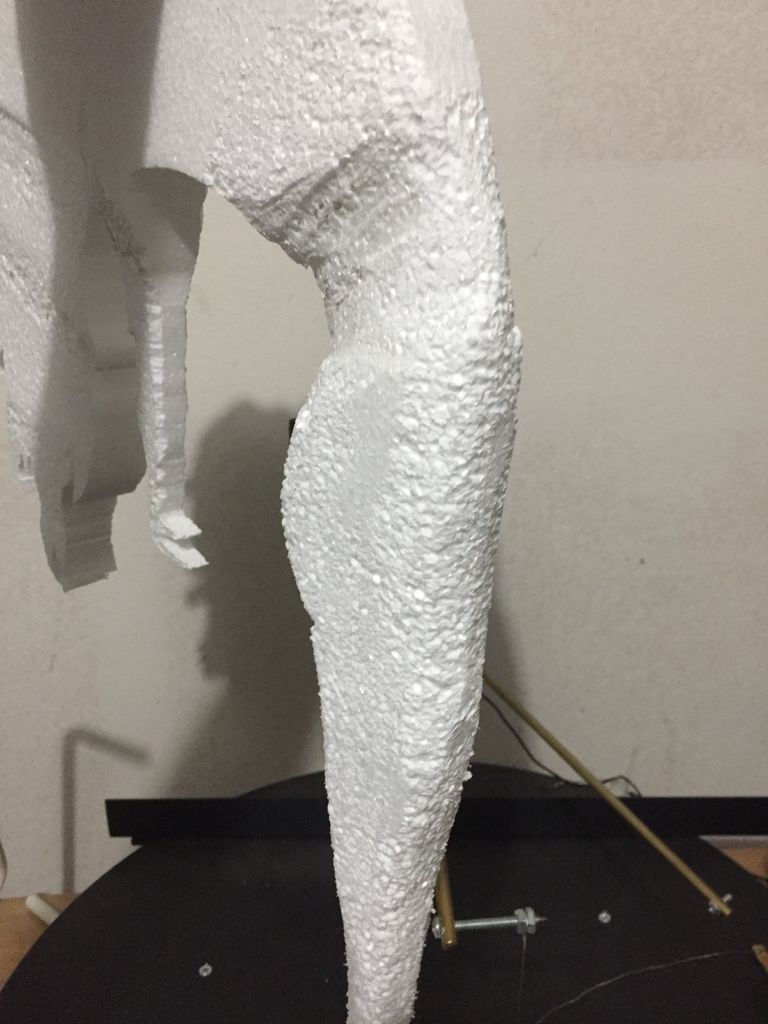
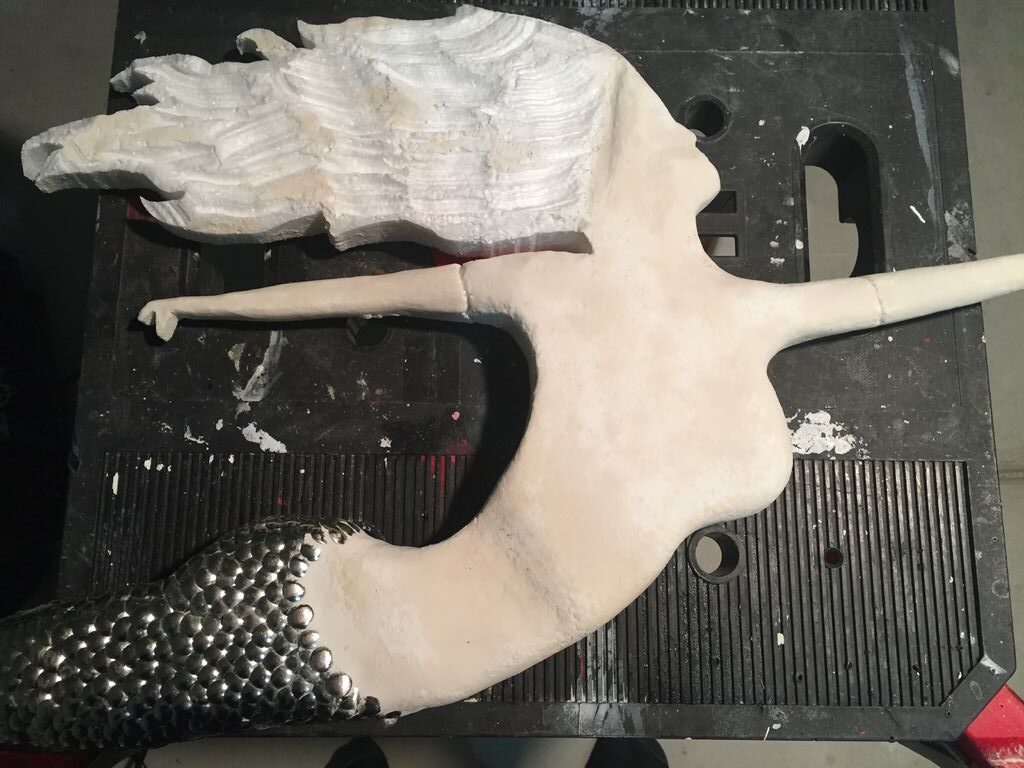
The arms were very delicate and, at one point, the top one broke off. After a few choice words, I decided it was a good thing and broke the other one off. This made it much easier to sand them so they were rounded and looked more natural. In one of the photos, you can see the arms reattached and they have a pretty nice shape.
The seam where the arms were broken off were filled with Spackle then sanded (a few times) until there was no evidence of the mermaid mutilation. In the same pic, you may notice part of the fingers of the lower hand also broke off. Not a big deal. I mess up all the time and have to fix things. I planned on using shells on the base and now she would hold one too!
Detailing: Hair
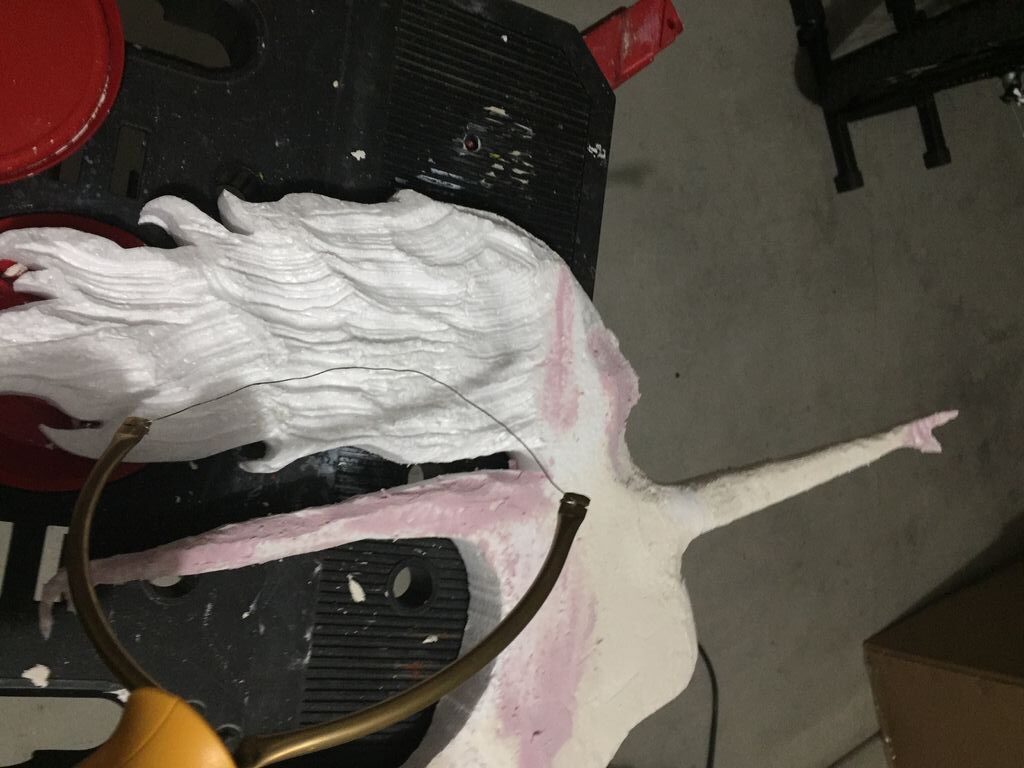
After tapering the hair a little from the head to the end of the flowing hair, I decided to experiment. I used my hot wire sculpting tool to gently make lines into the hair. I think this added a little more realism that wouldn’t have been there it had remained flat like a silhouette.
Detailing: Scales
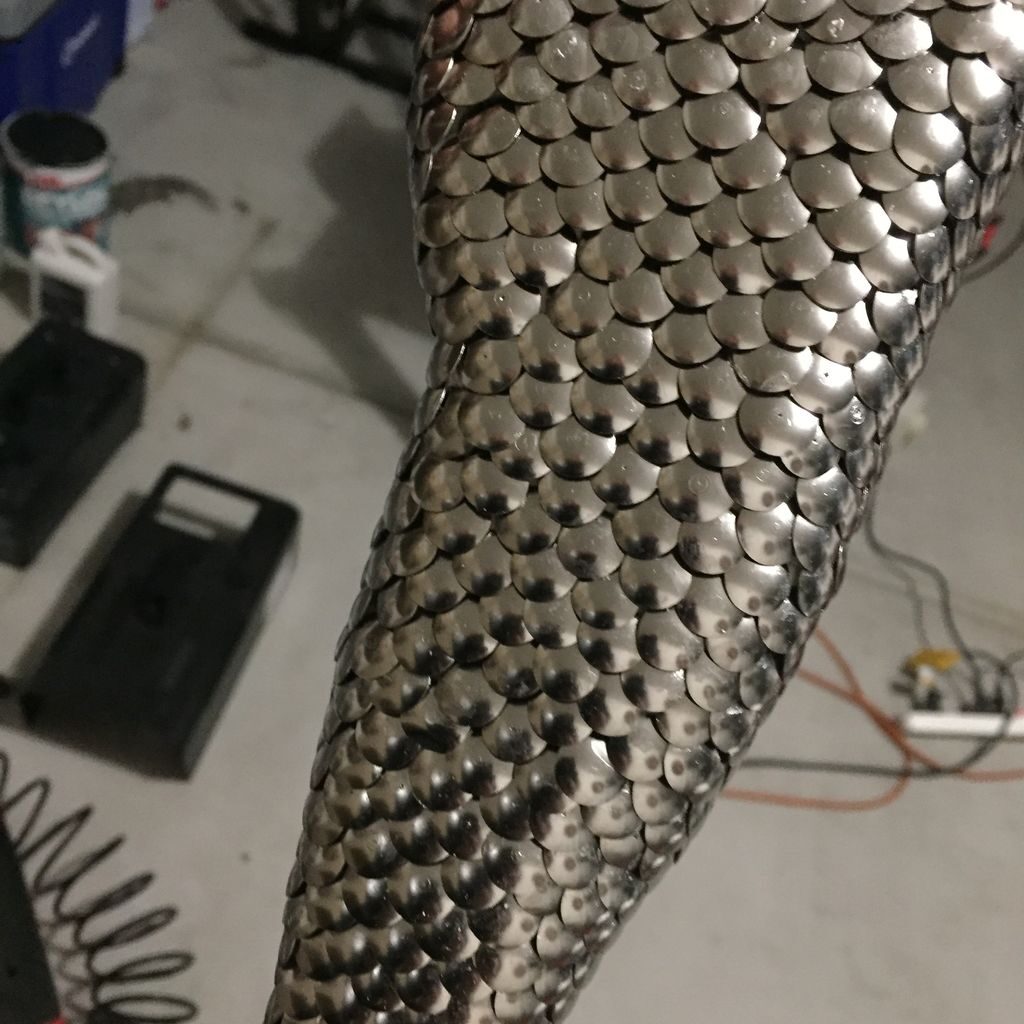
The scales. I began cutting little circles of foam and attaching them to the base of the tail/body. I decided it was taking WAY too long and didn’t like the look because of the thickness of the scales. I’m sure I’m not the first to think of this, but I thought round thumb tacks might work.
Again, starting at the base, I stuck a row of thumb tacks around it then worked my way up, overlapping the tacks. This was MUCH faster and resulted in a really good look 1100 tacks later. Before placing the tacks, I did brush a little Mod Podge onto the foam to help secure them.
Once they were all on, I brushed a coat of Mod Podge onto the tacks and between the spaces. This was mainly to coat any small amounts of foam which may be exposed since I would be spray painting this piece (spray paint destroys foam). I also used some Spackle where the scales end at the waist. This would smooth the area to create a nice transition from skin to scales.
Tail Fin
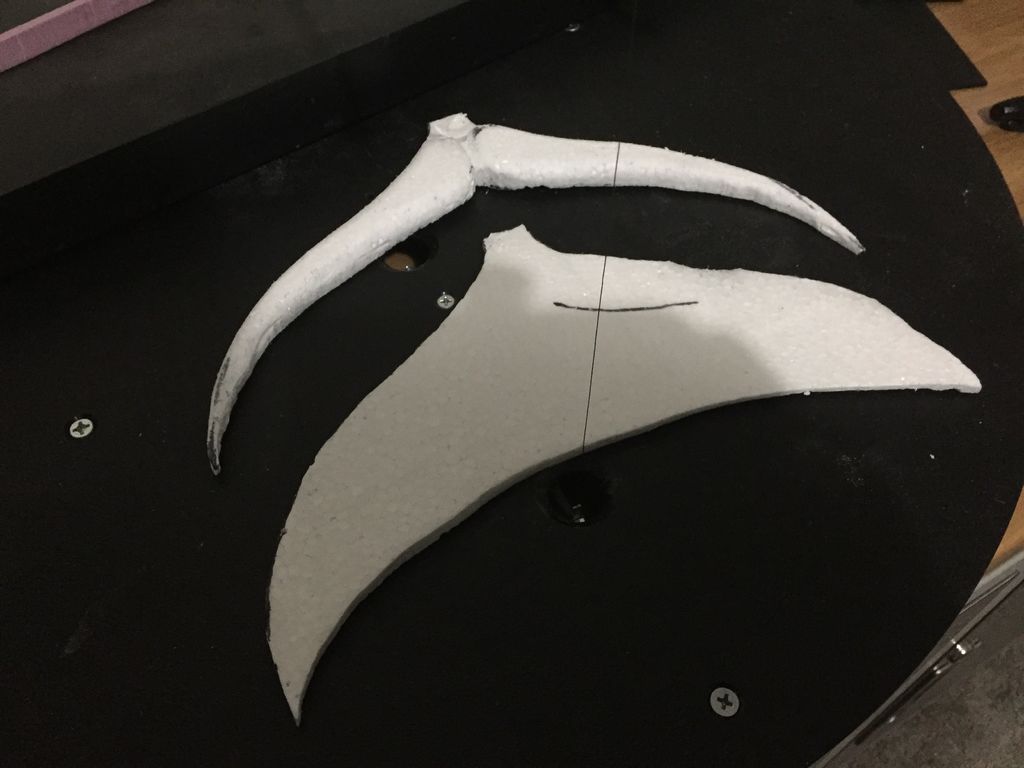
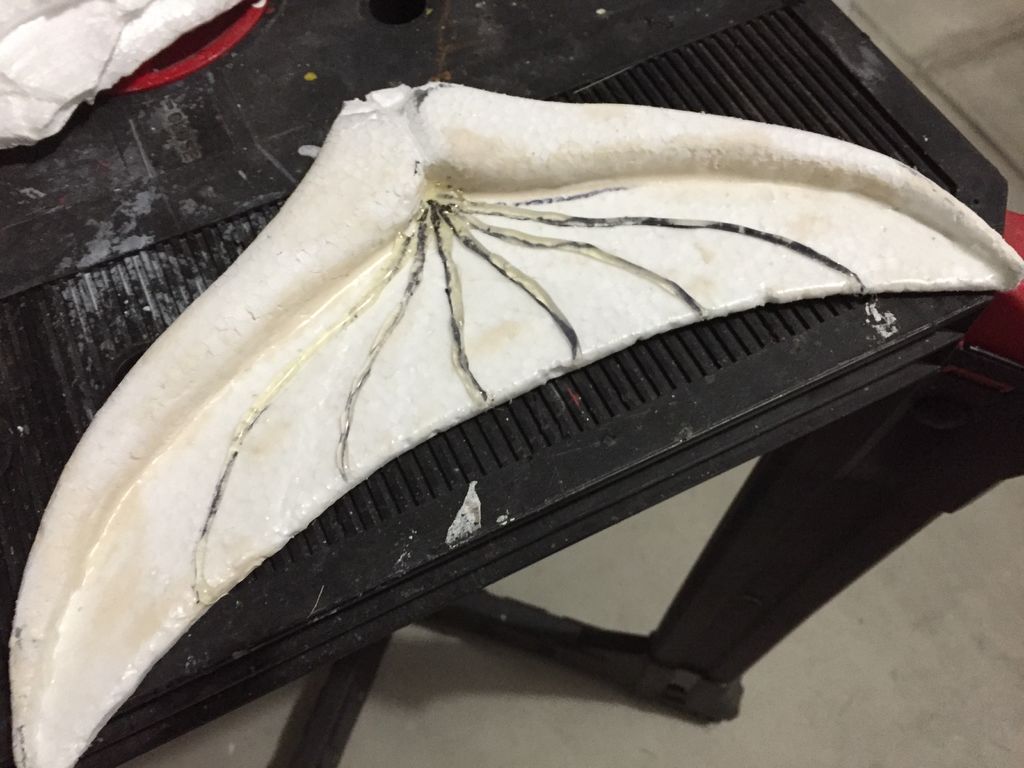
I originally had one thick tail and tried to cut and taper it to look like a dolphin or whale tail. I couldn’t quite get the look I wanted, so I cut the top portion off into my desired shape. I then cut a thin piece of foam to create the rest of the fin. Once glued, I filled crevices with filler and did more sanding. Additionally, I decided I didn’t like the blank look of the tail, so I used hot glue to create several raised lines on the main fin portion.
Caution: I used the glue gun on the lower setting to avoid melting the foam.
Sculpting The Base
I glued a few 1-1/2 inch foam pieces together then let them dry. I researched some images of underwater rock and, using the Hot Wire Sculpting Tool, I cut the foam to have a similar look to shale with lots of little crevices and ledges.
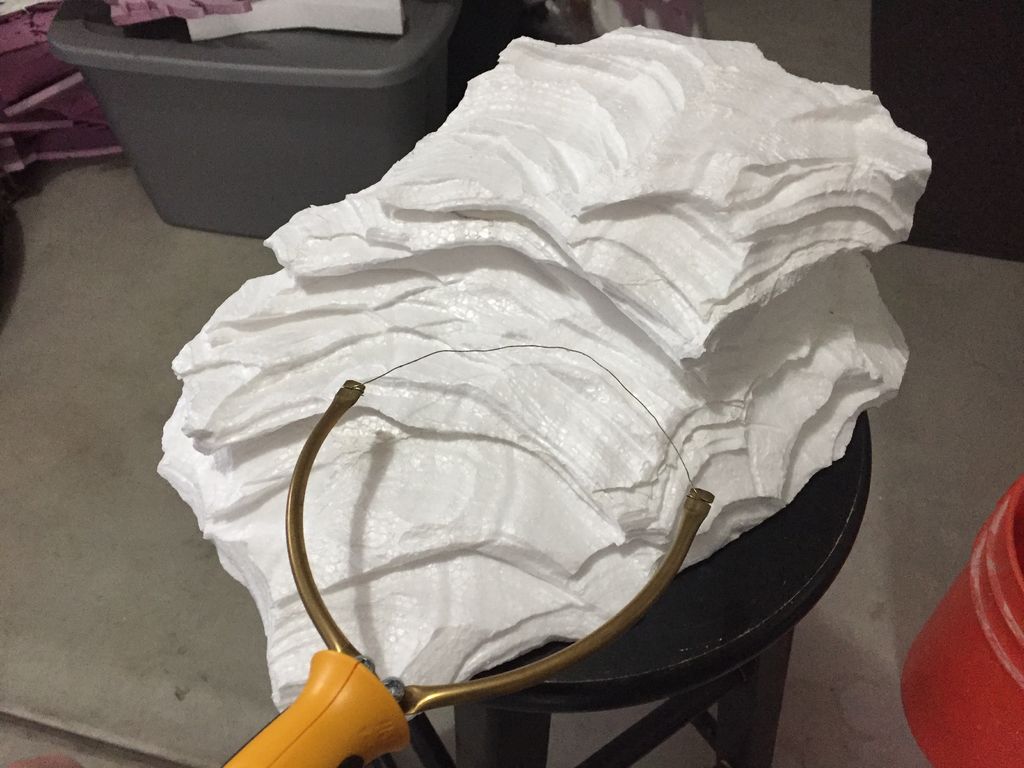
Here’s a quick video I did showing the hot wire sculpting tool on a piece of scrap foam. It really shows how easy the tool is to work with and and how, with just some back and forth movements, how easy the base can be made.
Attaching Mermaid to Base
The next step was attaching the mermaid to the base. Typically with foam, some wooden skewers and glue does the trick, but the metal thumb tacks added too much weight for that. I decided I would use an old doll stand and a metal rod to attach the body to the base. I determined where to place the mermaid and cut away portions of foam from the base until it appeared the tail could later be placed in a natural position once the mermaid was attached.
Use CAUTION here: I heated a metal rod and used it to melt a canal in the base, so the shaft of the doll stand could go through. Next, I cut the metal with my Dremel so several inches could be inserted inside the mermaid and so there would also be sufficient length to fill the doll stand. I again heated a couple inches of the metal before I inserted it through the bottom of the mermaids body, melting a hole as I pushed it through.
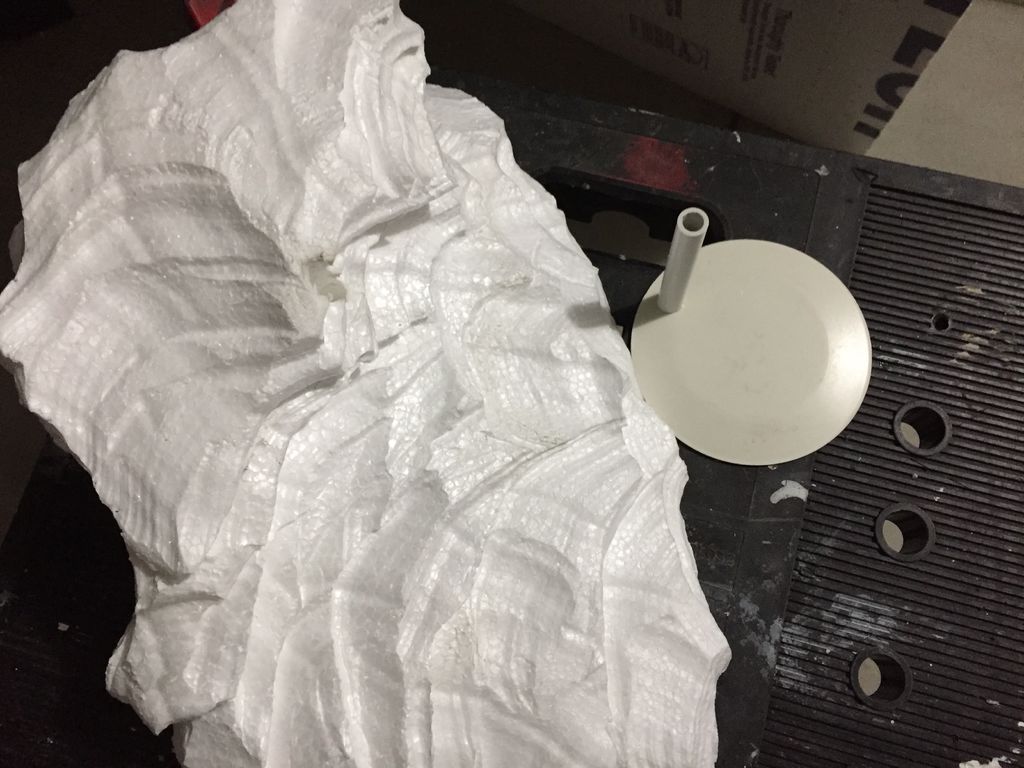
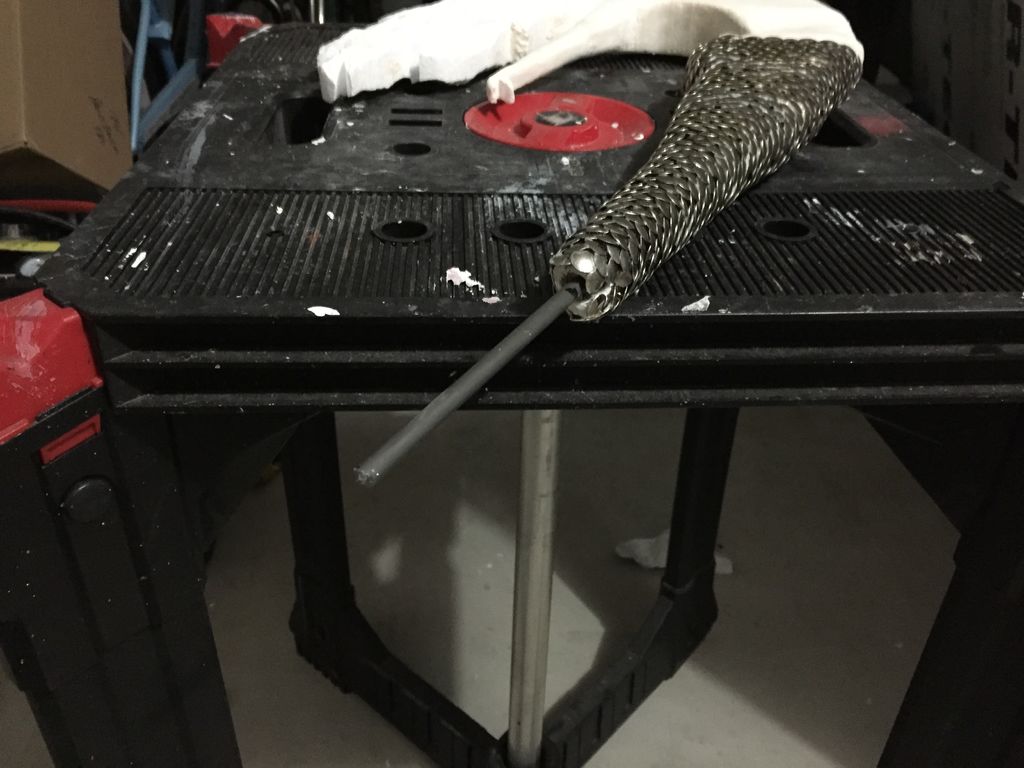
REMEMBER: The metal rod cannot be too thick since the points of the tacks take up space inside the mermaid’s tail (mainly at the narrow end). I removed the rod, let it cool, then put some glue on it before placing it back into the mermaid body. A good amount of glue was squirted into the doll stand as well. The exposed rod was placed into the doll stand, the mermaid was adjusted to the position I wanted her and the glue was allowed to dry.
Adding Shells & Sand Dollars
I purchased some small sea shells and filled them with wood filler prior to gluing them to the base and the mermaid’s lower hand. May or may not help, but I figured the filler might keep the shells from shattering if the piece is ever dropped. My neighbor had a couple small sand dollars which were also added to the base. These were particularly interesting since they soaked up a lot of spray paint during the first coat. This gave them a lighter color than the rest of the piece which was an interesting contrast, so I left them that way. If I didn’t want that look, I would have coated them with Mod Podge and then painted them.
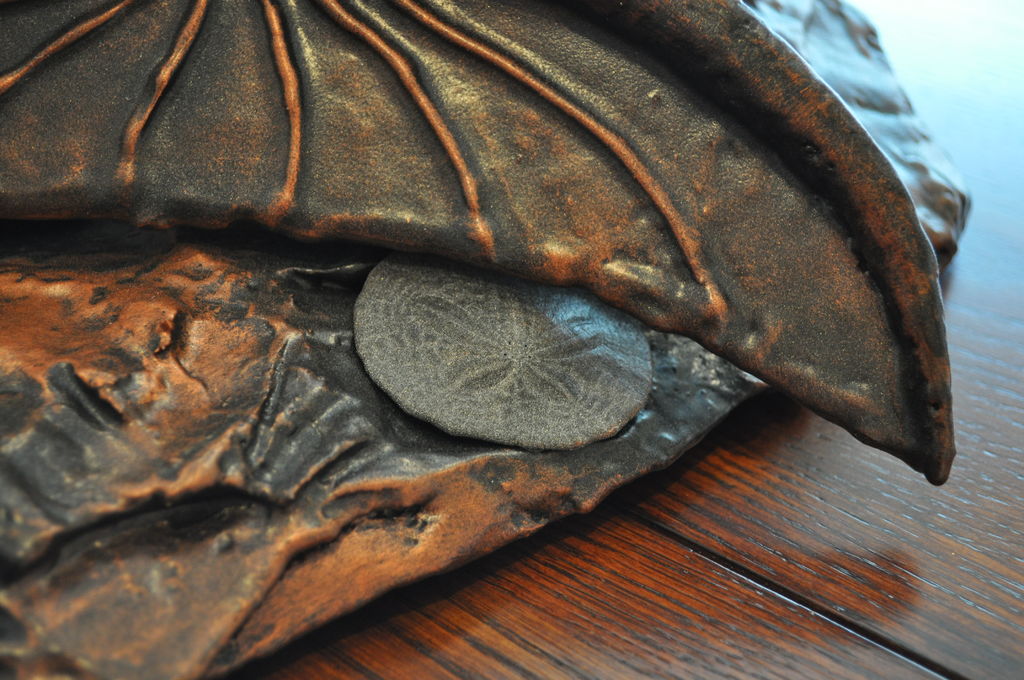
I positioned and glued the remaining tail portion so it was appropriately attached to the rest of the mermaid body. In order to do this, I needed to make a few adjustments by cutting away small portions of the base so the tail could fit a little closer to the mermaid at a natural angle.
Coating/Protecting The Foam
Now for a leap of faith. I recently won a foam tombstone making contest and received a gift certificate from Hot Wire Foam Factory. I decided to purchase some Styroplast since it is a little pricey and I hadn’t wanted to part with the $ to use it on my past projects. This project, however, really needed something to make it less brittle. Based on what I had seen in videos, I thought the Styroplast could also add some smoothness.
In a nutshell, Styroplast is two parts you mix together before you apply it to foam. It can be applied a few ways, but I used cheap brushes. Once it cures, Styroplast will become plastic-like. Sorry, I didn’t take any pics, but it ends up drying to a yellowish white color. What I found is one coat was good, but would still give a little when you pressed on it. After the second coat, however, it became a much harder shell. Another thing that was nice, was it has something in it that helps it to be self-leveling.
Here’s a video from TerranScapes regarding Styroplast. It created a very hard shell. I had ended up with a few drips here and there, but found it difficult to sand them by hand. I ended up using a Dremel to sand the thicker areas or drips that needed to be sanded down then cleaned it up with some hand sanding. Then the project was dusted and wiped off in preparation for paint.
“Bronzing”
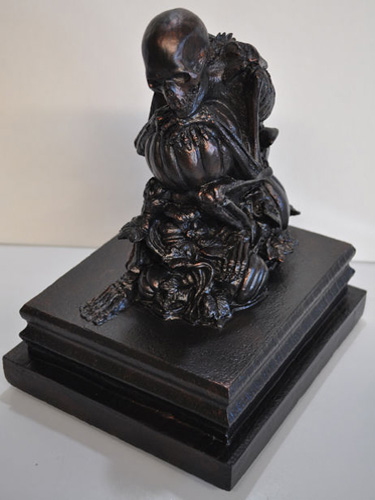
I have used Rust-Oleum’s Oil Rubbed Bronze (ORB) spray paint on a few projects and have been very happy with the results. To show contrast to what I did with the mermaid, I added a photo of a skeleton sculpture I painted with the ORB. This was a plastic Halloween decoration I picked up at thrift store. It actually is a pretty amazingly detailed piece in my opinion. Anyway, I removed its crushed base and added a new one made with foam. The piece was sprayed with a couple coats of ORB. When dry, I used copper acrylic paint to add little highlights, but not too much.
With the mermaid, I decided to use more copper paint in order to make the “scales” and other features stand out more. So, I first sprayed the mermaid with a few light coats of ORB. Don’t try to put too much paint on at one time, you’ll end up with drips. After the paint was dry, I added copper paint to a brush then removed most of it by brushing it onto another surface. I lightly brushed the copper paint onto the mermaid wherever I wanted. I went pretty heavy on the scales and torso. In other areas, such as the hair, I gently brushed so only raised areas would be painted. In order to avoid brush lines, I painted larger areas in an X pattern. I also used a piece of paper towel to rub the paint around to blend or take away a little of the copper paint.
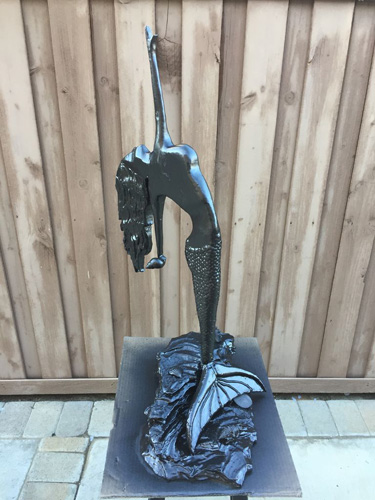
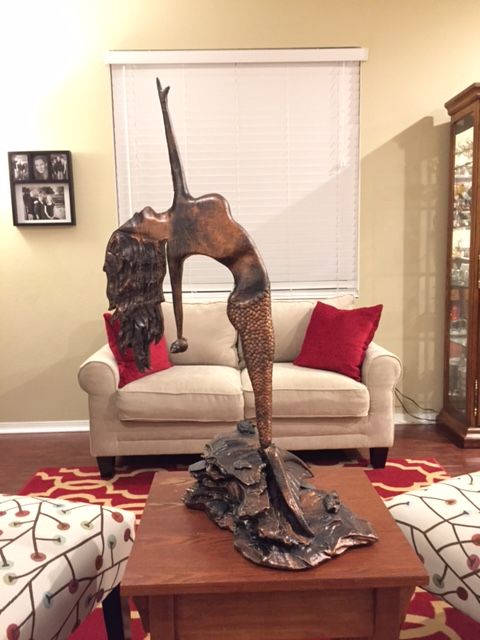
The finished project is approximately 34 inches tall and is made almost entirely from insulation foam board. This was a great learning process since I have no “sculpting” training and have never tried anything like this before. I like how it came out and hope you do too!
