3D Tank Backgrounds
Safe for reptiles to climb on, scratch and lick!
By Raven Bethancourt
The Regal Reptile
www.facebook.com/theregalreptile
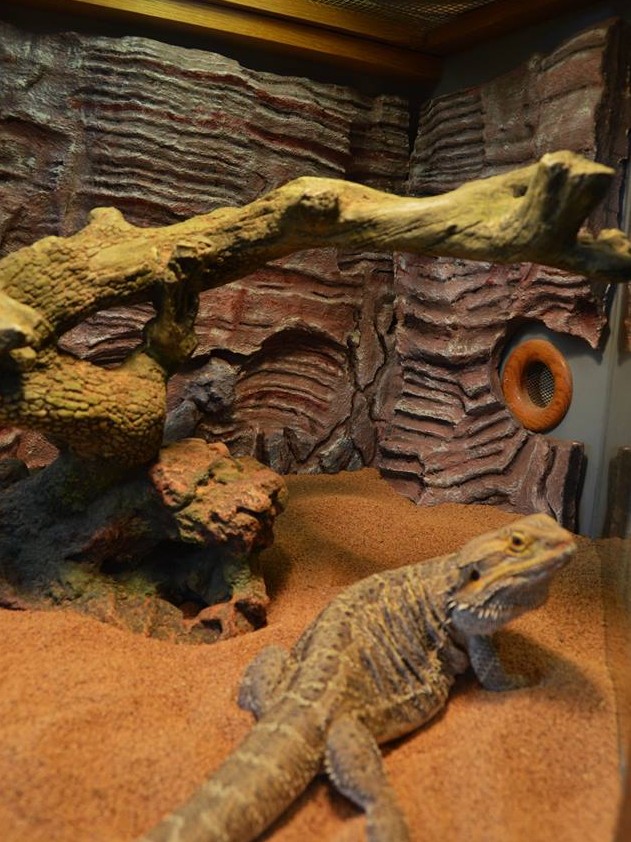
When making a hide or background for your exotic animal, it is important to use non toxic materials which can withstand heat and moisture. To make a project like this you will need a few things:
- Polystyrene (white sheet foam) will be your main structure for your project
- A non-toxic foam-safe glue
- Hot Wire Foam Factory All Purpose Foam Coat will cover your project in a tough rocky exterior, making it strong enough for animals to climb on
- Hot Wire Foam Factory Bounce Rubberizer adds more strength to the Foam Coat by making it more impact resistant, in case your lizard wants to run into your wall. They will do that sometimes!
- Acrylic paint, which is non-toxic when dry but it can have problems with water
- Shieldsall #50 is a non-toxic water sealer that keeps your paint job safe from water, and will withstand cleaning with a light scrub brush
Shaping foam is the first step in your project. I first started out with a steak knife and lighter torch, which can work, but will result in a terrible mess. I upgraded to the Hot Wire Foam Factory Pro 8” Hot Knife, which cuts a smooth melted edge, without the tiny foam ball mess! The Freehand Router allows you to cut more than straight lines and angles, giving you the power to truly sculpt your foam in a smooth and natural way.
A few other things include cheap paint brushes for the Foam Coat, and a variety of artistic paint brushes for the acrylic paint. You’ll also want a marker and tape measure handy to mark out where you want to cut and what you want to build. Last but not least, tooth picks! You can use tooth picks to hold foam together after gluing, to mix small amounts of Foam Coat with water, and even mix paint colors together cleanly and without constantly washing paint brushes. Seriously, I cannot overstate the usefulness of tooth picks.
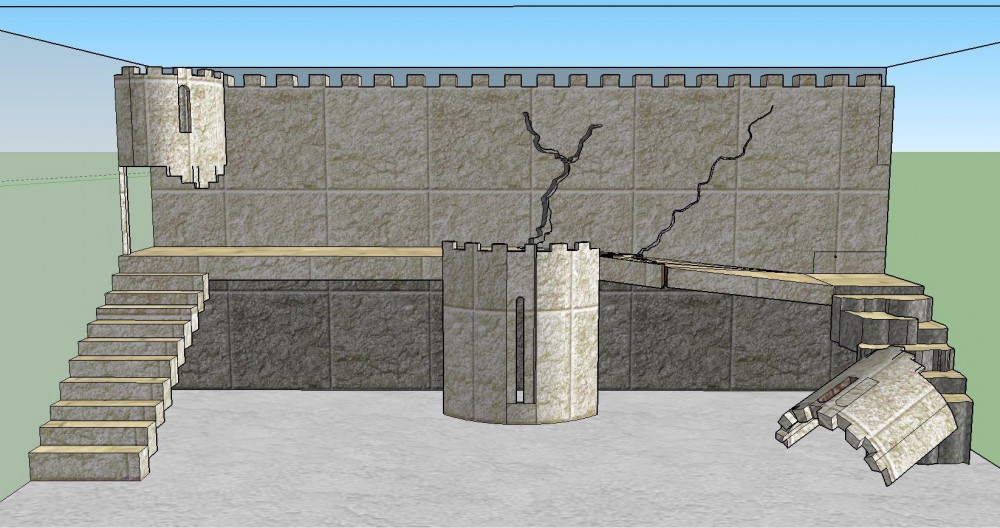
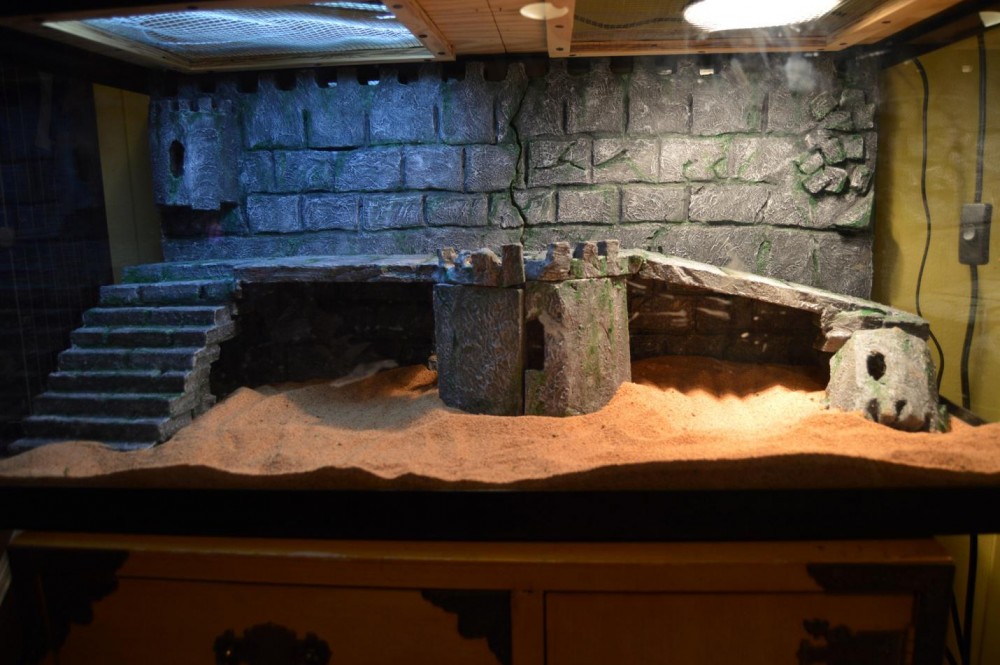
First, I like to figure out what I want to build. This includes the theme, the cage size and the animal’s needs. For example, a bearded dragon likes floor space but also likes to bask on an elevated platform, while a ball python doesn’t bask and prefers to hide in a tight cave. You can sketch your ideas out on blank paper or go a step further and use a 3D modeling computer program to get exact measurements. A good simple one to use is Google Sketchup – plus, it’s free! Pictured above is an example of a 3D model of a project for a bearded dragon.
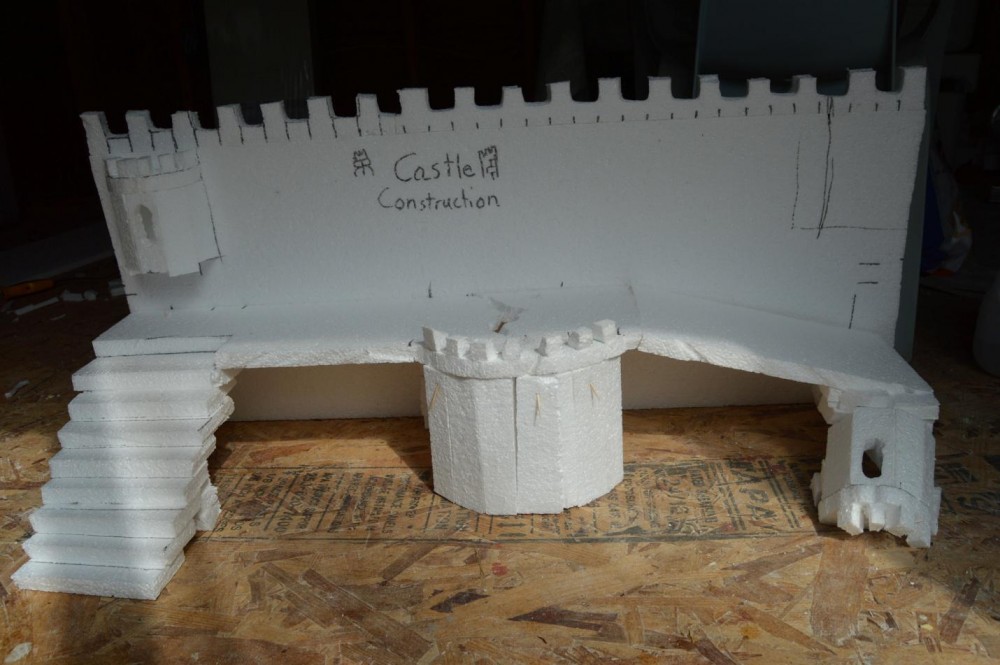
Knowing your measurements and sketching it out will help you know how much floor space you’ll have left over and if some of your project is hidden. It’s important to write down your measurements and mark them down on your foam before cutting. Sometimes you need to use several tools to get the right look, and remember, everything looks better once it’s covered in Foam Coat. Make sure everything has adequate support. Consider the weight and size of the animal that will eventually sit on your project.
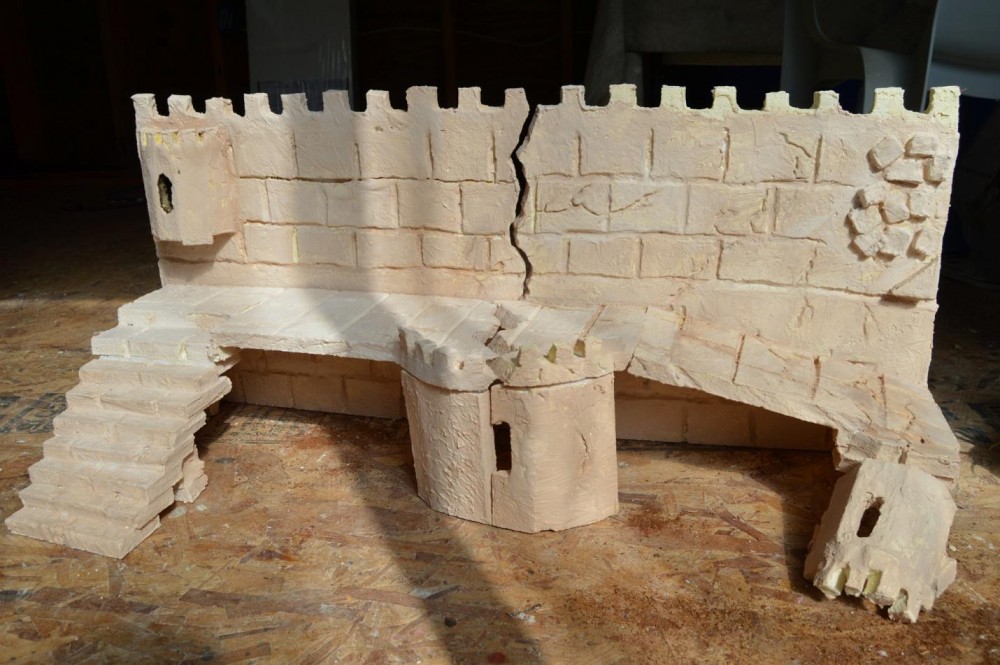
Mixing the Foam Coat comes next. Use a paint stirrer or large disposable spoon to mix the Foam Coat in a large flexible mixing bowl. Add a little Bounce to each mix, and you can also add a dab of acrylic paint to give each coat a unique color so you don’t get lost. You’ll want a few cheap house painter brushes to apply the Foam Coat. Your first coat should be soupy, like pancake batter. The second coat should be a little thicker, and the last coat should be the thickest to cover any cracks you don’t want. You can use a lot of things to give your project texture before the last coat dries, like a tooth pick to make small cracks or pin holes, your fingers, and even the paint brush itself to make streaks or rough dappling. Tap your project with your fingernails to see if your coating cracks. If it does, add another coat. The photo above shows what the white foam looks like after three coats of Foam Coat.
Now it’s time to paint your project! I start with a layer of watered-down dark paint. Make sure to paint everything including the back and bottom because this helps seal the project against moisture. Let it dry. Next, add any supporting colors like lighter brown or reds, depending on your theme. Lastly, take a fan brush and lightly brush very light paint over your whole visible project. This will allow the texture you made with the foam coat to show through! If you’re really ambitious, you can get a very thin brush and add in some dark shadow details, which makes your project pop.
After you’re finished painting, take your Shieldsall #50 and use another cheap brush to cover the whole project, front and back and bottom. Allow three days to put three nice coats over your project. Don’t worry, it will dry clear and allow your paint job to shine through, protected. Fit your project in its tank and celebrate your handmade, one of a kind masterpiece with your friends and your pet!
A few more tips:
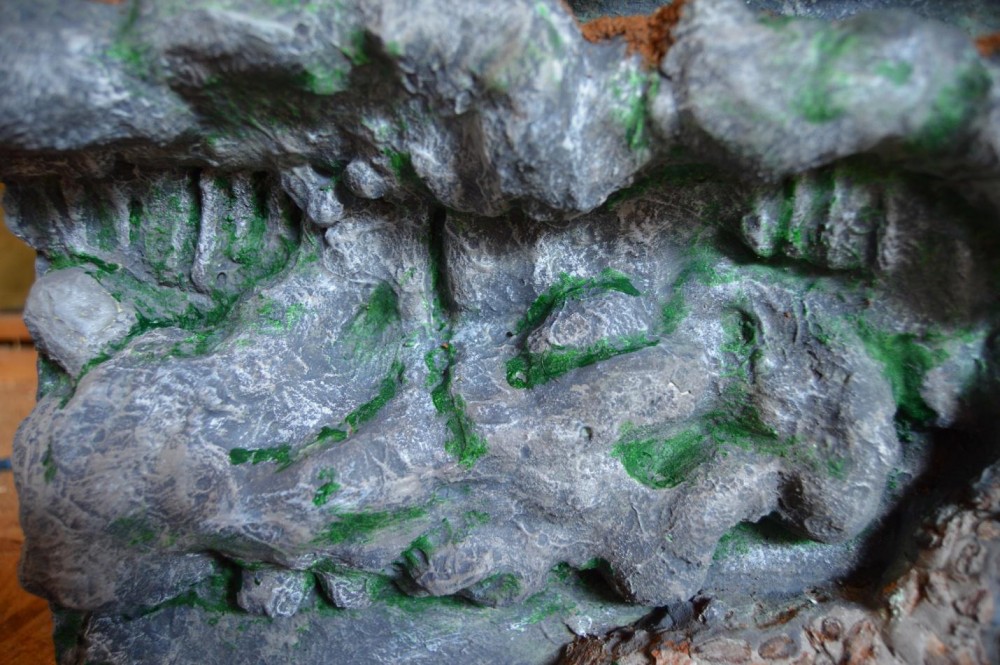
If you want a natural shadow look- color your last coat of foam coat a bold light color- and once it dries, paint over it with watery dark paint. The water will drag the dark paint into the nooks and crannies of the project, exposing the bold color underneath. Pictured above on the left is an example of green Foam Coat with a watery dark gray on top. Some green showed through, some green was added later.
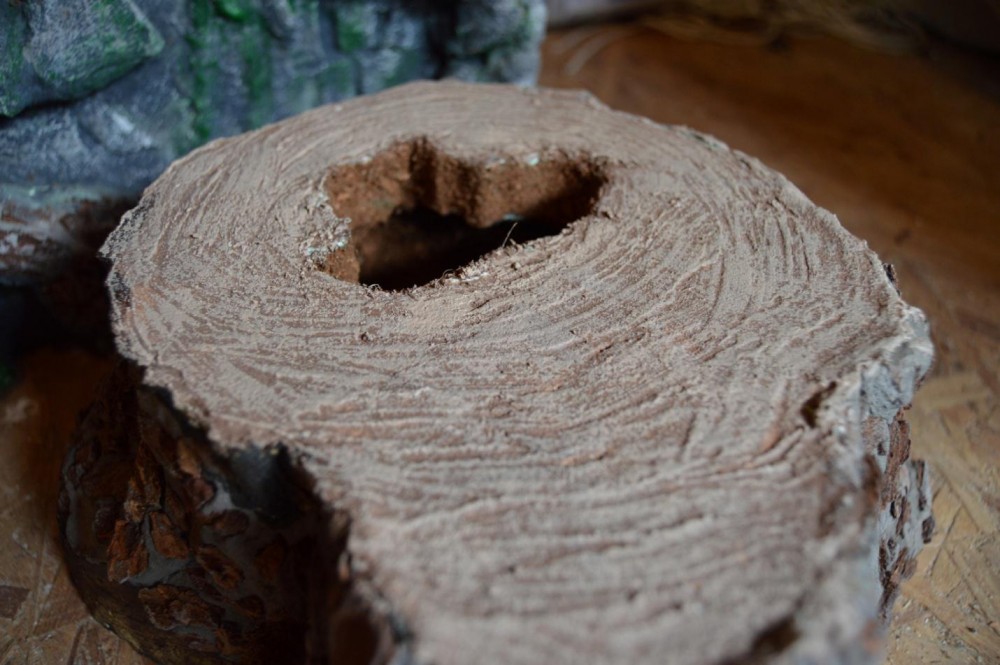
You can use your brush, tooth picks, or your fingers to make awesome texture in wet Foam Coat. Also pictured above on the right is an example of growth rings on a tree stump. You may also press non toxic stones, beads, wood or coco fiber into wet Foam Coat to create unique texture, or a place for moss to grow!
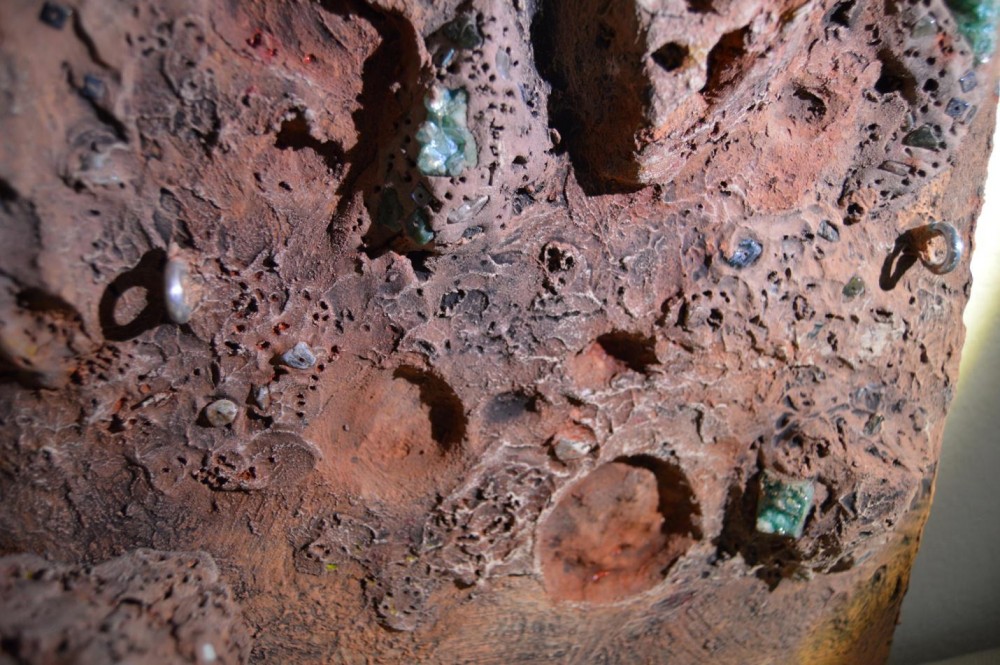
The first photo above, on the left, shows an example of tooth pick texture – geode stones and beads pressed into the Foam Coat. The eye hook is for a hammock and is simply screwed through the foam and cemented in place with Foam Coat.
You can use watercolor principals with acrylic paint. After our base coat of paint is dry, you can use watery colors, and paper towels to sop up unwanted paint. This will allow the paint to migrate into crevices and accent the texture of your project. The project literally paints itself!
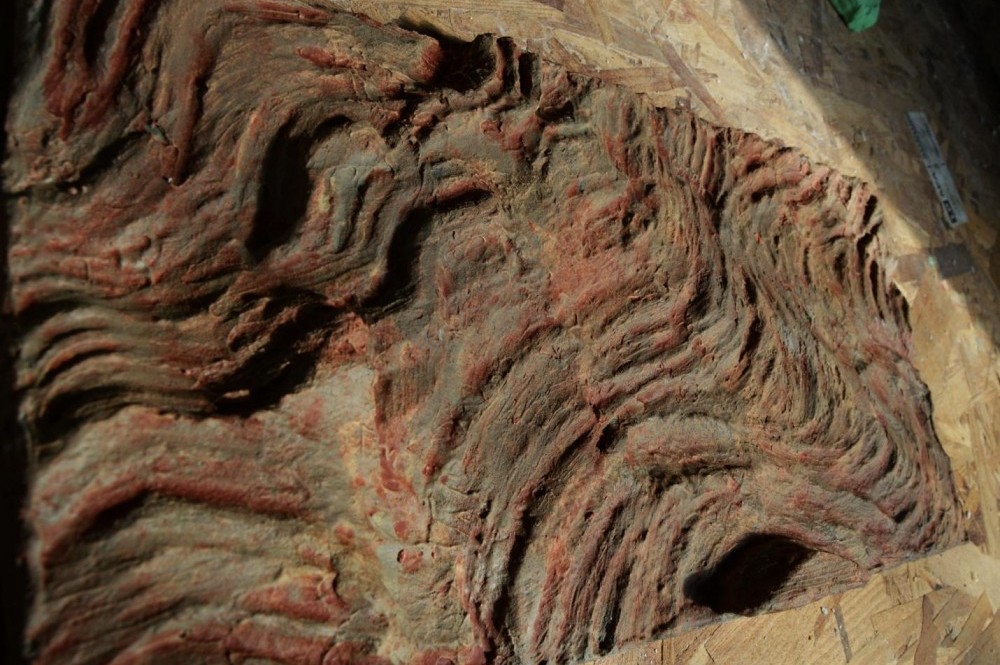
The second photo, on the right, shows how using red, tan, yellow, and brown paint with water, paper towels and gravity can create a unique, natural look.
One final important tip is to make sure you’re measurements are a little smaller than your tank. Three coats of Foam Coat will make your project a little bigger and the last thing you want is something that won’t fit inside your enclosure. If you have the enclosure with you, it’s best to keep size testing your project after each building step!
Good luck! Let your imagination run wild!