Napoleon Blownapart Tombstone
By David Downer
I had a lot of fun with this tombstone – my very first tombstone ever! The name came to me first. I had heard “blown apart” somewhere and thought it sounded like Napoleon’s last name of “Bonaparte”. So, when this tombstone contest came along I thought this could be a really fun play-on-words to create.
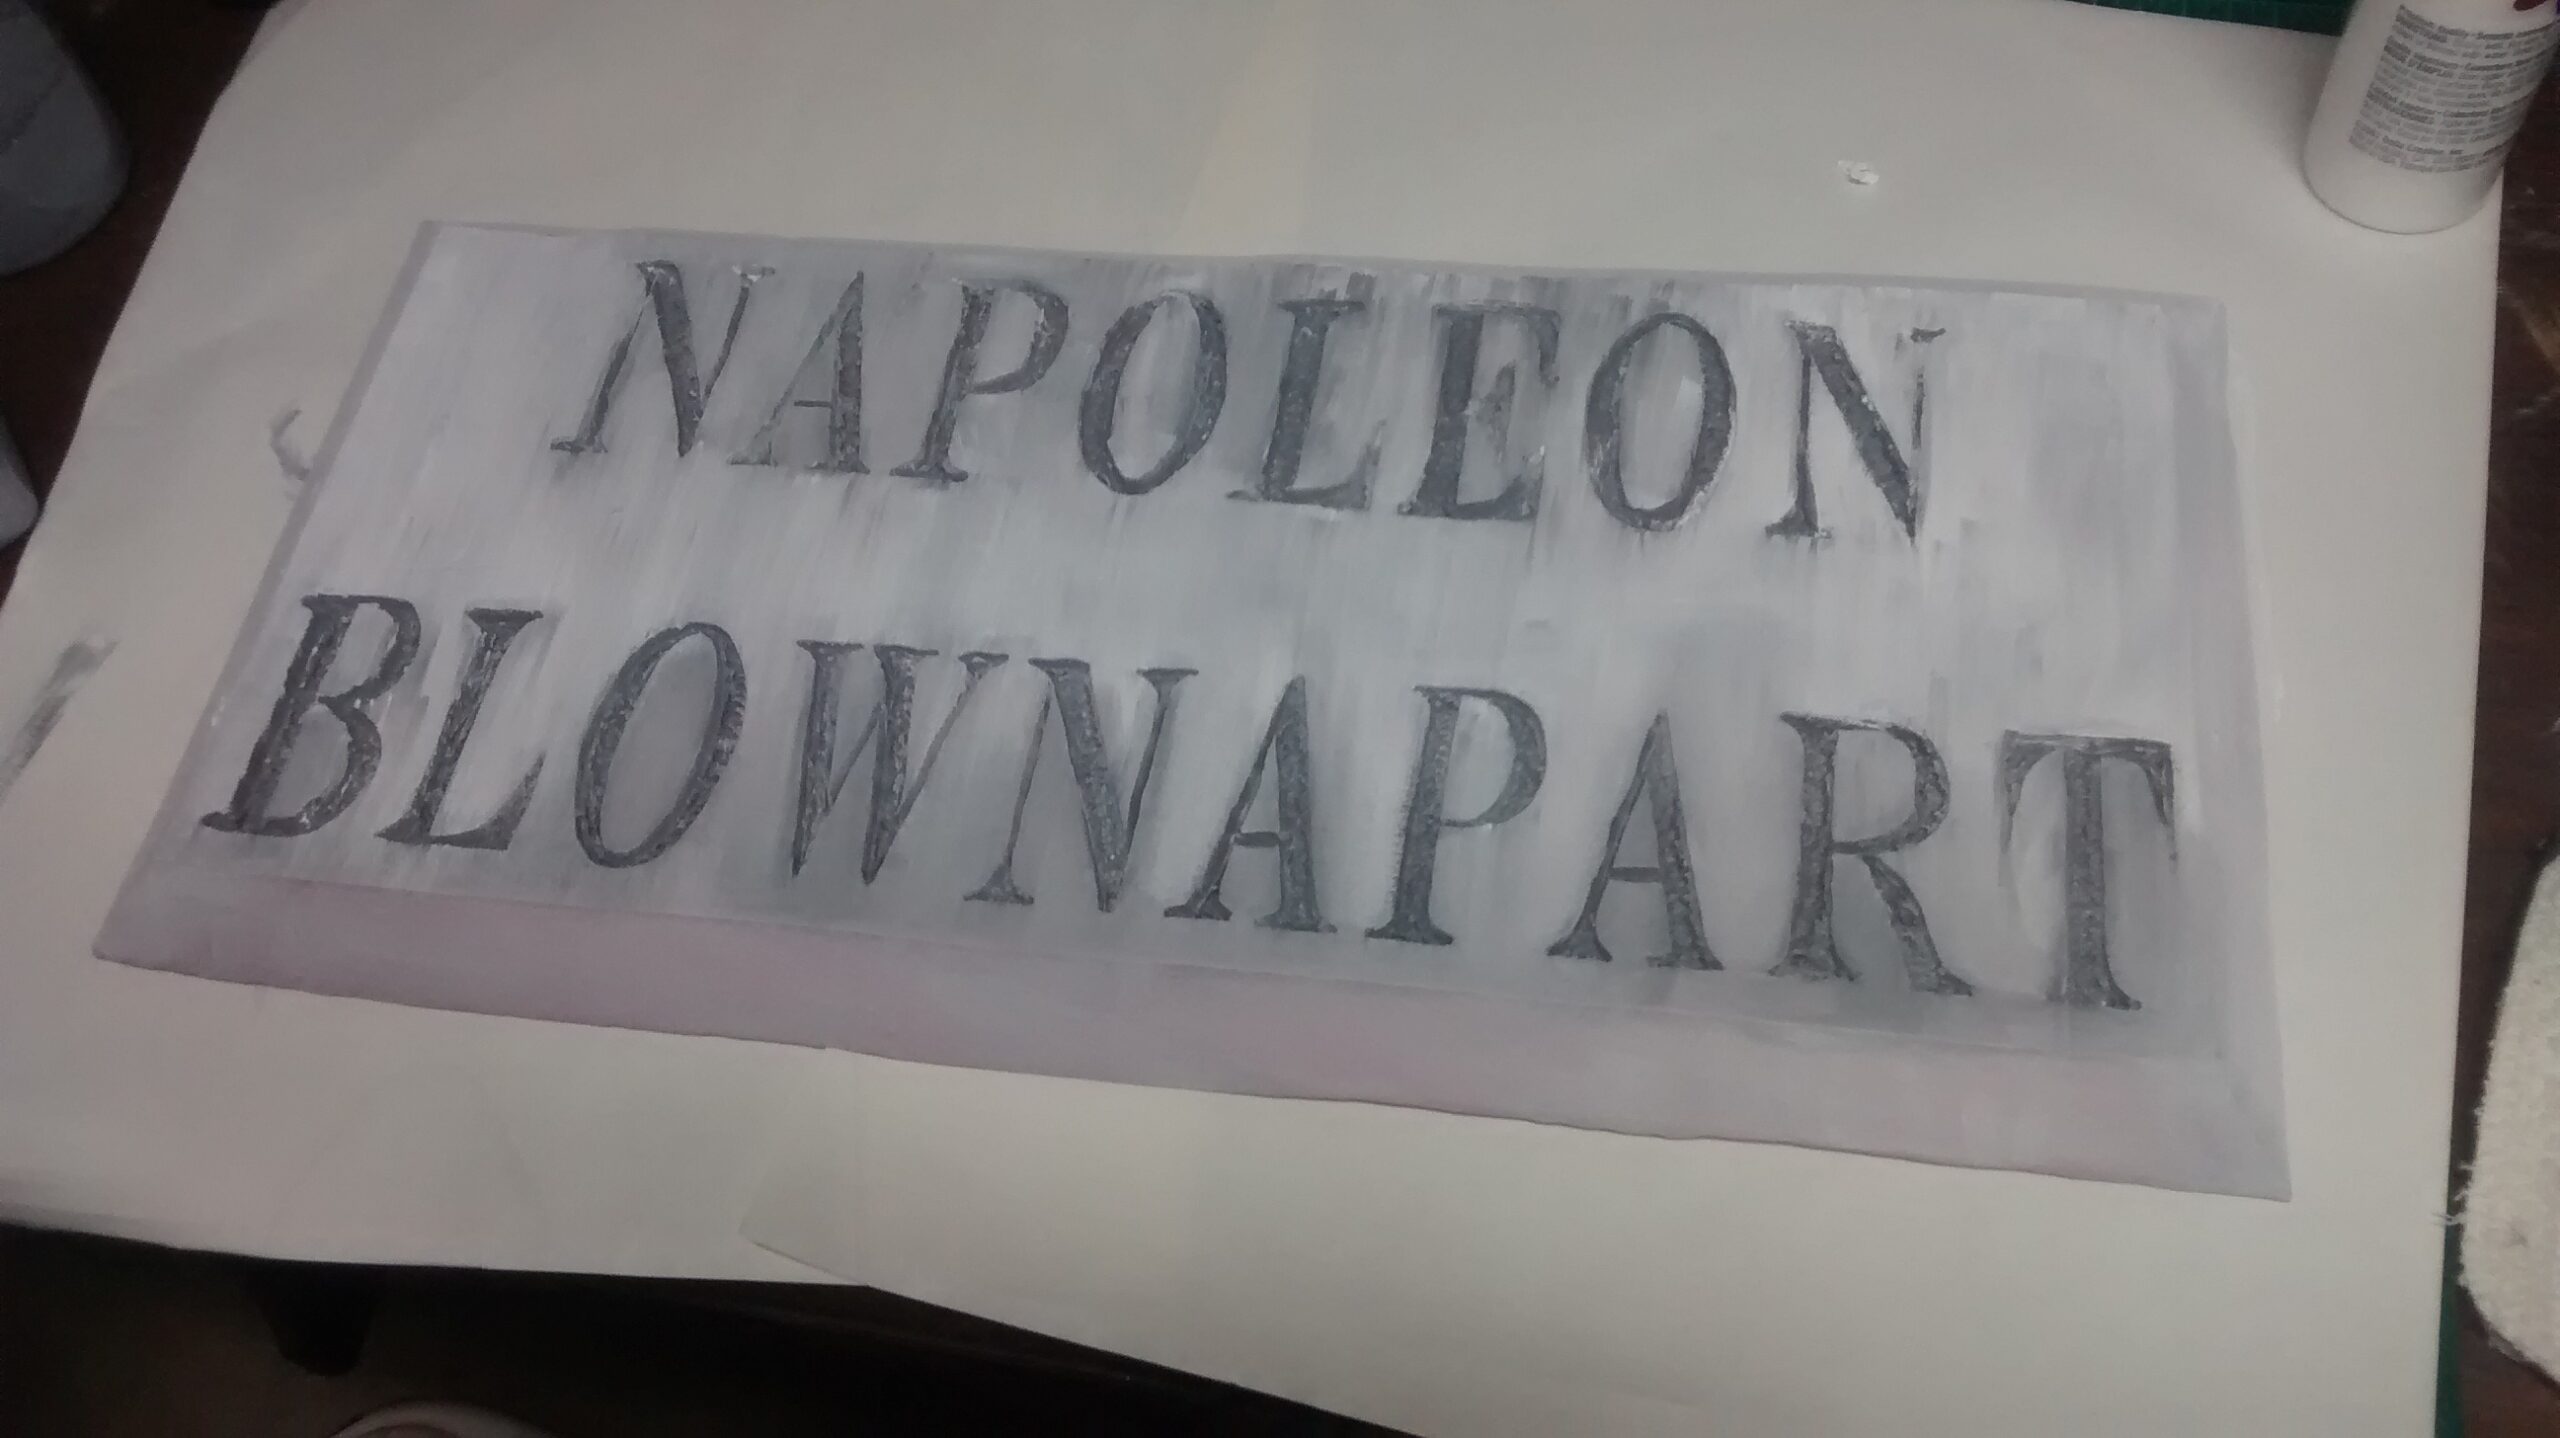
“I began with the nameplate. I wanted to really make it look like it was being blown apart so I decided to use the high-density pink building-insulation foam (I get it at Home Depot) in order to get the detail level I wanted. I created the name on my computer in the font I wanted and then printed it out. I used the Hot Wire Sculpting Tool to cut a rectangular shape (with beveled edges) from the insulation board. I then taped the printed name to the insulation board and used a ball-point pen to trace over the letters, thus creating a shallow imprint in the foam below. The Engraving Tool was used to then “carve” the letters deeper into the foam. (Artist note: Take your time with this part…it is time consuming, but worth it to have nice, straight letters!)
Once the letters were finished, I gave the nameplate a coat of light gray acrylic paint to seal the foam and then dark gray inside the letters.”
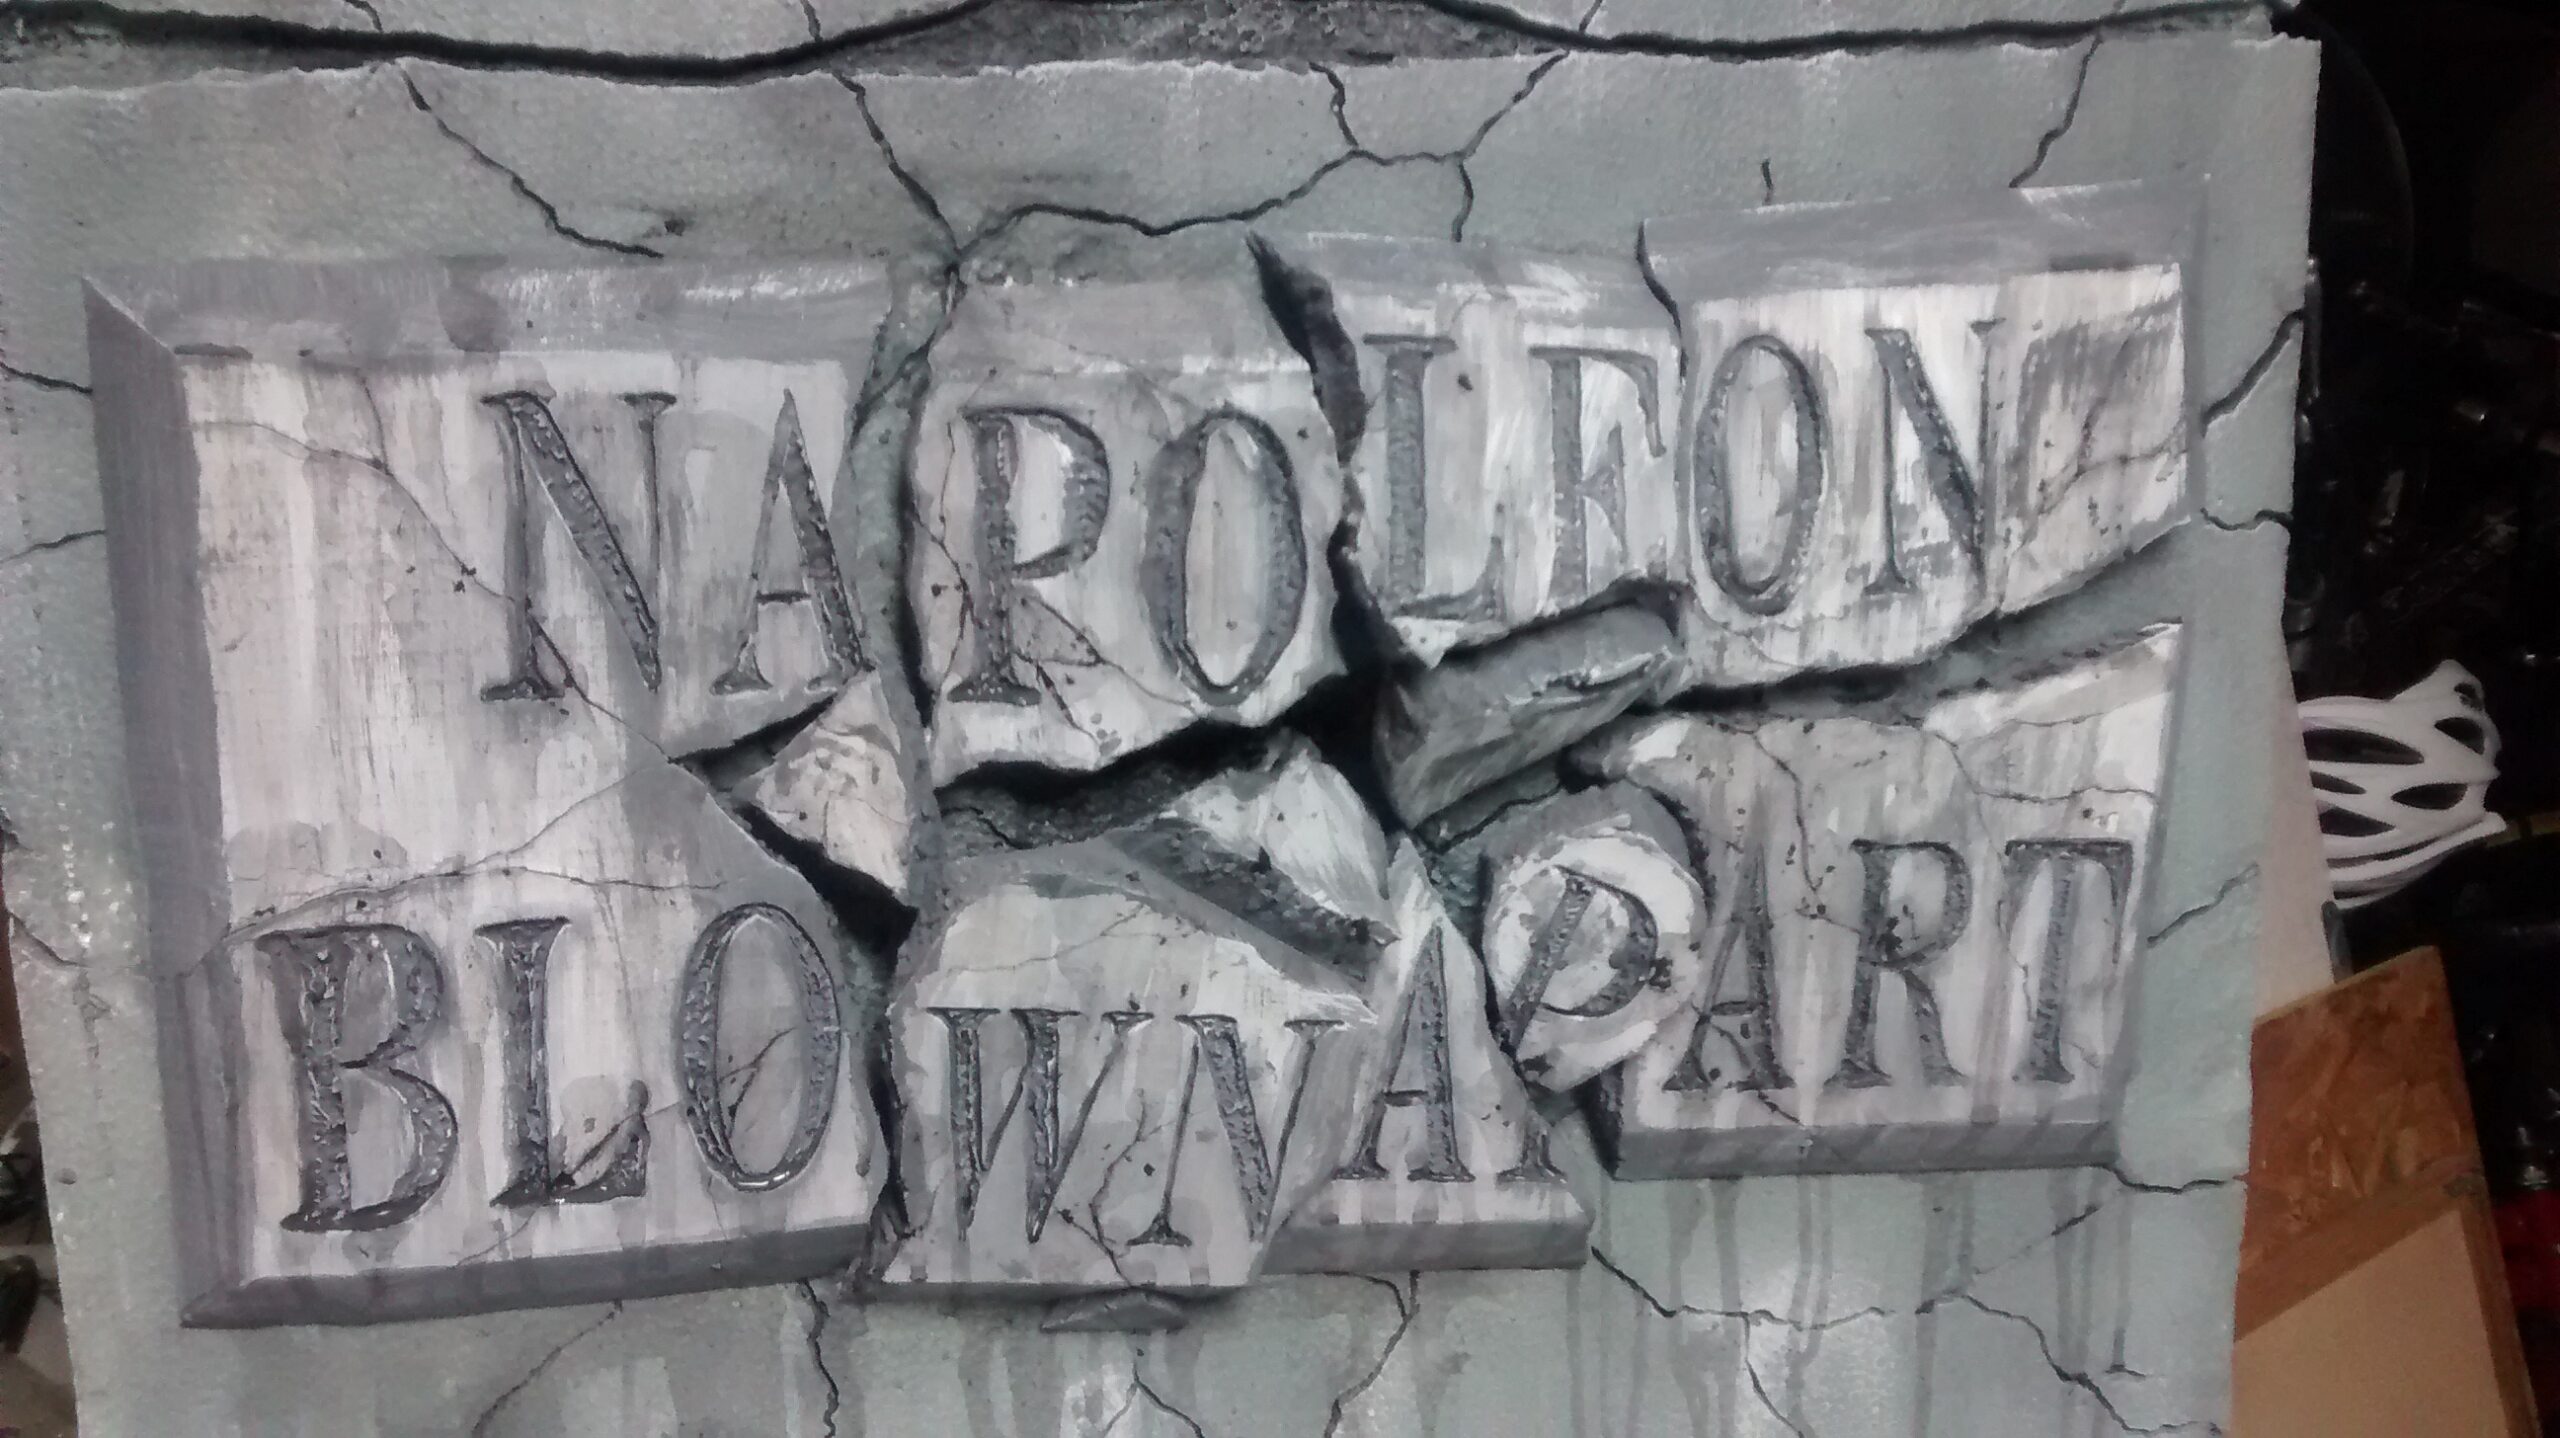
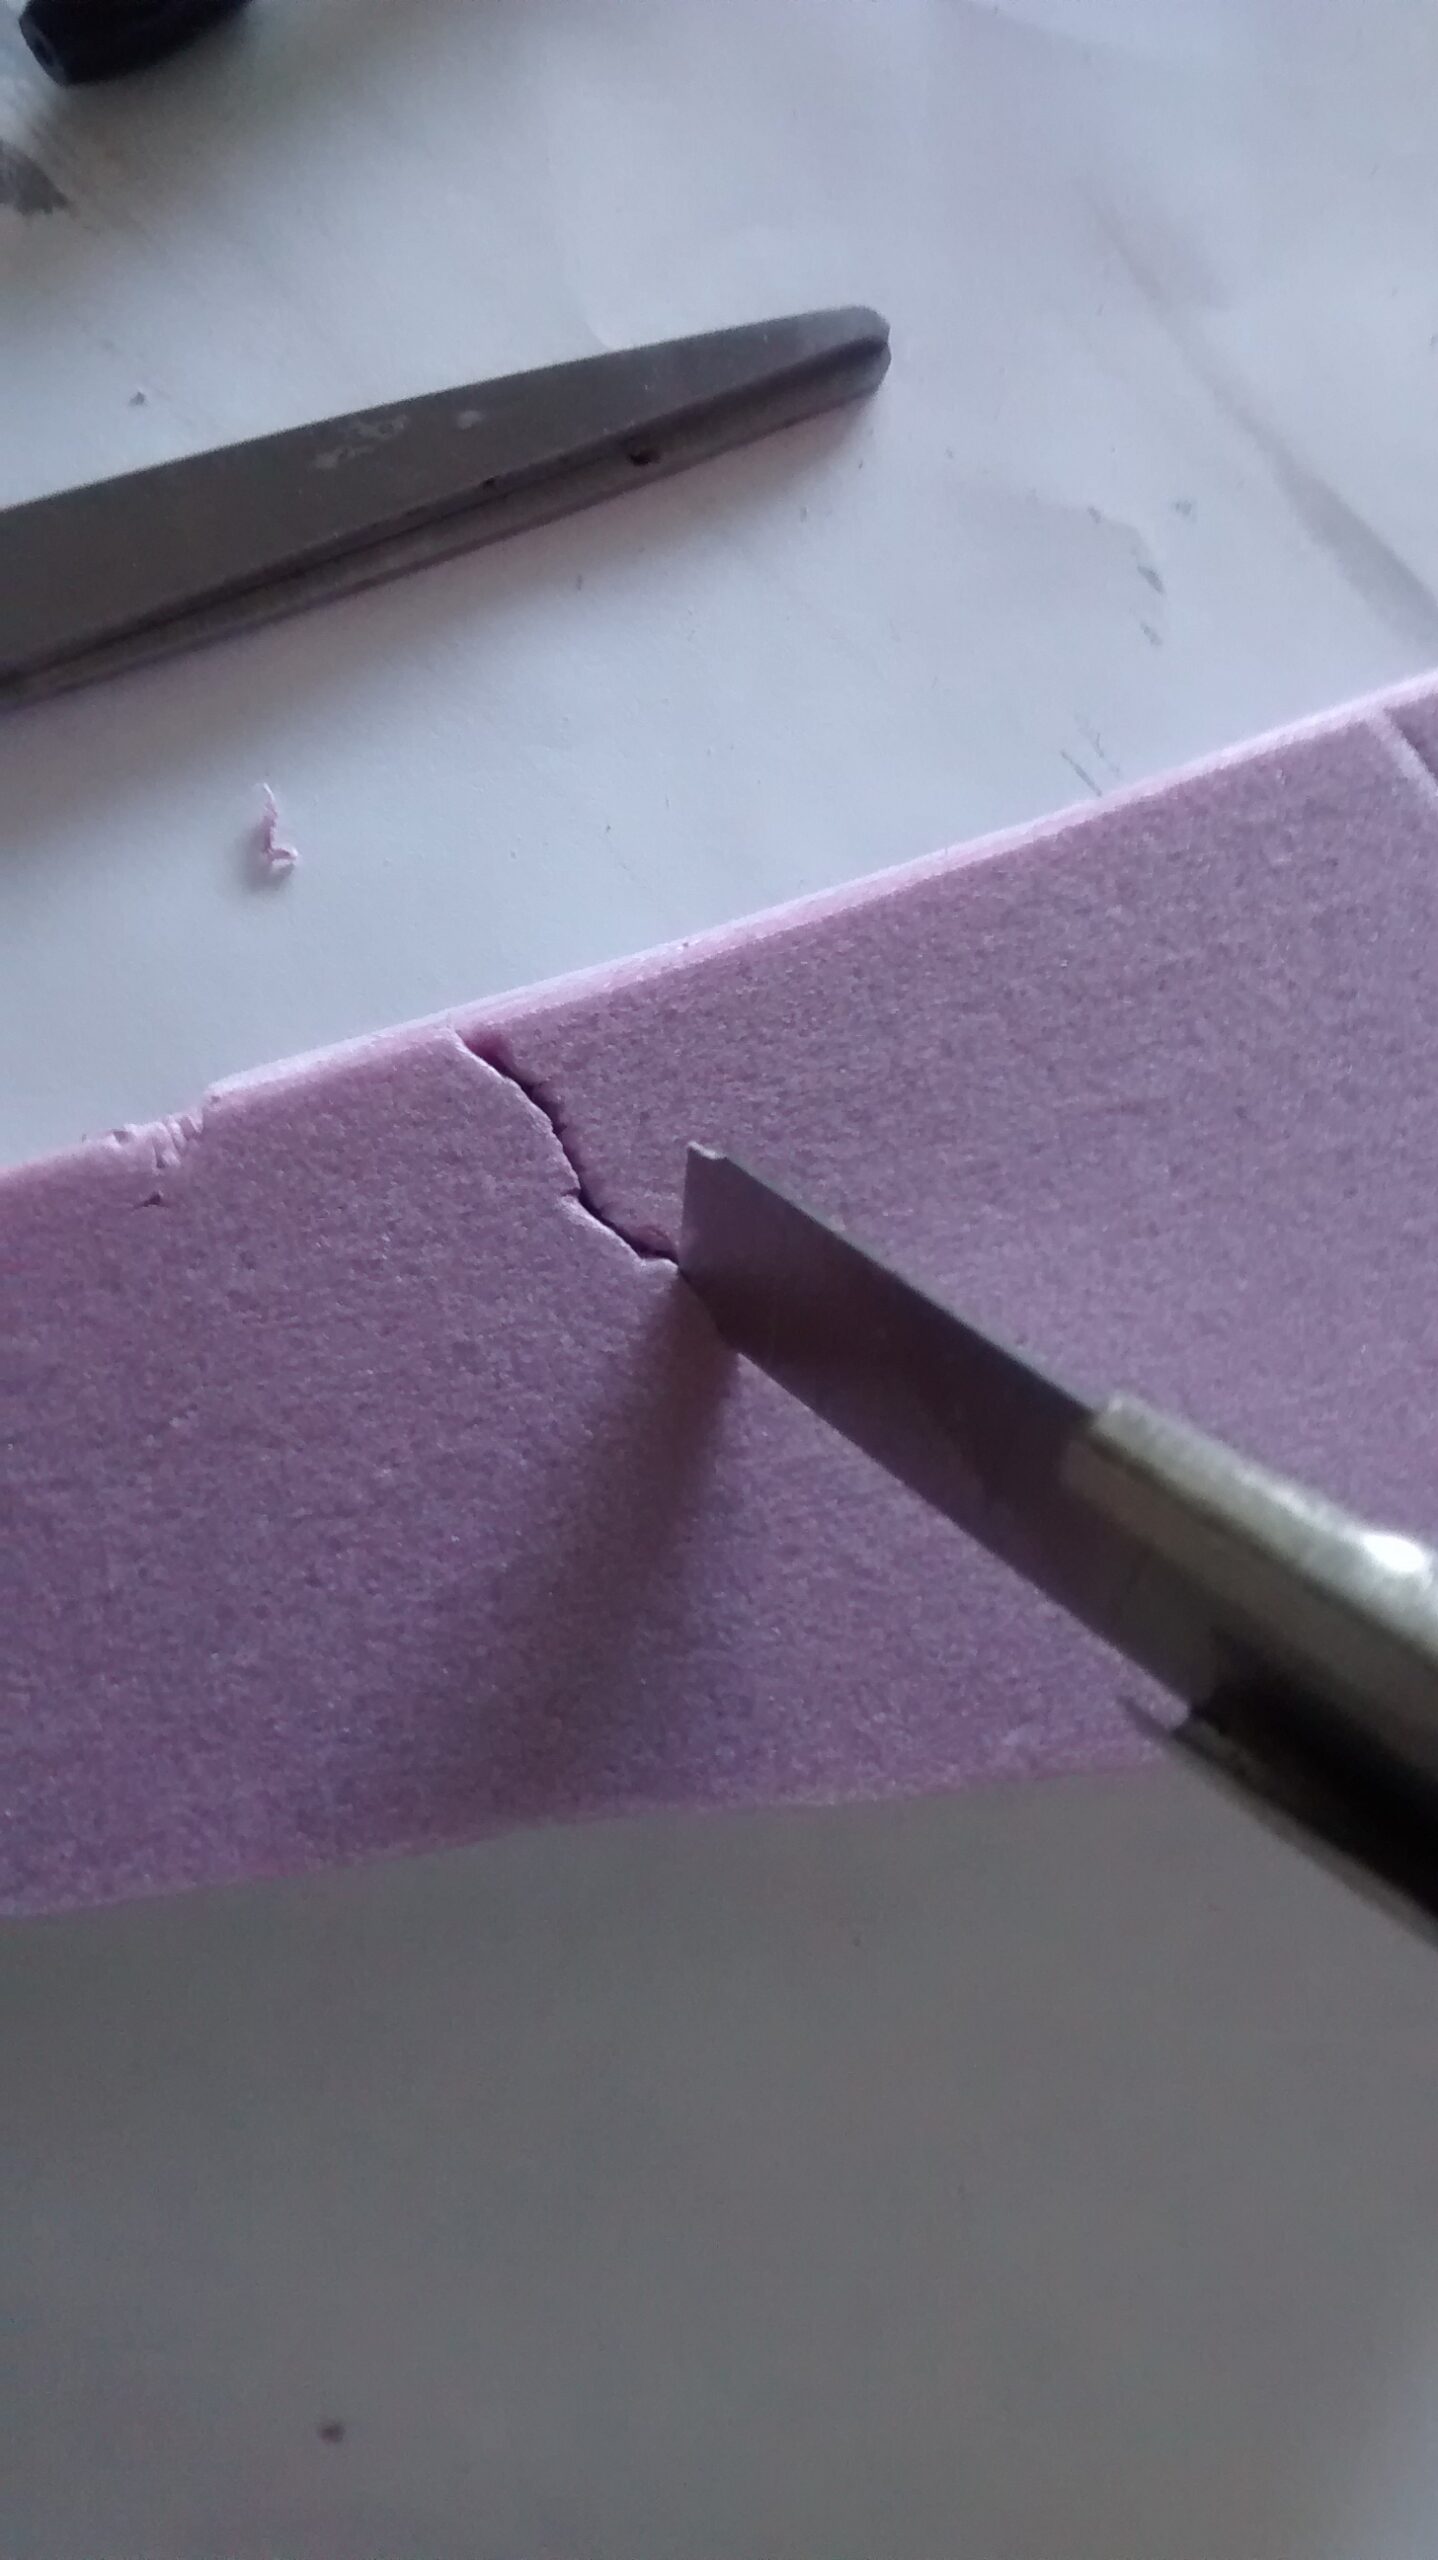
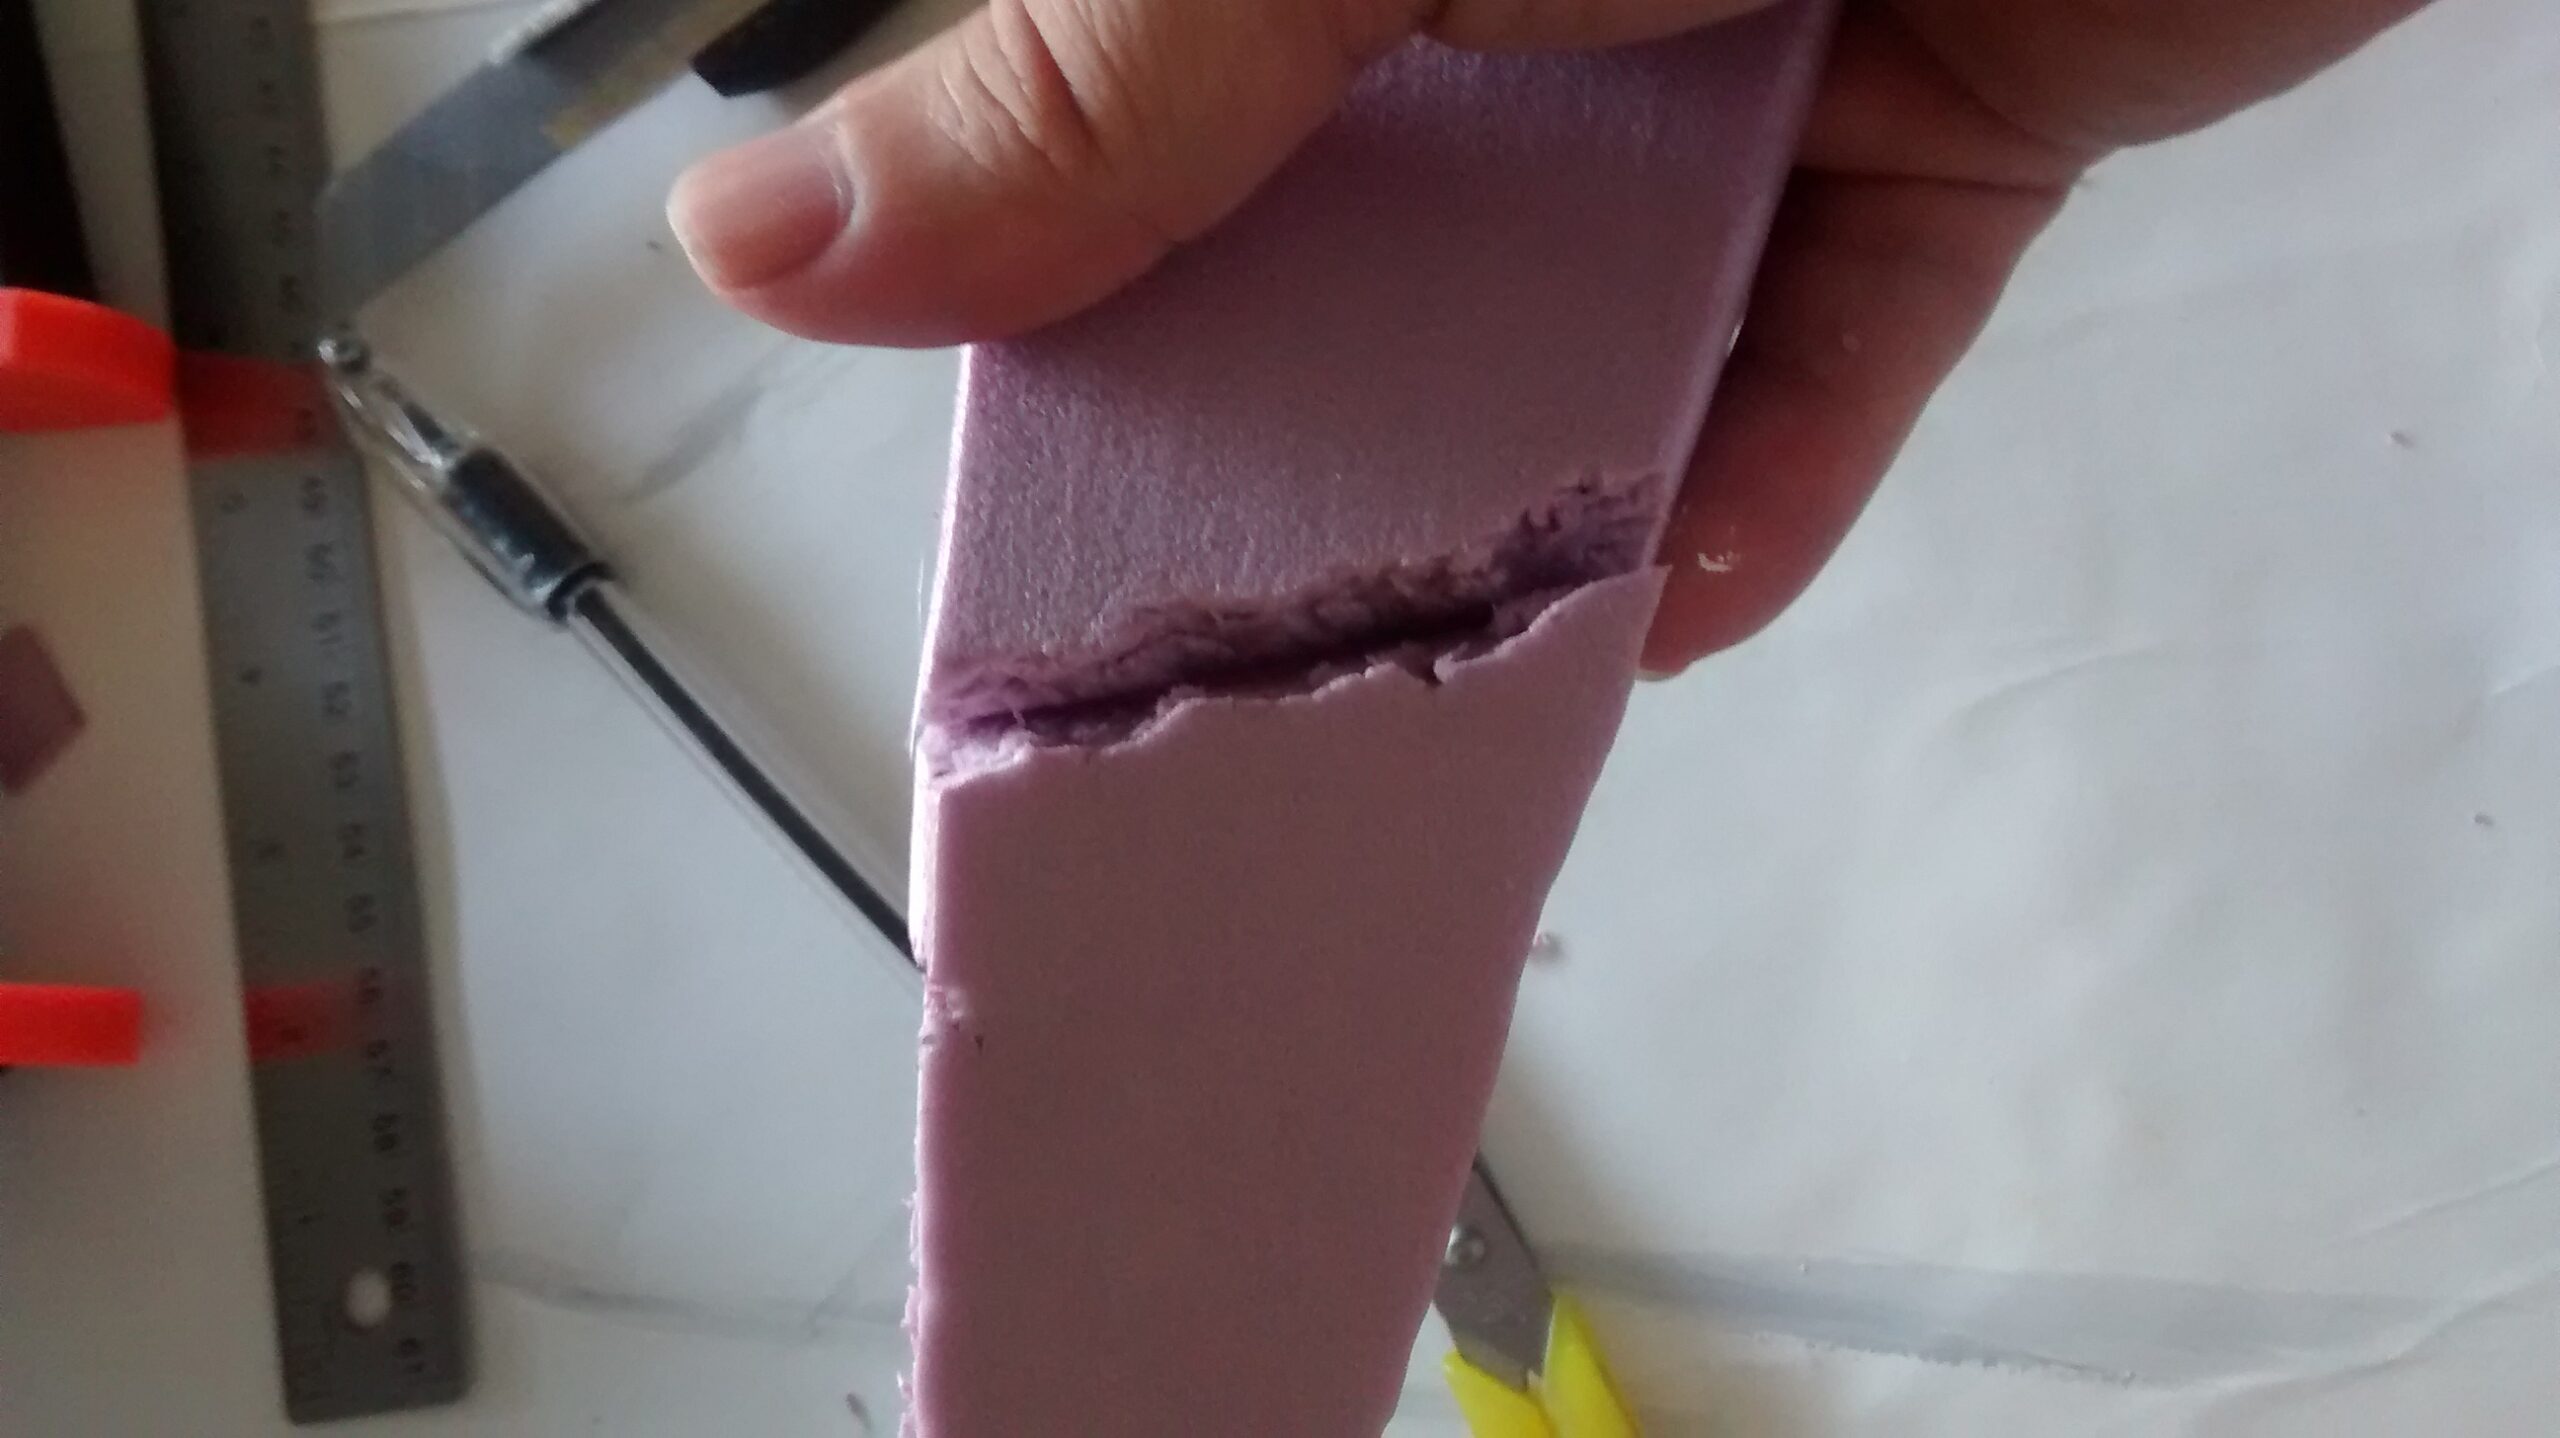
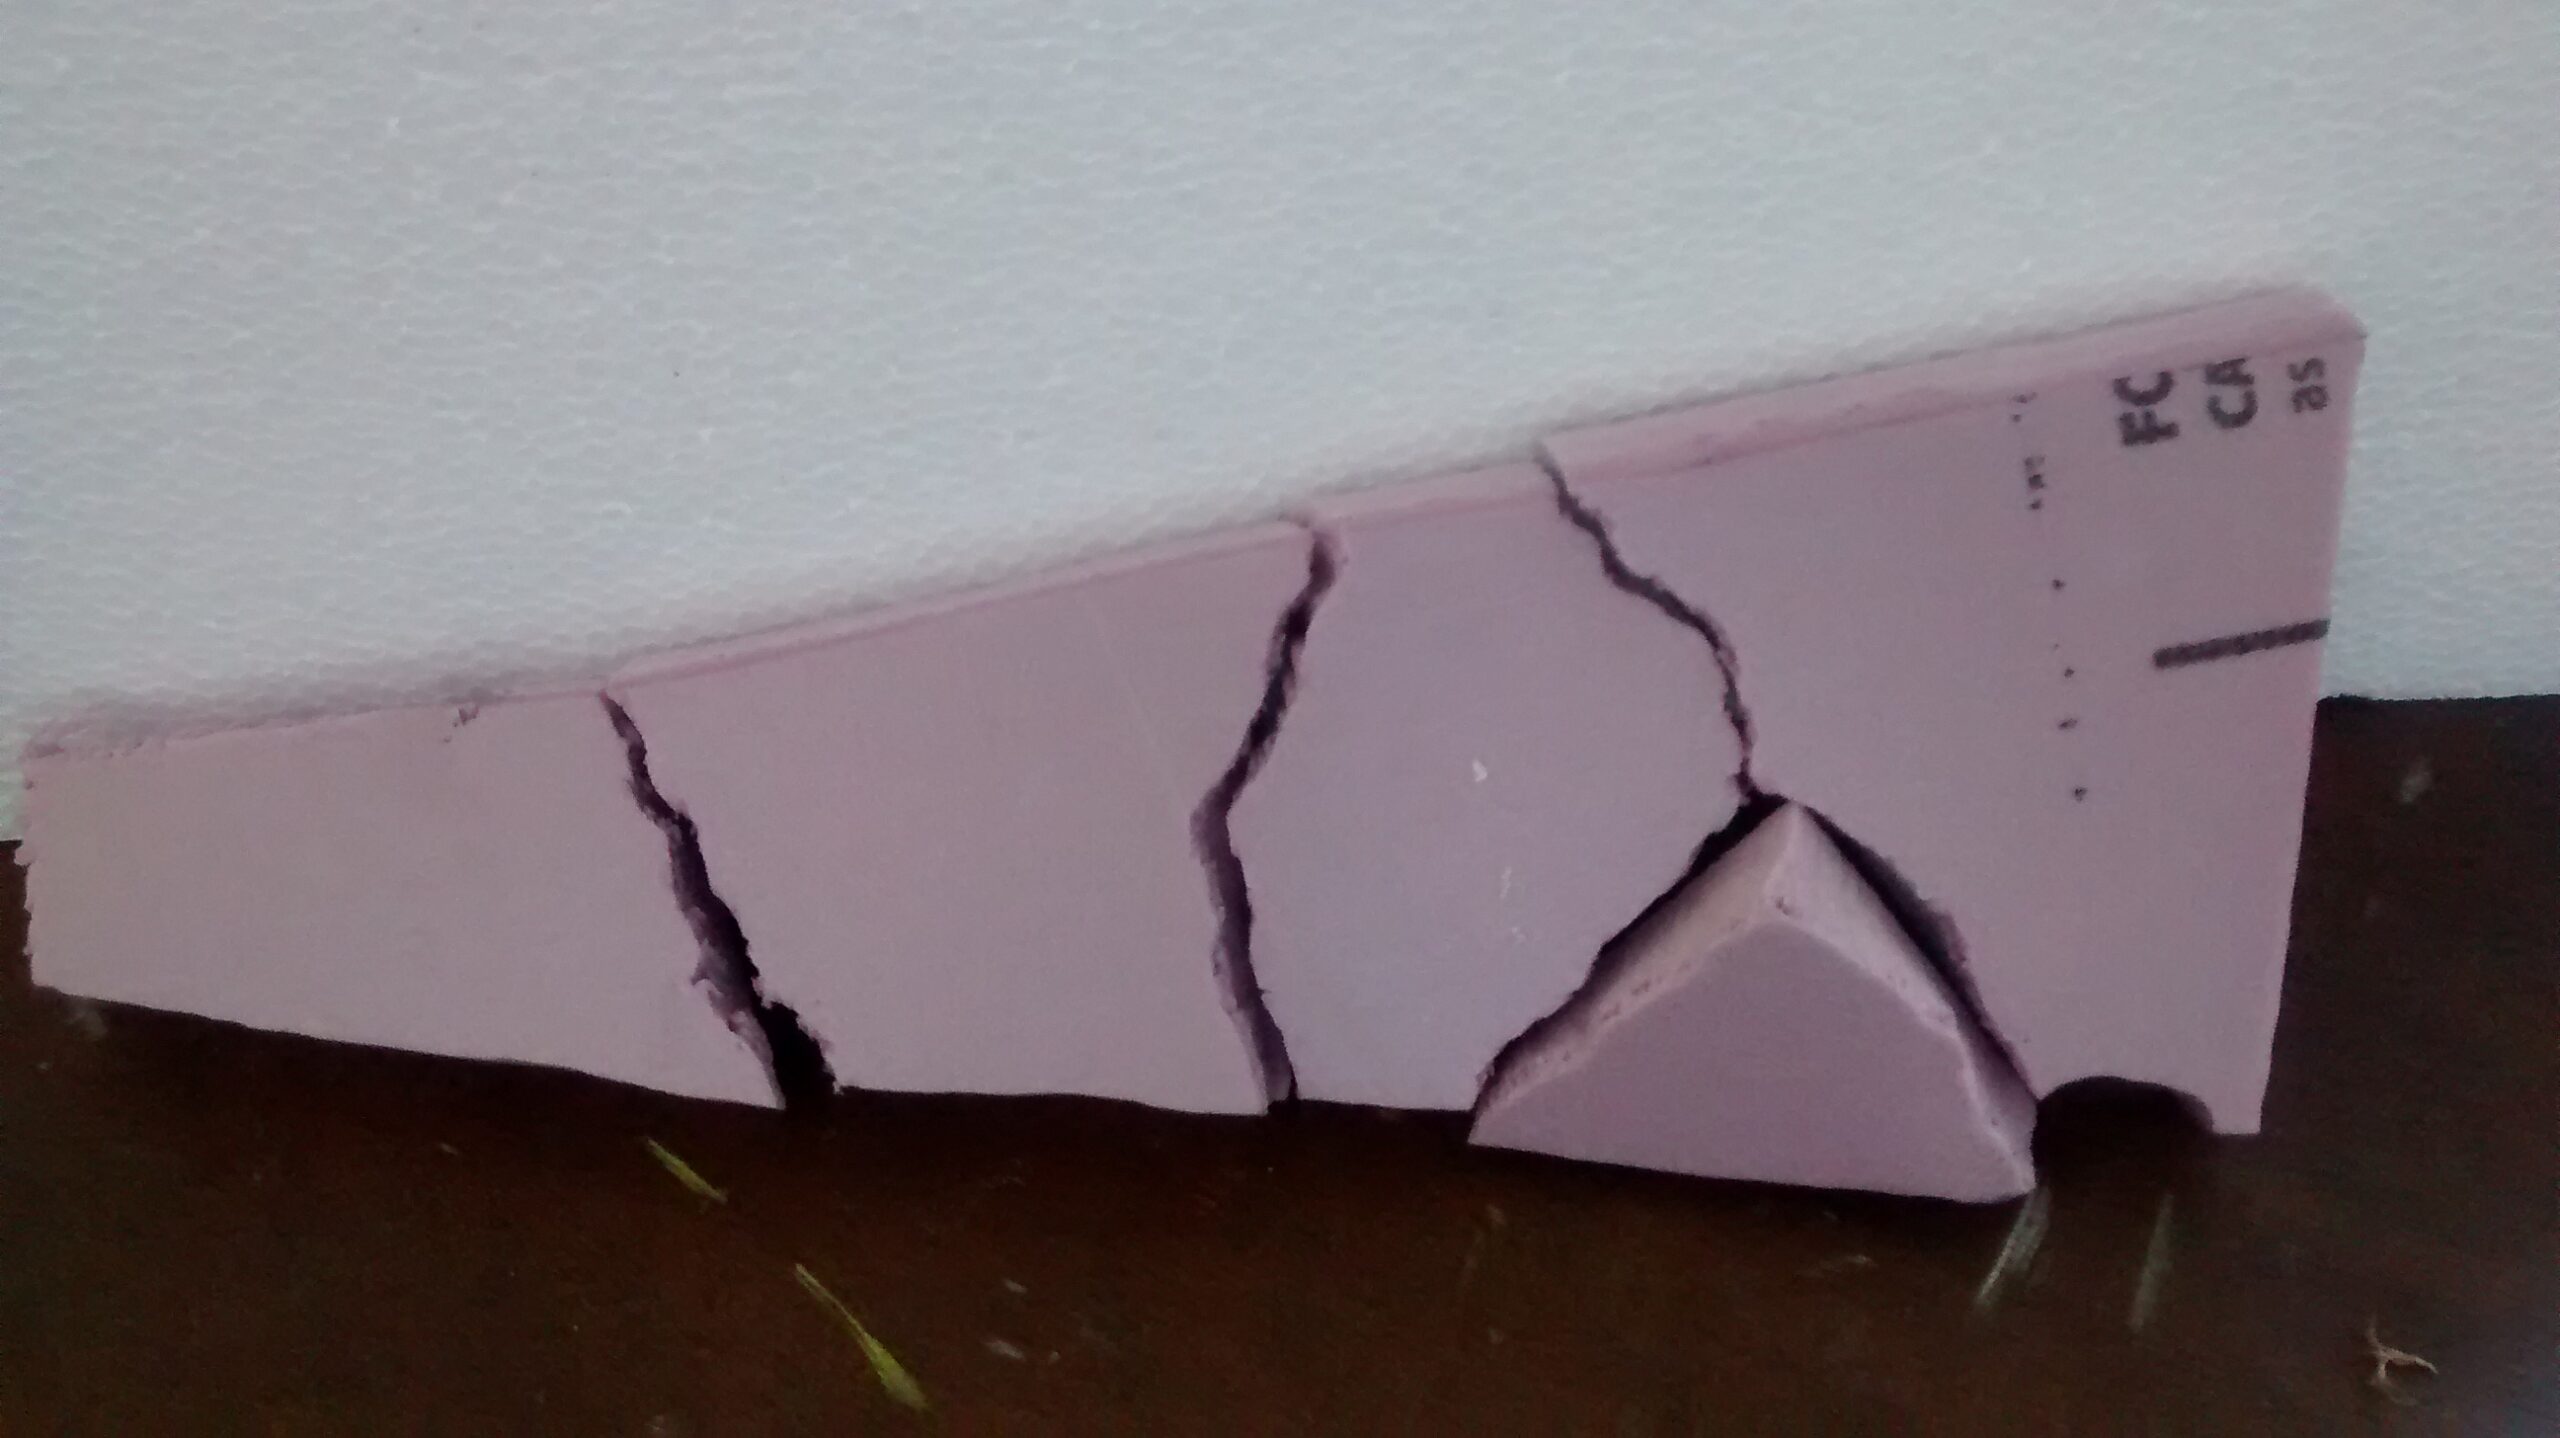
“Now, to figure out how to make this nameplate look like it was exploding or being “blown apart!” I watched some YouTube videos to check on crack-making and checked out hundreds of images of walls being exploded and things like that. What I couldn’t find was how to make foam stone really look broken. Most of the tutorials out there used the hot wire tools and the lines, in my opinion, seemed a little too perfect. So, I created my own technique. I would first take a box cutter and create a thin, jagged, random “score line” in the foam where I wanted the break to be. Then, I would go back over the line just a little bit deeper into the ¾” foam. Finally, I simply gripped the foam with my hands on each side and physically snapped the foam. The result was exactly what I was hoping for…a completely natural break. (see pictures) I then applied this technique to the entire nameplate.”

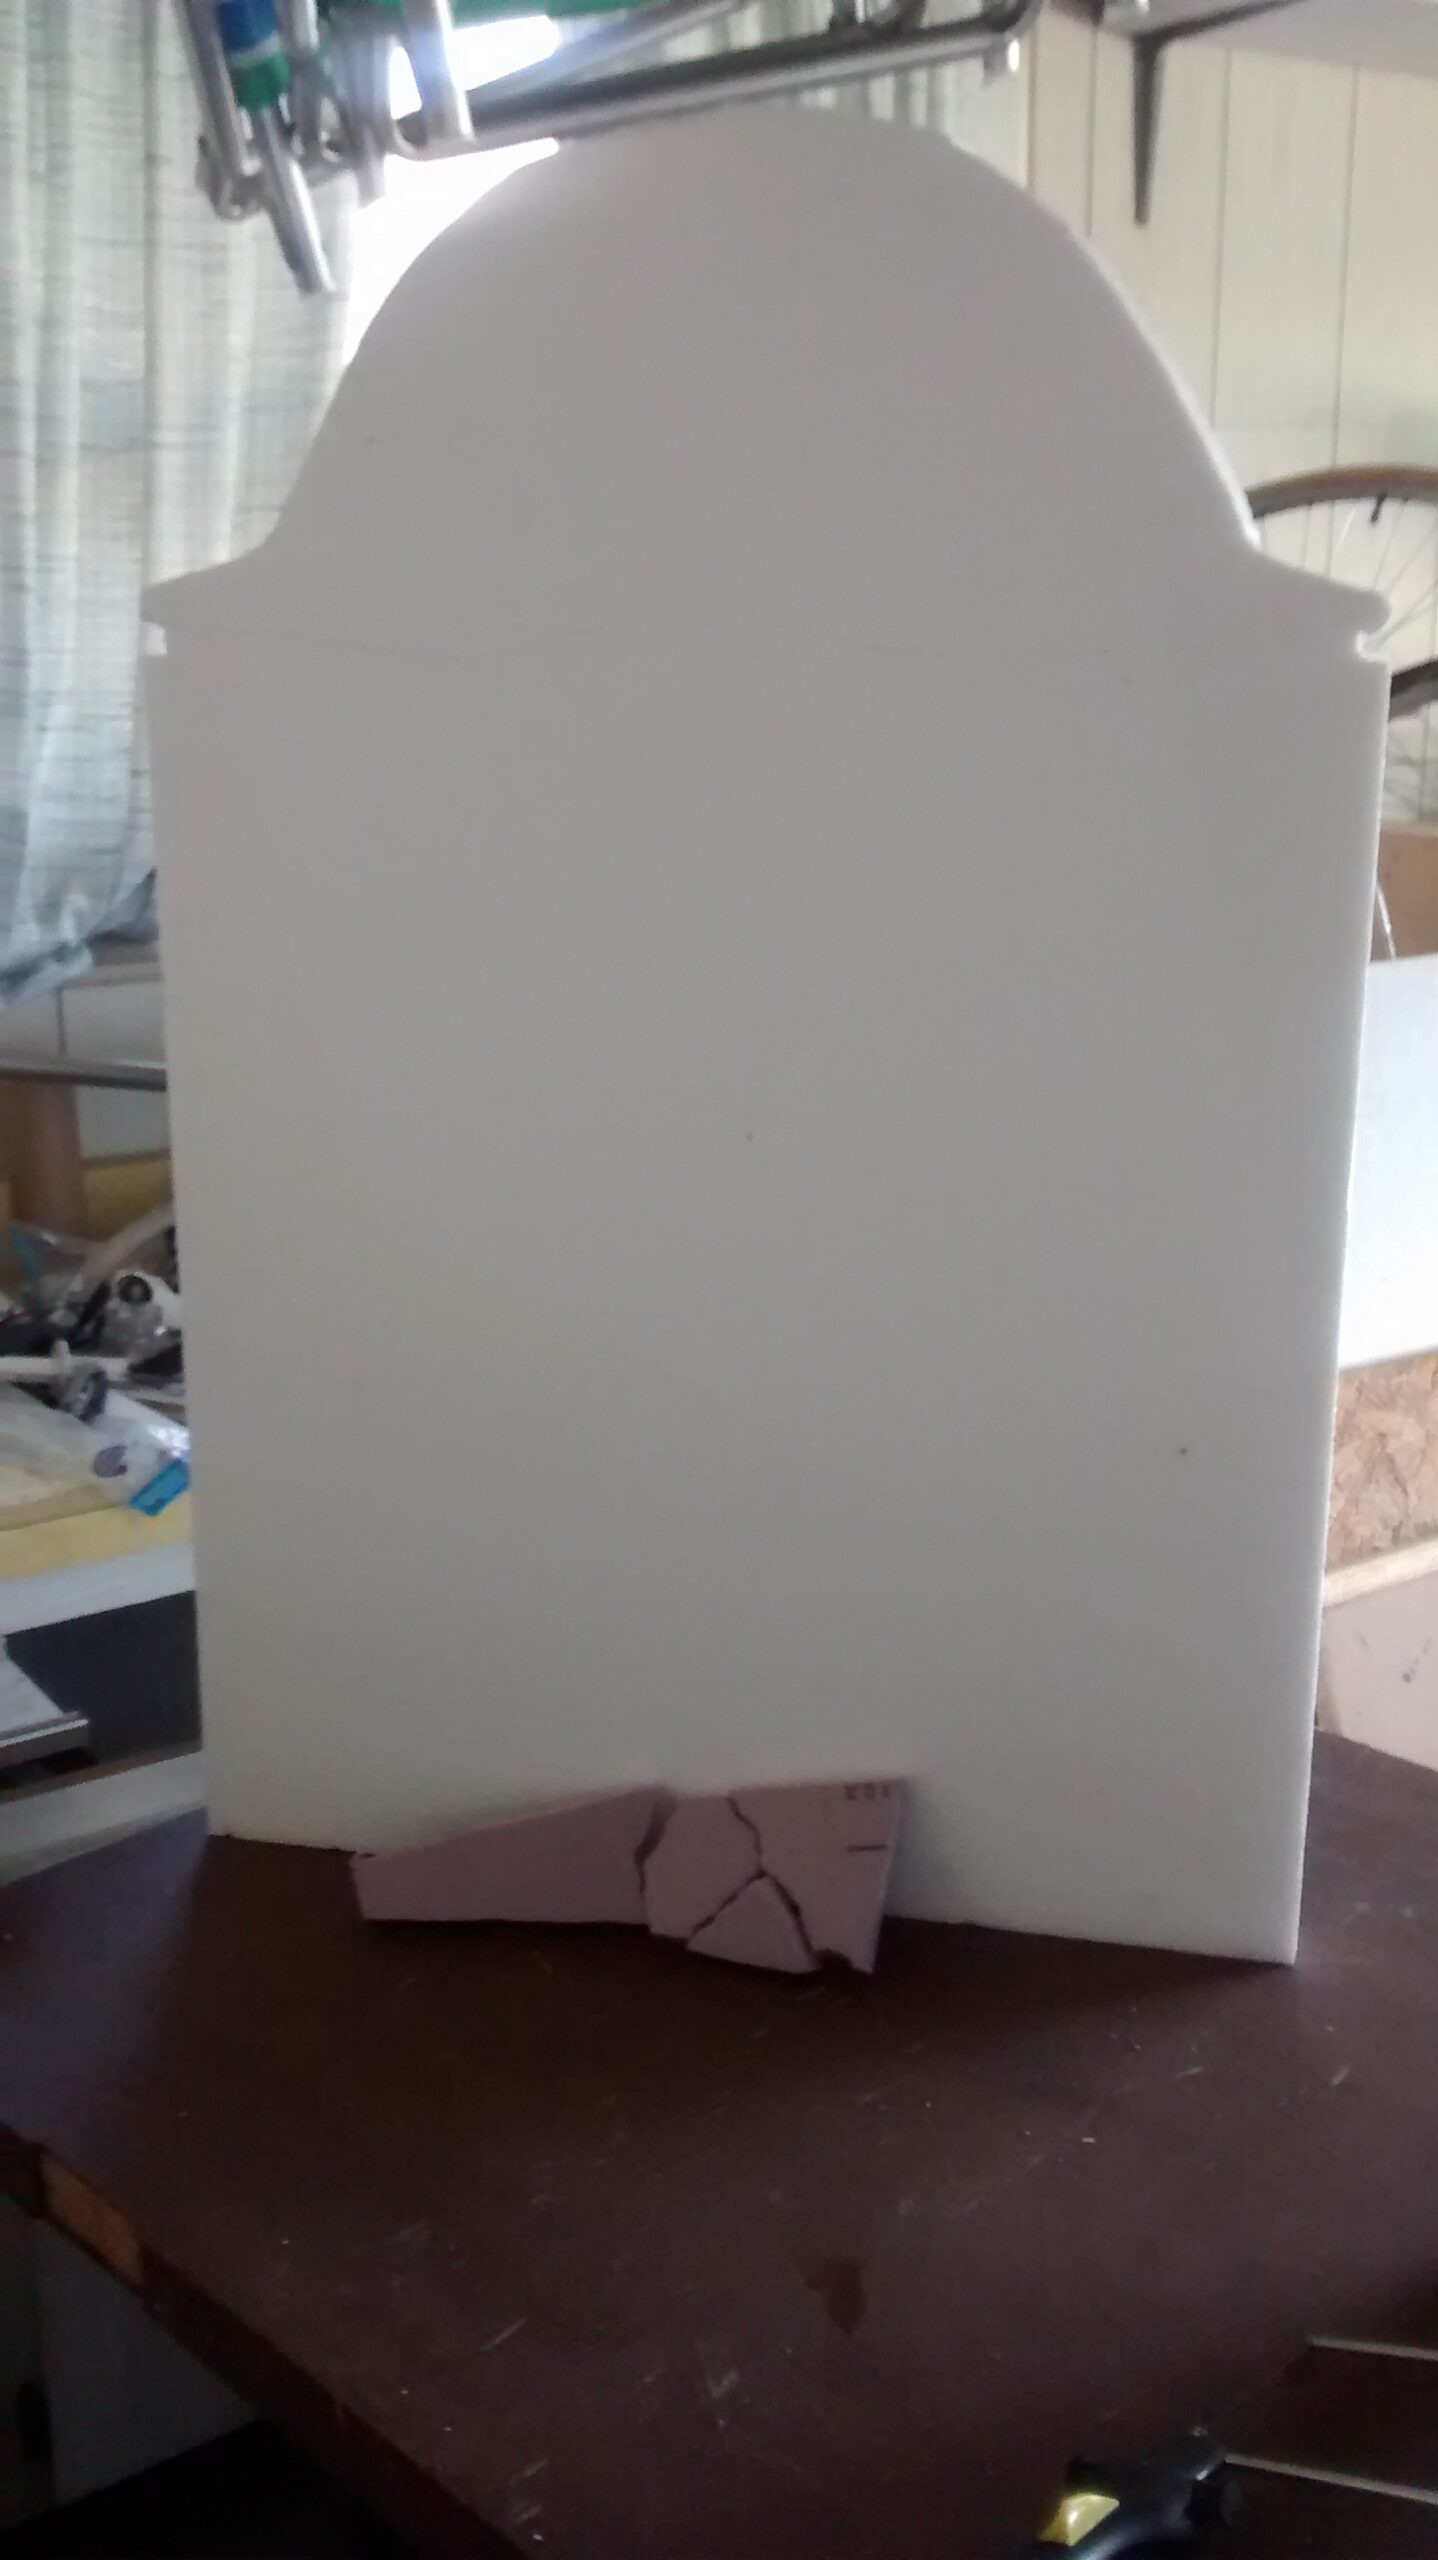
“The main body of the tombstone is a 2-foot wide x 3-foot tall piece of 2″ EPS Styrofoam. I looked up pictures of Napoleon’s hat because I thought that would make a perfect “top” of the tombstone. I cut the main outline using the hot wire Sculpting Tool. For the inner “front” part of the hat I ended up cutting the entire top off in the shape of the front, then cut that piece in half longwise (to make it 1″ thick) and then I glued one of the 1″ pieces back on the top of the tombstone, thus giving the 1″ relief effect between the front and back of the hat. I then used the Engraving Tool to carve out all the details for the hat: the fringe trim, the ribbon and button over the medallion, and the underside of the hat to give it depth.
Finally, all the cracks were added. I did some tests using the Engraving Tool and again, found that the cracks were a little too smooth for my liking. So, I abandoned that method and simply used a box cutter to cut the cracks in random patterns around the tombstone. To make some of them wider (I didn’t want all of them to be the same width) I used a heat gun and lightly went back and forth over the cracks to enlarge them. It worked really great and gave a natural look to cracks where some were big and then they faded down to hairline cracks and then disappeared. Again, the “natural” look is what I was going for and I think this accomplished that.”
“Next came the painting and weathering. I started off by purposely using a granite spray paint. Yes, spray paint has acetone in it and will melt foam. In this case, that is exactly what I wanted. I sprayed a really good concentration of it in the middle of the tombstone so I could get a cratered effect, kind of like an explosion. I then lightly sprayed the rest of the entire tombstone, increasing the texture in just a couple areas to get a little more effect. Overall, I think it gave a really good base and texture to start with.”

Once this base coat was applied and dry, I began the tedious task of attaching the “blownapart” nameplate pieces to the main body. This was done basically by test-fitting the pieces and trying to figure out a look that would really have movement and look like the pieces were coming apart. I used hot glue mainly because of the very quick dry time. I could glue the piece, hold it for a half minute and it was dry and set in place. This was extremely helpful when placing the pieces that were coming apart and angled in funny ways. Unfortunately, after gluing all the pieces in place, I lost most of the “cratered effect” on the base of the tombstone because it got covered up. Oh well!
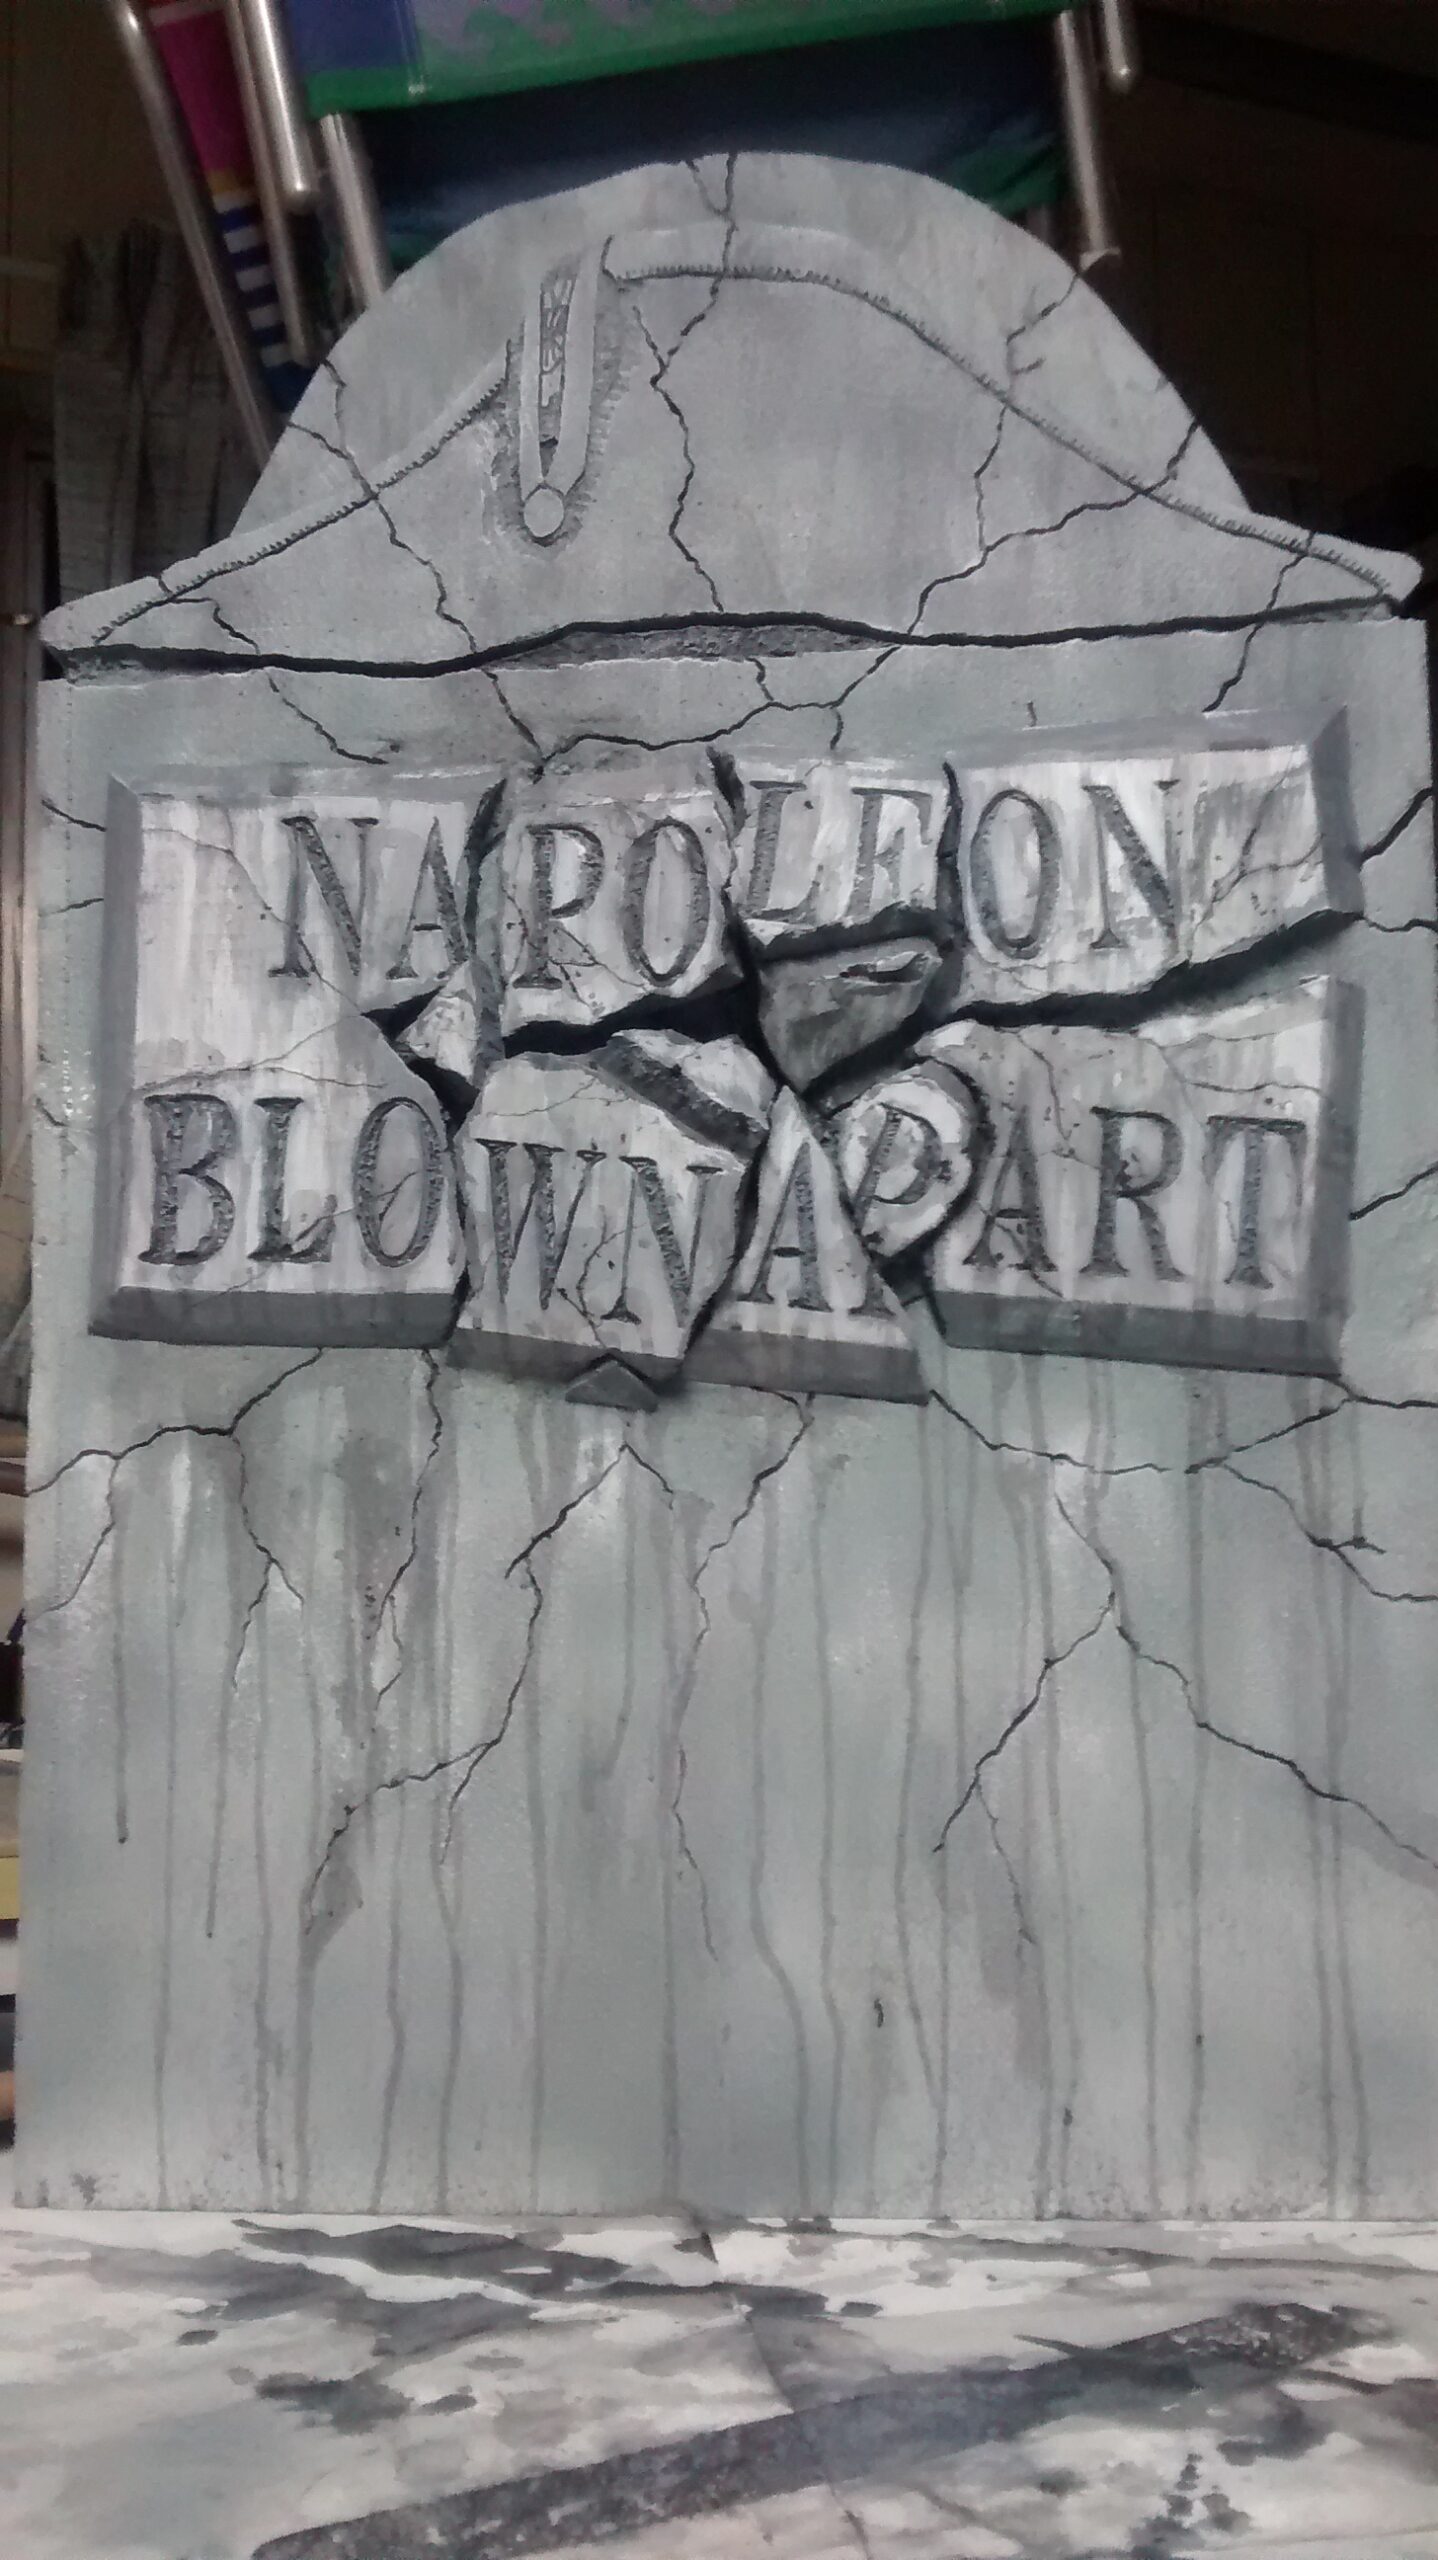
“The next step involved layer upon layer of “tea-staining???. This is an effect where you water-down a paint color and then use a large brush to apply the paint at the top of the tombstone and let it run down to the bottom, purposely leaving the streaks and “splotches??? of color and letting the color run where it naturally wanted to. I used a light gray acrylic paint (which also helps seal the foam) for the first round of tea-staining and almost completely covered the tombstone with it. I then added black to the mixture and did several more coats of darker stain – each time trying to hit the same areas as well as other areas to give a very natural look. For the darkest areas, I laid the tombstone flat and used a small squirt-bottle filled with the dark color/water mixture and squirted it directly into every single crack and recessed area on the whole stone.
When all the cracks were filled I lifted the tombstone into a standing position and let the color run where it wanted to. The idea is that the tombstone just sits in the wind and rain, but it will come from different directions and at different strengths. So, dirt or other accumulation at the top of the stone will run down in different concentrations and different patterns based on the weather at the time. Over time, there should be several different effects over the tombstone. The final step involved highlighted areas with dry-brushed white and light gray. I think using several different colors of dark and light gray really help to accentuate the weathered look.
One thing that turned out to be a really cool coincidence is that I did the cracks on the tombstone base and the broken nameplate completely separately. However, when I placed the nameplate (in what I thought was a random manner) on to the base tombstone, several of the cracks and broken pieces lined up perfectly. It was a very happy accident! ???
Overall, I am extremely pleased with the end result! It is exactly what I imagined when I first conceptualized this idea. A couple suggestions or “tips??? for aspiring foam artists:
- Make a plan. Draw out your idea and plan the dimensions of the final piece.
- Make a list of everything you’ll need to complete the project. Think about what type(s) of foam you want to use, cutting tools (like box cutters and hot wire tools), safety equipment (like ventilation and respirators for using hot wire cutters on foam that gives off fumes), paints, brushes, paper or drop cloths to protect surfaces when painting and weathering, etc.
- Take your time. These things don’t just “happen??? overnight!
- Don’t fret mistakes! However, use scrap pieces of foam to test techniques and then do the final version on the actual piece.
- Try new things! I had never done tea-staining or dry-brushing before. I watched videos and read tips from other artists and learned a lot. I then tried them with this project. Thankfully the nature of the project allowed for testing directly on the final piece because splotched paint or running streaks of paint were actually part of the design whereas I would normally consider those mistakes! It was a very forgiving project!
- Learn from others. As I mentioned above, watch videos and get on “tips and tricks??? websites or groups. People in this area are more than willing to be helpful and offer advice and tips on how to do things and grow as an artist.
- Purchase tools from the Hot Wire Foam Factory! The tools really do make a difference. Having the right tools makes things go so much smoother and having the right tool to accomplish the job is essential. There are different tools for different things. The main ones I use are the Sculpting and Engraving Tools, but I have also used the Hot Knife and just purchased the Freehand Router (which I know is going to be indispensable!!!) I also will be getting the 16″ Scroll Table to be able to create different shapes easier as well as long, straight cuts in larger material. HWFF is the way to go!”