Eternal Graveyard Flame
John Ehrenreich
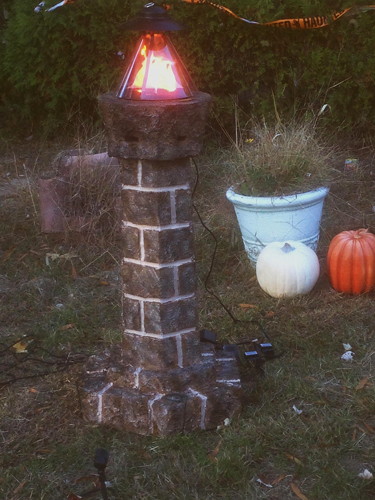
We wanted to create an eternal flame for our front yard Halloween Haunt using one of the artificial flames in a hanging cauldron. We chose a flame that was AC powered and had a plastic cover protecting the flame. Our Eternal Graveyard Flame is constructed of XPS foam.
Hot Wire Foam Factory tools and products used in the construction of the Eternal Flame are:
• Boost
Other items used in construction include:
• 3-inch drywall screws
• Exterior Latex paint
• Starlight.com Weatherproof Artificial Flame
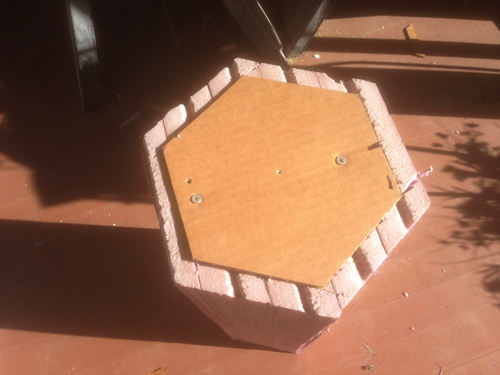
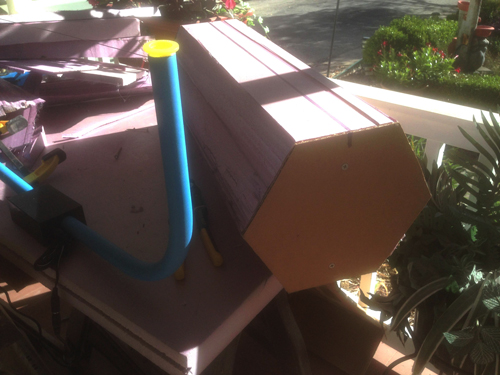
We started by creating a column. Using 2-inch thick XPS foam. We cut five pieces using the Industrial Hot Knife. Each piece was 10 x 24 inches. We glued the five pieces together using Foam Fusion resulting in a block of foam that measured 10 x 10 x 24 inches.
We cut two cardboard templates in the shape of a hexagon. A center line was marked on the foam block and registration marks were placed on the templates. The templates were placed on each end of the block, aligning the registration marks with the center line on the block. The templates were not removed just yet. The top template was trimmed back as a smaller hexagon. The column was erect along the templates again with the bow cutter with the results being a tapered column.
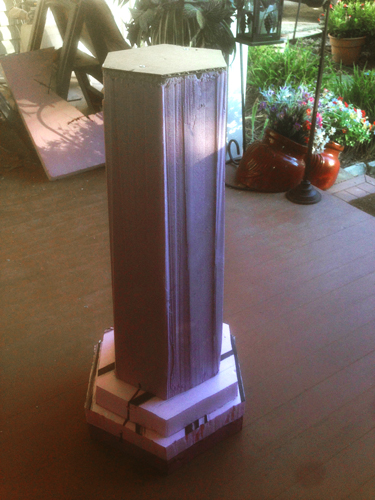
A tiered base was cut into a hexagon shape using the Industrial Hot Knife. The base consisted of a 2-inch piece of foam with the hexagon being 3 inches wider than the column. The bottom of the tiered base was two pieces of 2-inch foam also cut into a hexagon shape, but 6 inches wider than the first (note: photo shows a smaller version of the bottom tier of the base than what was finally done).
The smaller of the two hexagon bases was glued to the column using Foam Fusion and 3-inch drywall screws. The larger base was then glued and screwed to the smaller base.
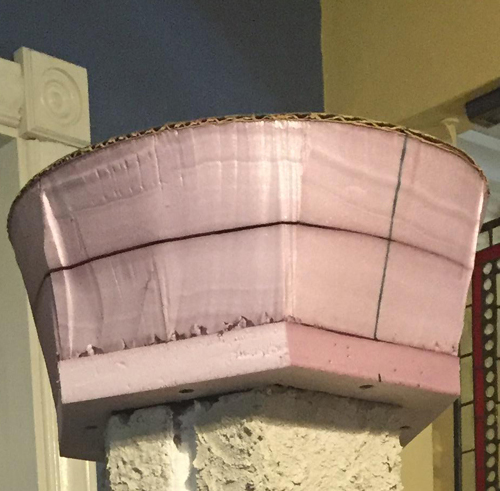
The bowl at the top was constructed of two 1 inch pieces of XPS foam and two 2-inch pieces of XPS foam (picture shows only one piece of 1-inch foam). They were initially pinned together. A circular template was placed on the top and bottom, aligned with registration marks just as the column was. The pinned pieces of foam were cut using the bow cutter.
The templates were not removed. The bottom template was trimmed in the shape of a hexagon, a little smaller in width than the circular template on top. The bowl was cut again with the bow cutter resulting in the bowl having a slight taper which transitions from a hexagon on the bottom to a circle on the top.
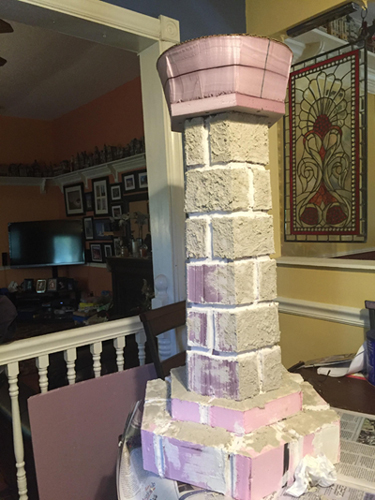
Registration marks were placed across the four pieces of foam and the bowl was taken apart. Using the Industrial Hot Knife, the center of the lower 1-inch piece of foam was removed in the shape of a hexagon that would fit snugly over the top of column. Aligning the registration marks, it was then glued to the second 1-inch piece of foam.
The two 2-inch pieces of foam were glued together after aligning the registration marks. The center of the two 2-inch pieces were cut out using the Industrial Hot Knife so that the cauldron of the artificial flame would fit in it.
The two lower pieces of the bowl were glued to the two upper pieces and the assembled bowel was attached to the top of the column using Foam Fusion and drywall screws.
The mortar joints were cut using the Freehand Router.
With all assembly completed, the mortar joints were coated with a thin coat of Exterior Foam Coat with Boost fortifier. The carved blocks were coated with a thicker mixture of Exterior Foam Coat also with Boost which was stippled on the stone blocks and bowl.
With coating completed, it was ready to paint. The mortar joints were painted a light tan using exterior latex paint. The blocks of the base and column and the bowl were painted a dark brown and streaked with tan. A final coating of black paint was lightly dry brushed over the entire assembly.
