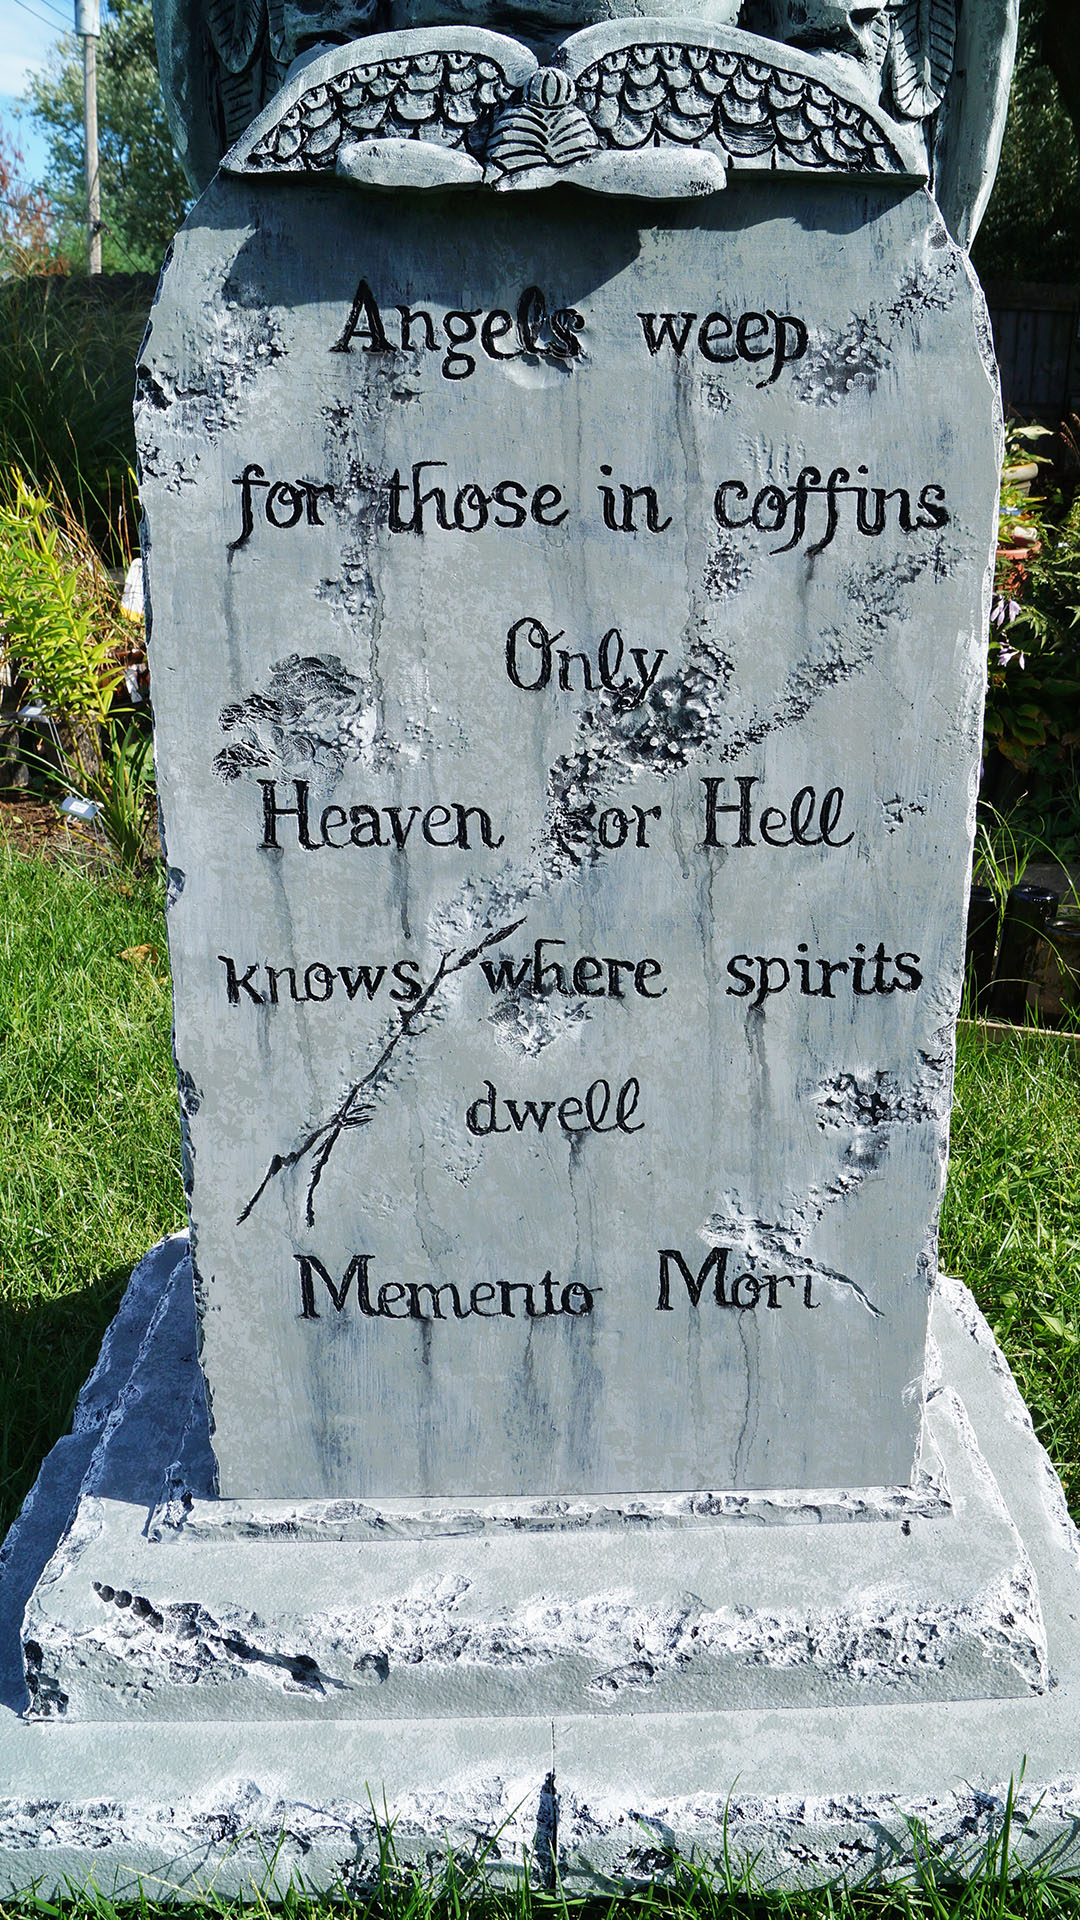
Angel of Death Tombstone
By Ted Piekutowski
“I started doing home haunts for Halloween when I was fifteen years old. Over the past 35 years, my prop building skill level has increased tremendously. I decided that my graveyard should have lots of unique tombstones and since most store bought tombstones say “RIP” that left me to make my own. I create many forms of art using lots of different mediums. This was a fun project for me because I got to use my new Hot Wire foam cutting tools purchased at the Transworld Haunt Trade Show held in my hometown of St Louis.”

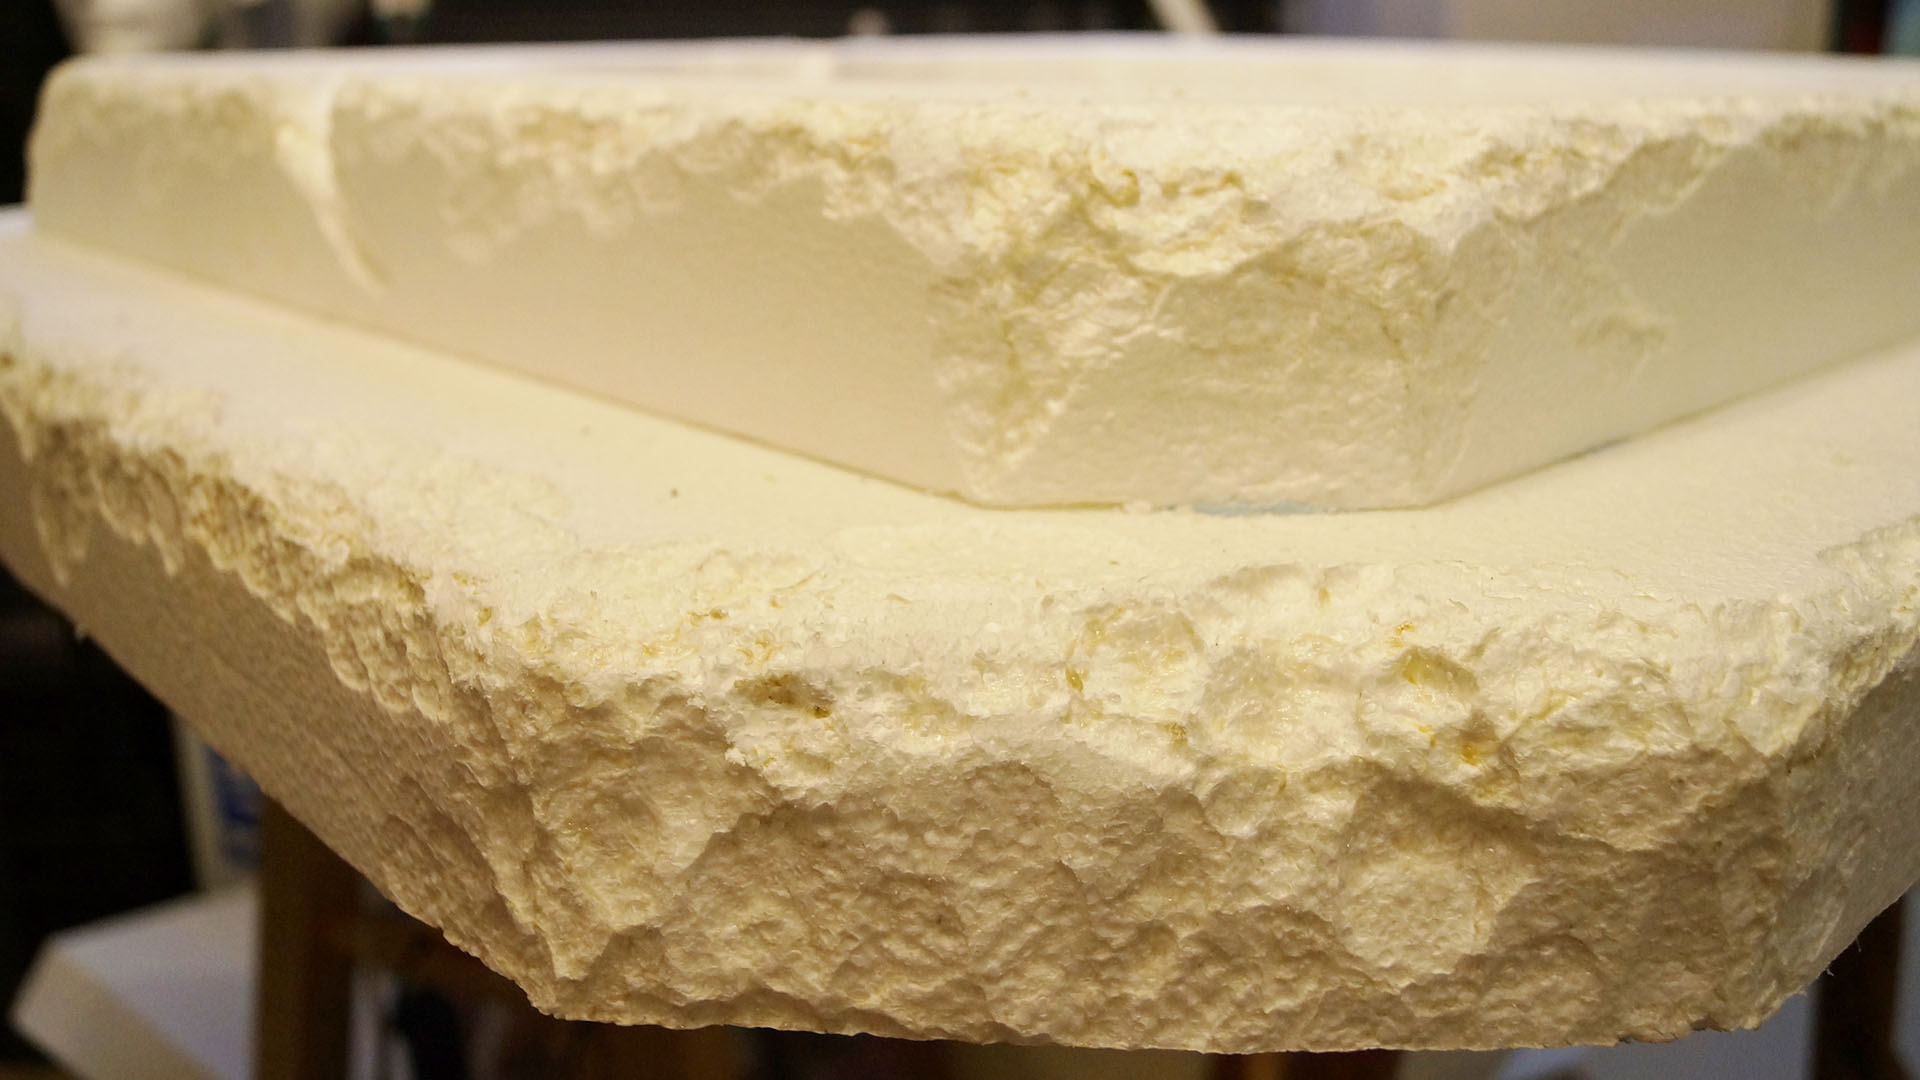
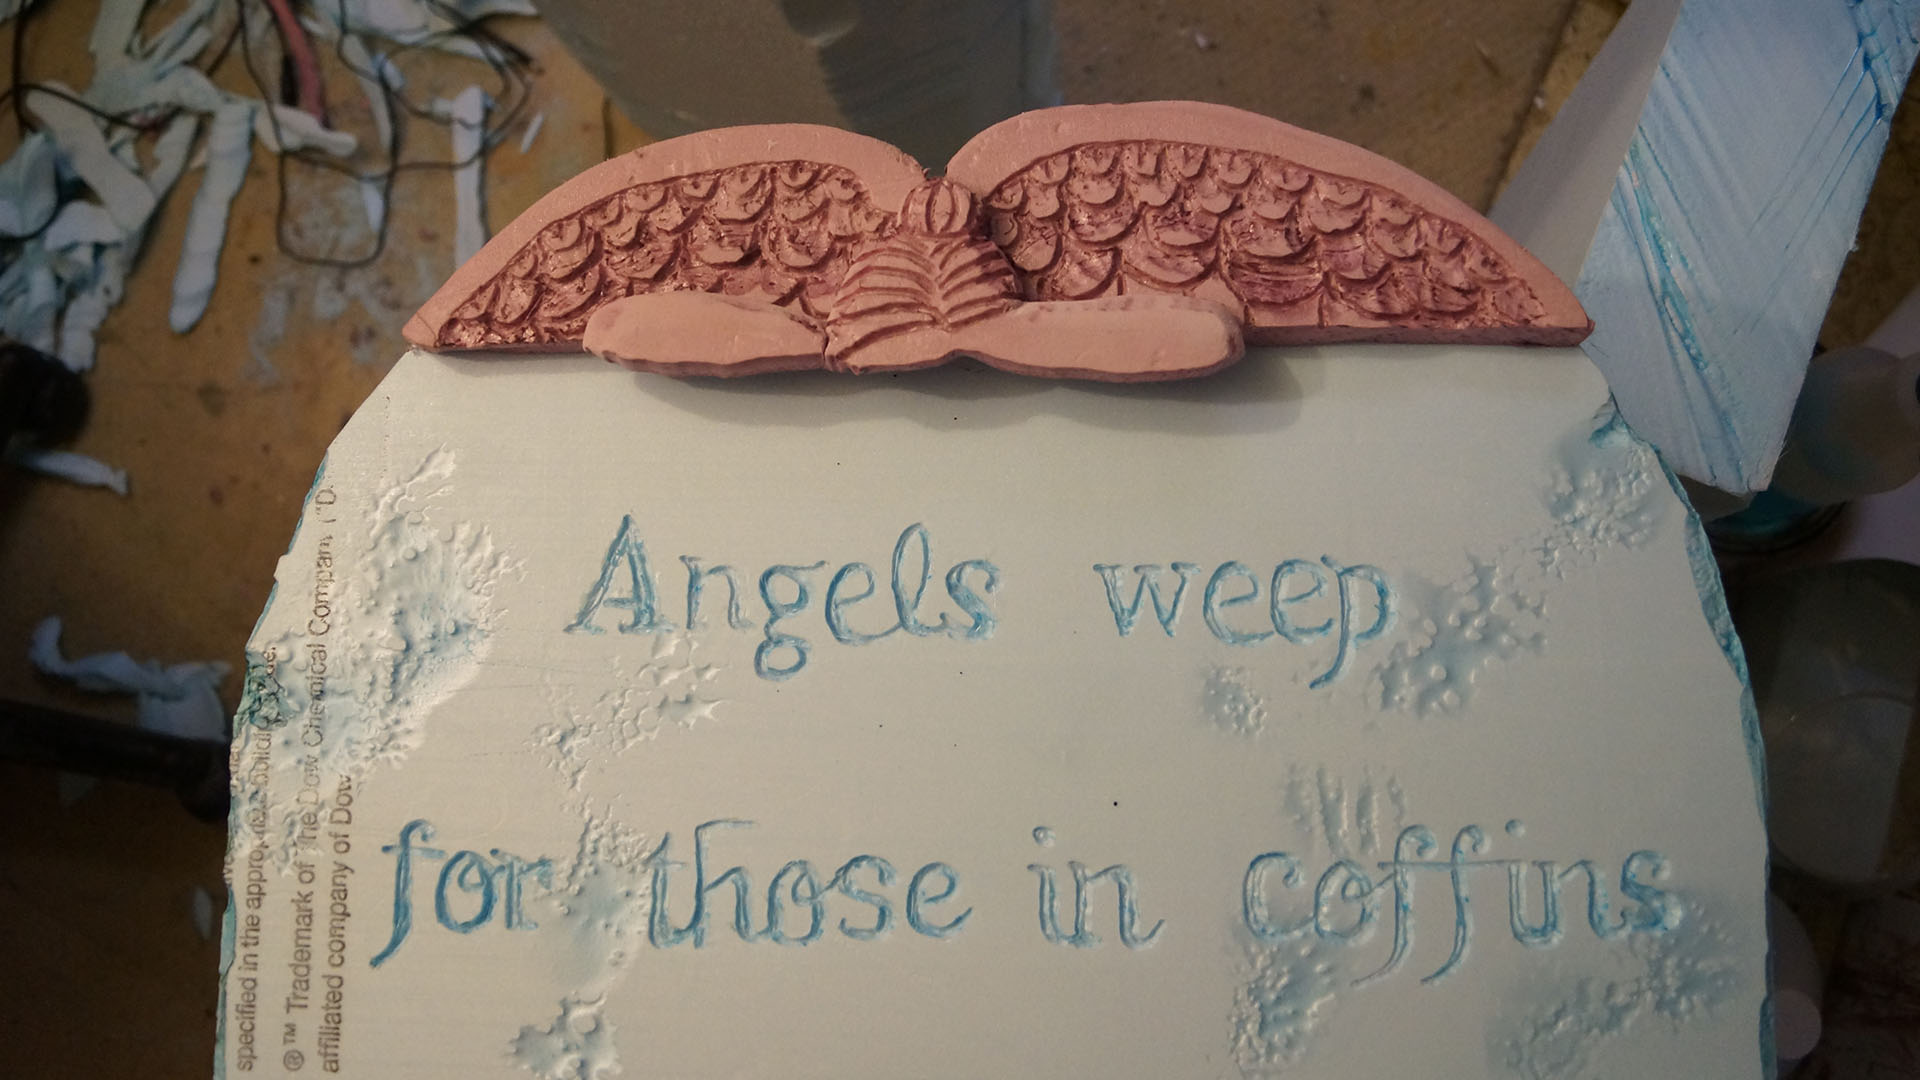
“Every aspect of this tombstone is made from Styrofoam. The base is made from three pieces glued together and the edges distressed using the wire cutter and heat gun.”
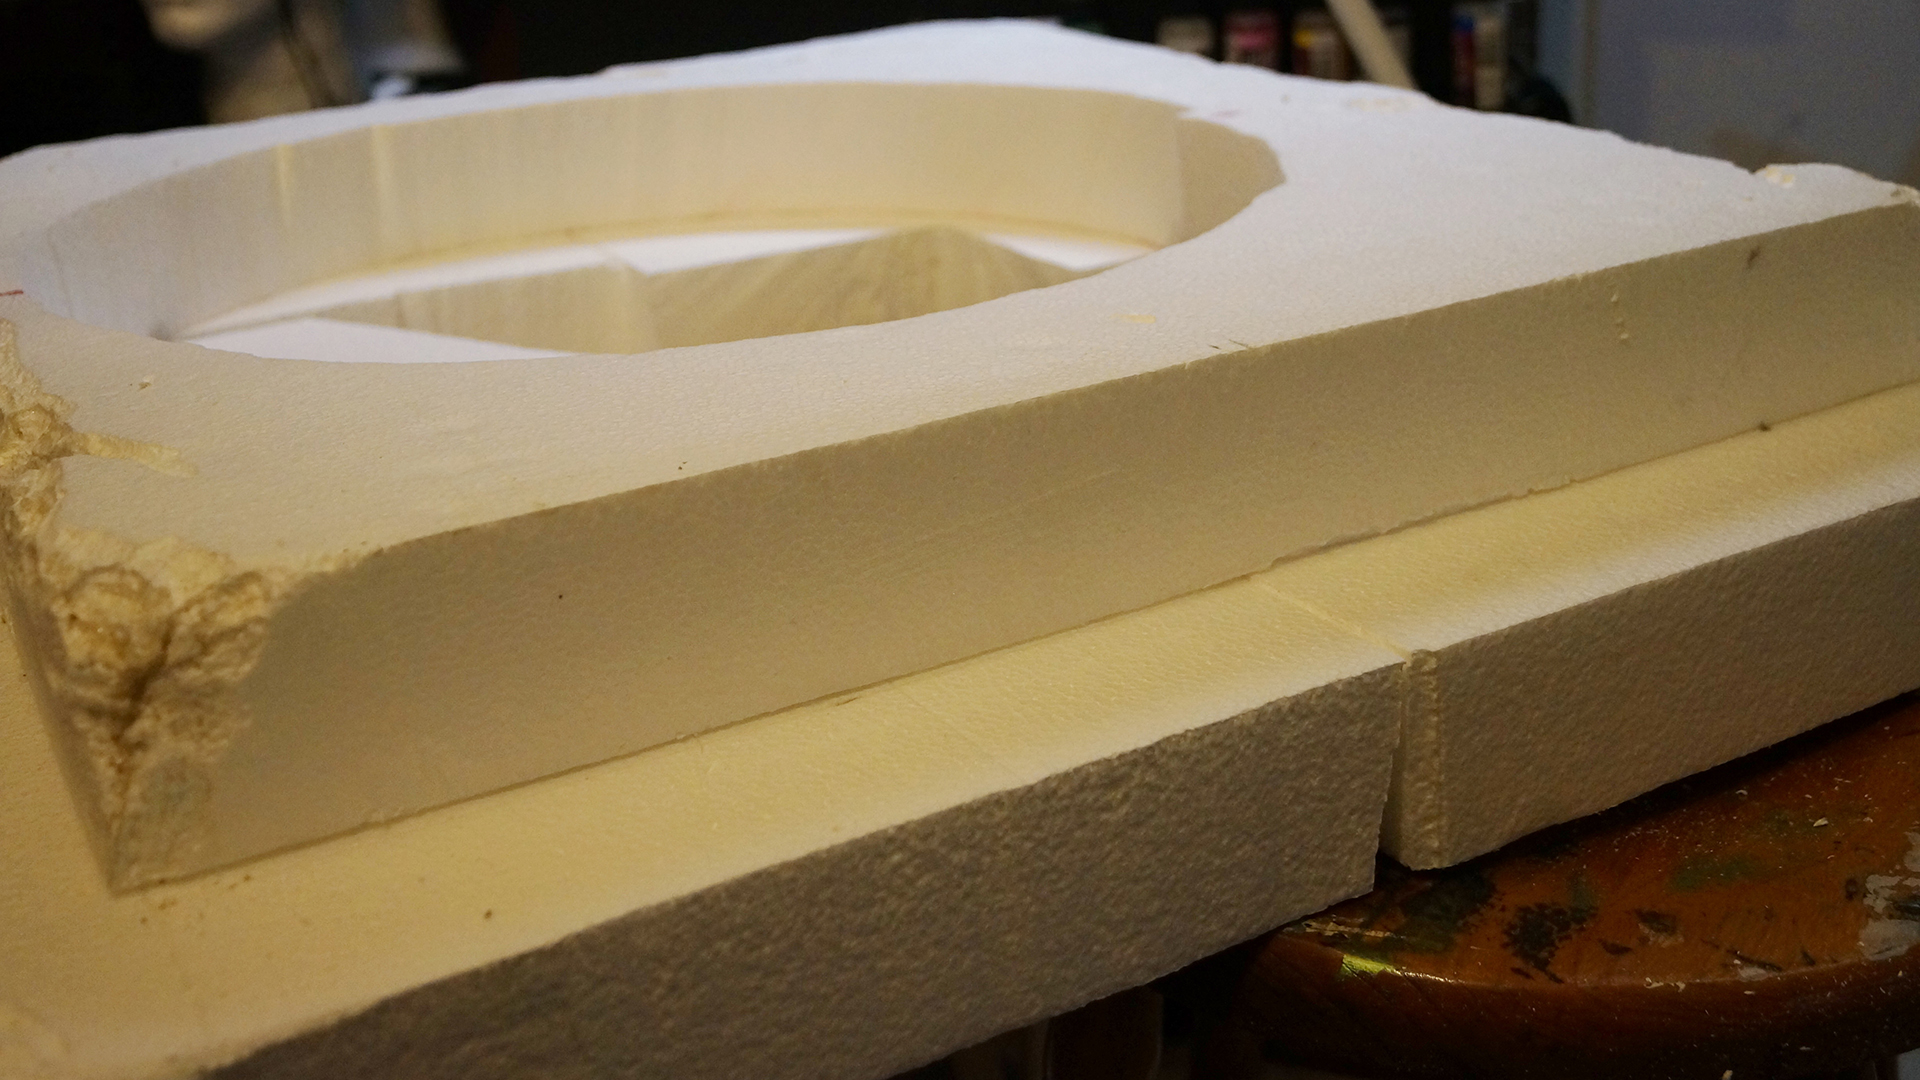
“Distressing the edges gives the illusion that the tombstone is centuries older that it is.”
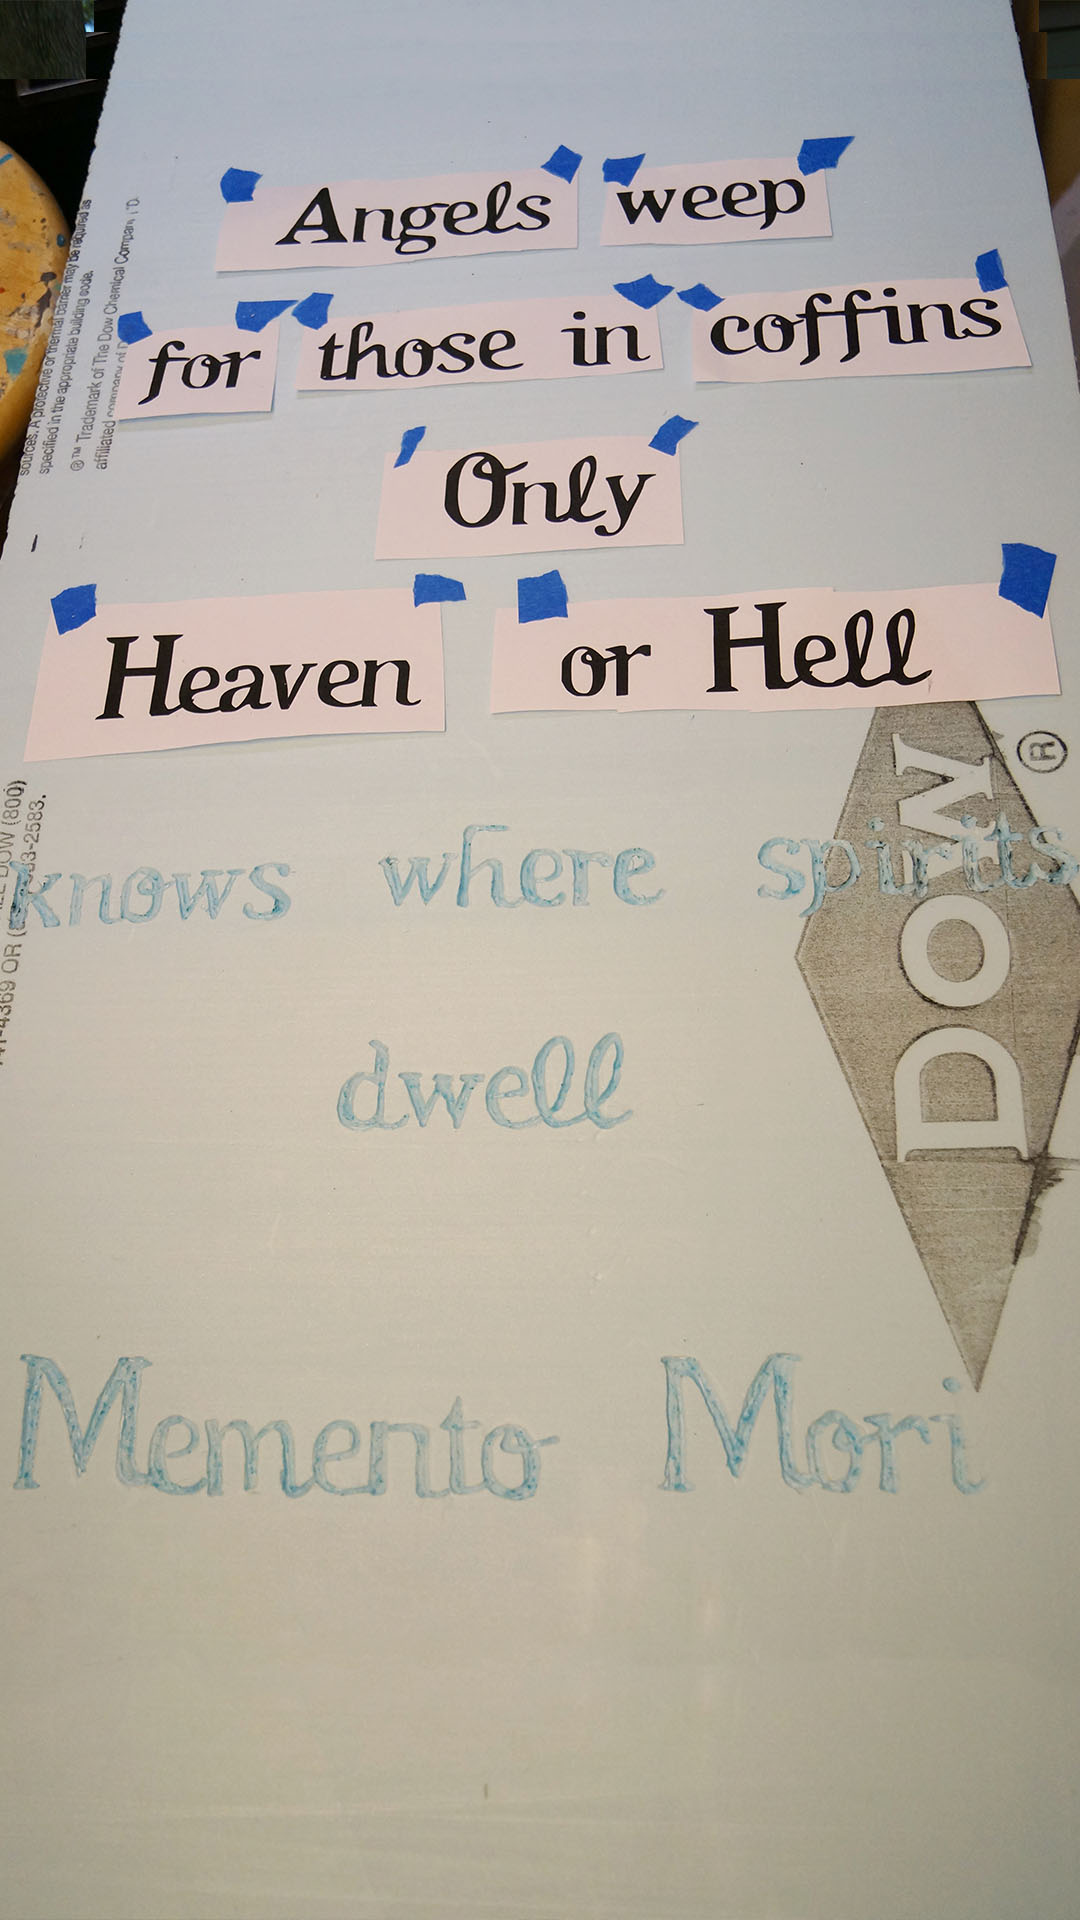
“The wording on the tombstone was created with the help of a computer, laid out, and traced onto the surface of the tombstone. I used the engraving tool to carve the wording into the foam.”
“While doing research for this project, I can across lots of photo showing angels draped over the grave in sorrow for the loved one. These crying angels were the inspiration for the small angel at the top of the tombstone. The flexible wire cutter was used to create this.”
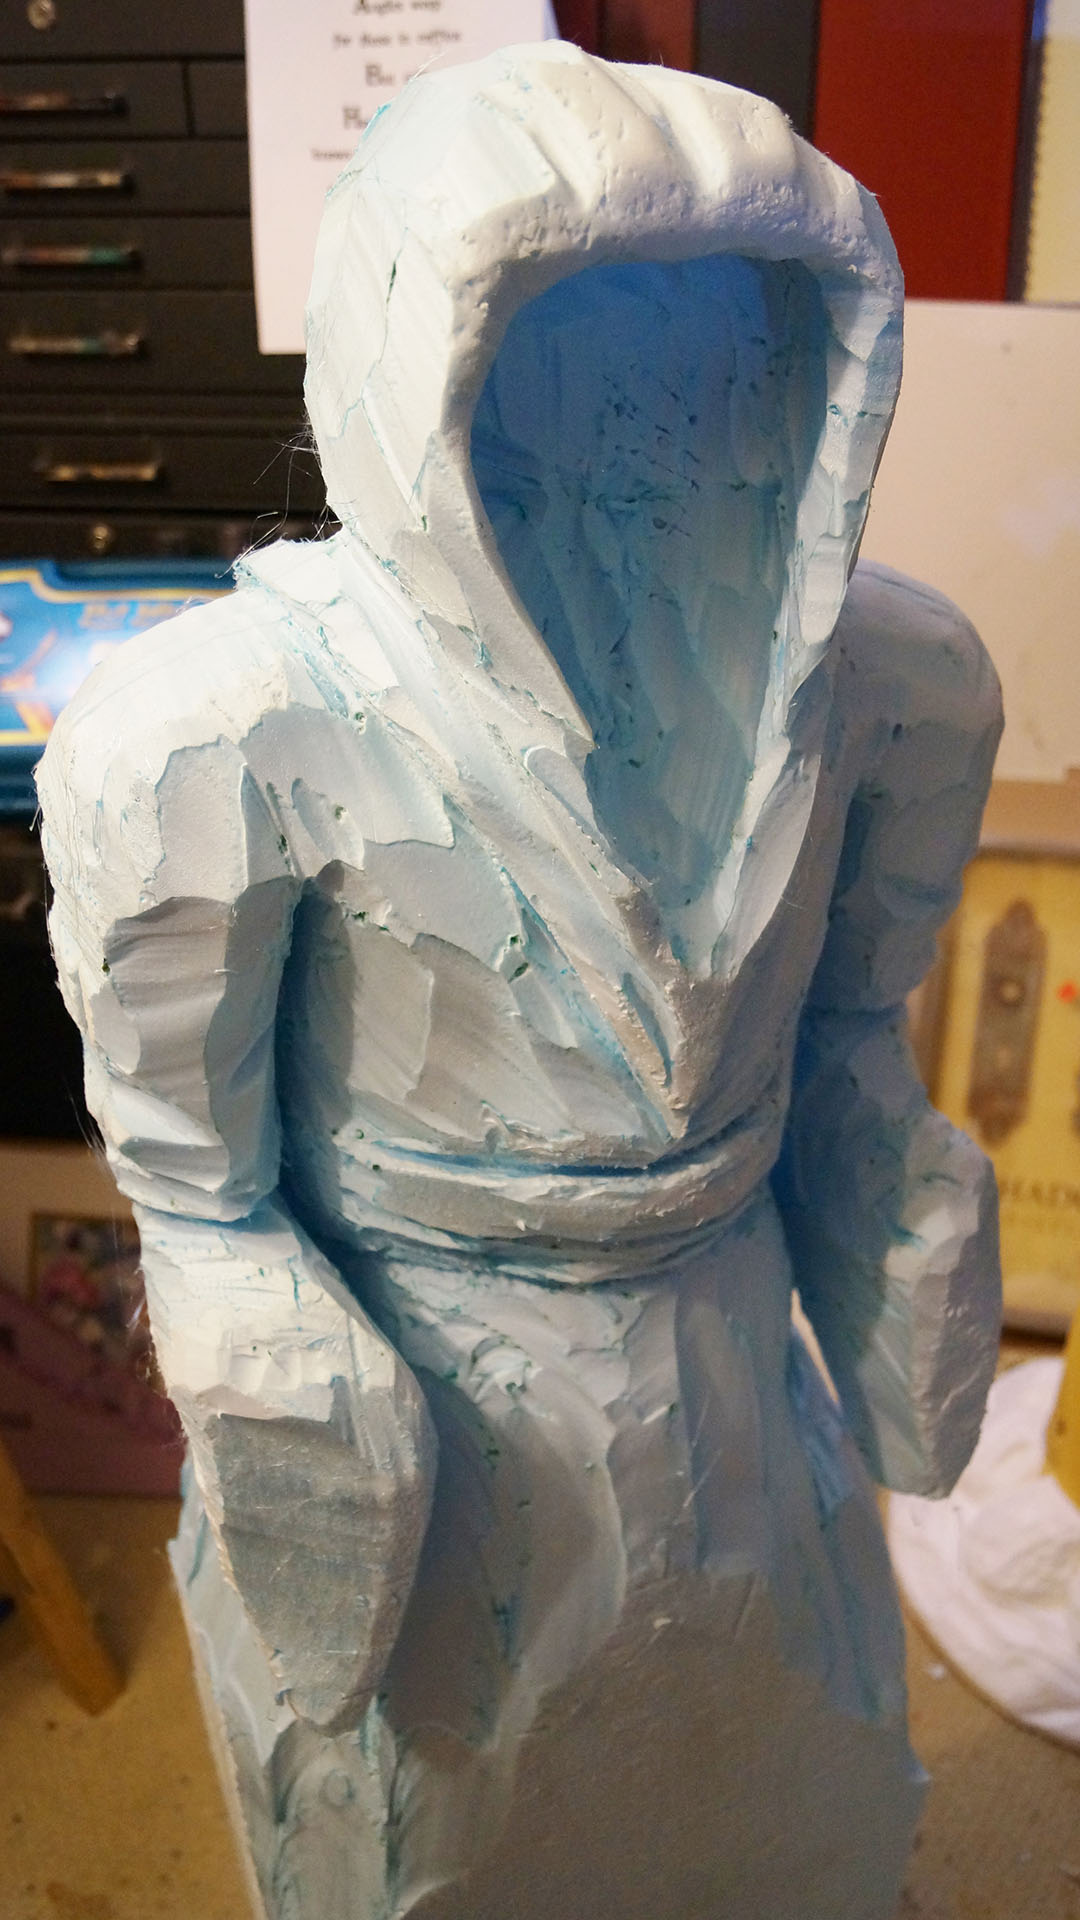
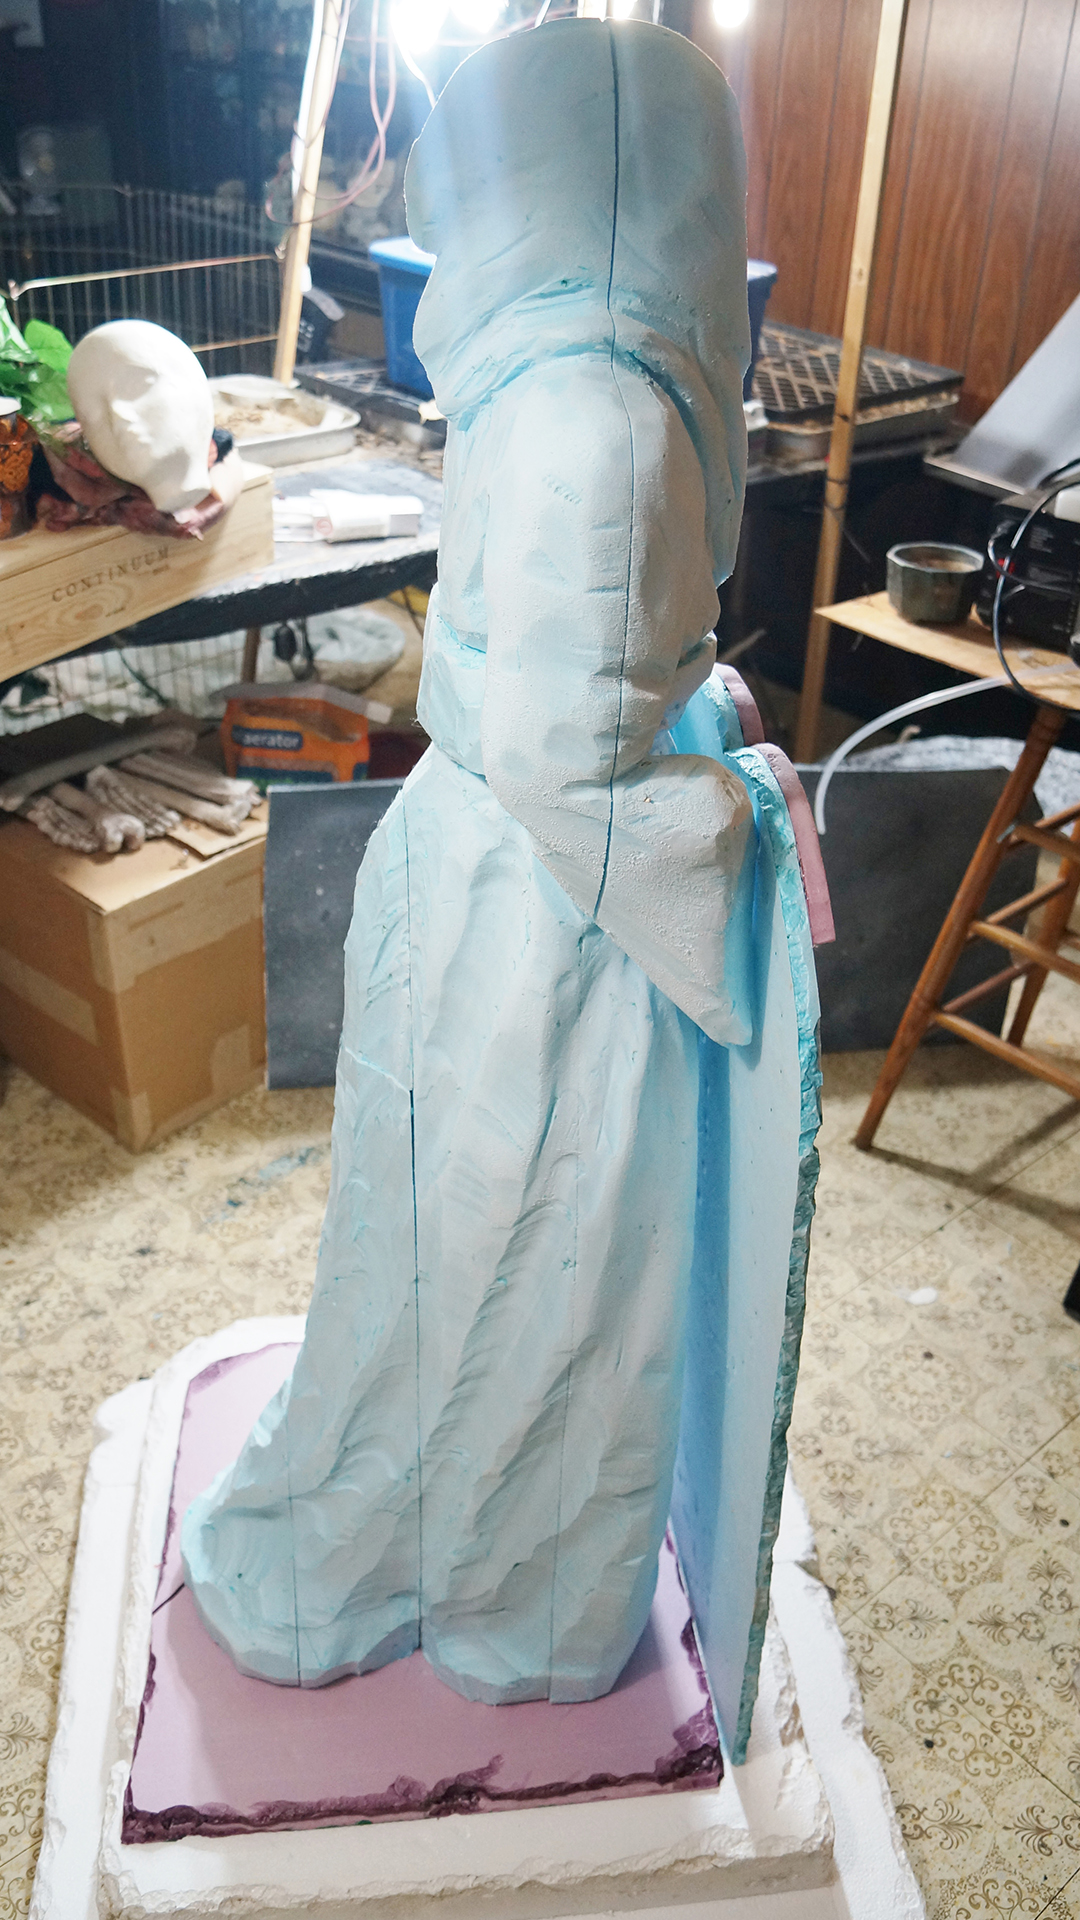
“The Angel of Death is made of four pieces of foam sandwiched together and carved. Several tools were used here. First I used the hand held wire cutter to block out and remove large hunks of foam. Next I used the long wire wand to create the details. A sanding block was used to smooth out the fine details.”
“This project took about eighty hours to create from start to finish. I have used other wire cutting tools in the past. Hot Wire tools made this project easy. The other tools I used would not have stood up to the many hours of continuous use. Hot Wire tools have taken my work to a new level.”

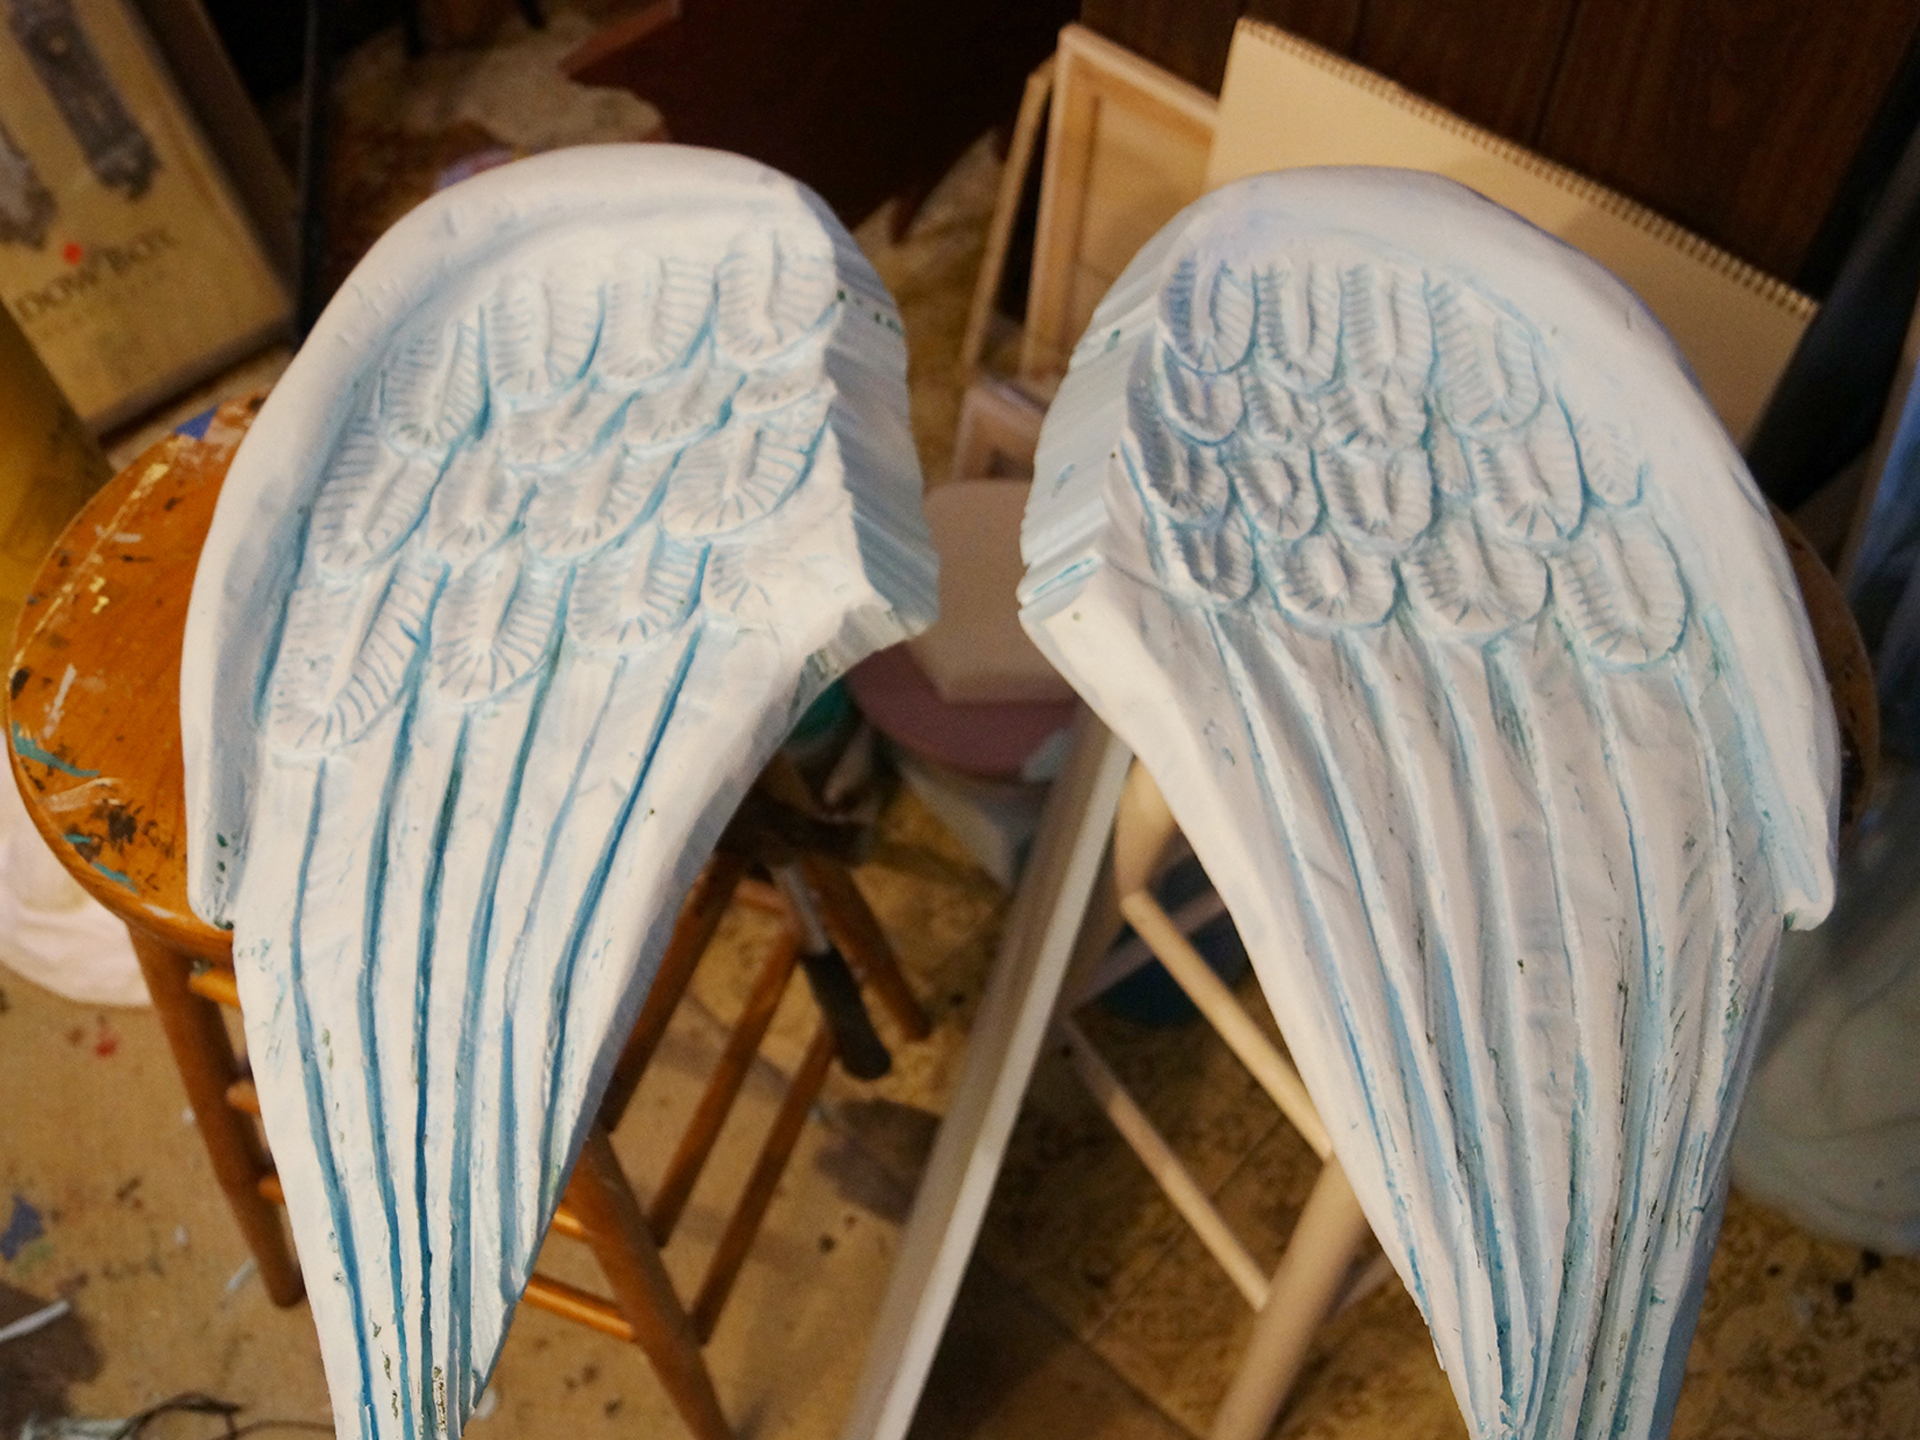
“The wings were carved out of two separate pieces of 3” thick foam. The thick foam allowed them to be concave. The detail of the wings was created using the Engraving Tool.”
“The entire piece was painted black, then dry brushed with a light gray acrylic paint. Next, a dark green was added to the gray color, producing a greenish tinted gray, and this was sponged on to give the piece a granite look.”
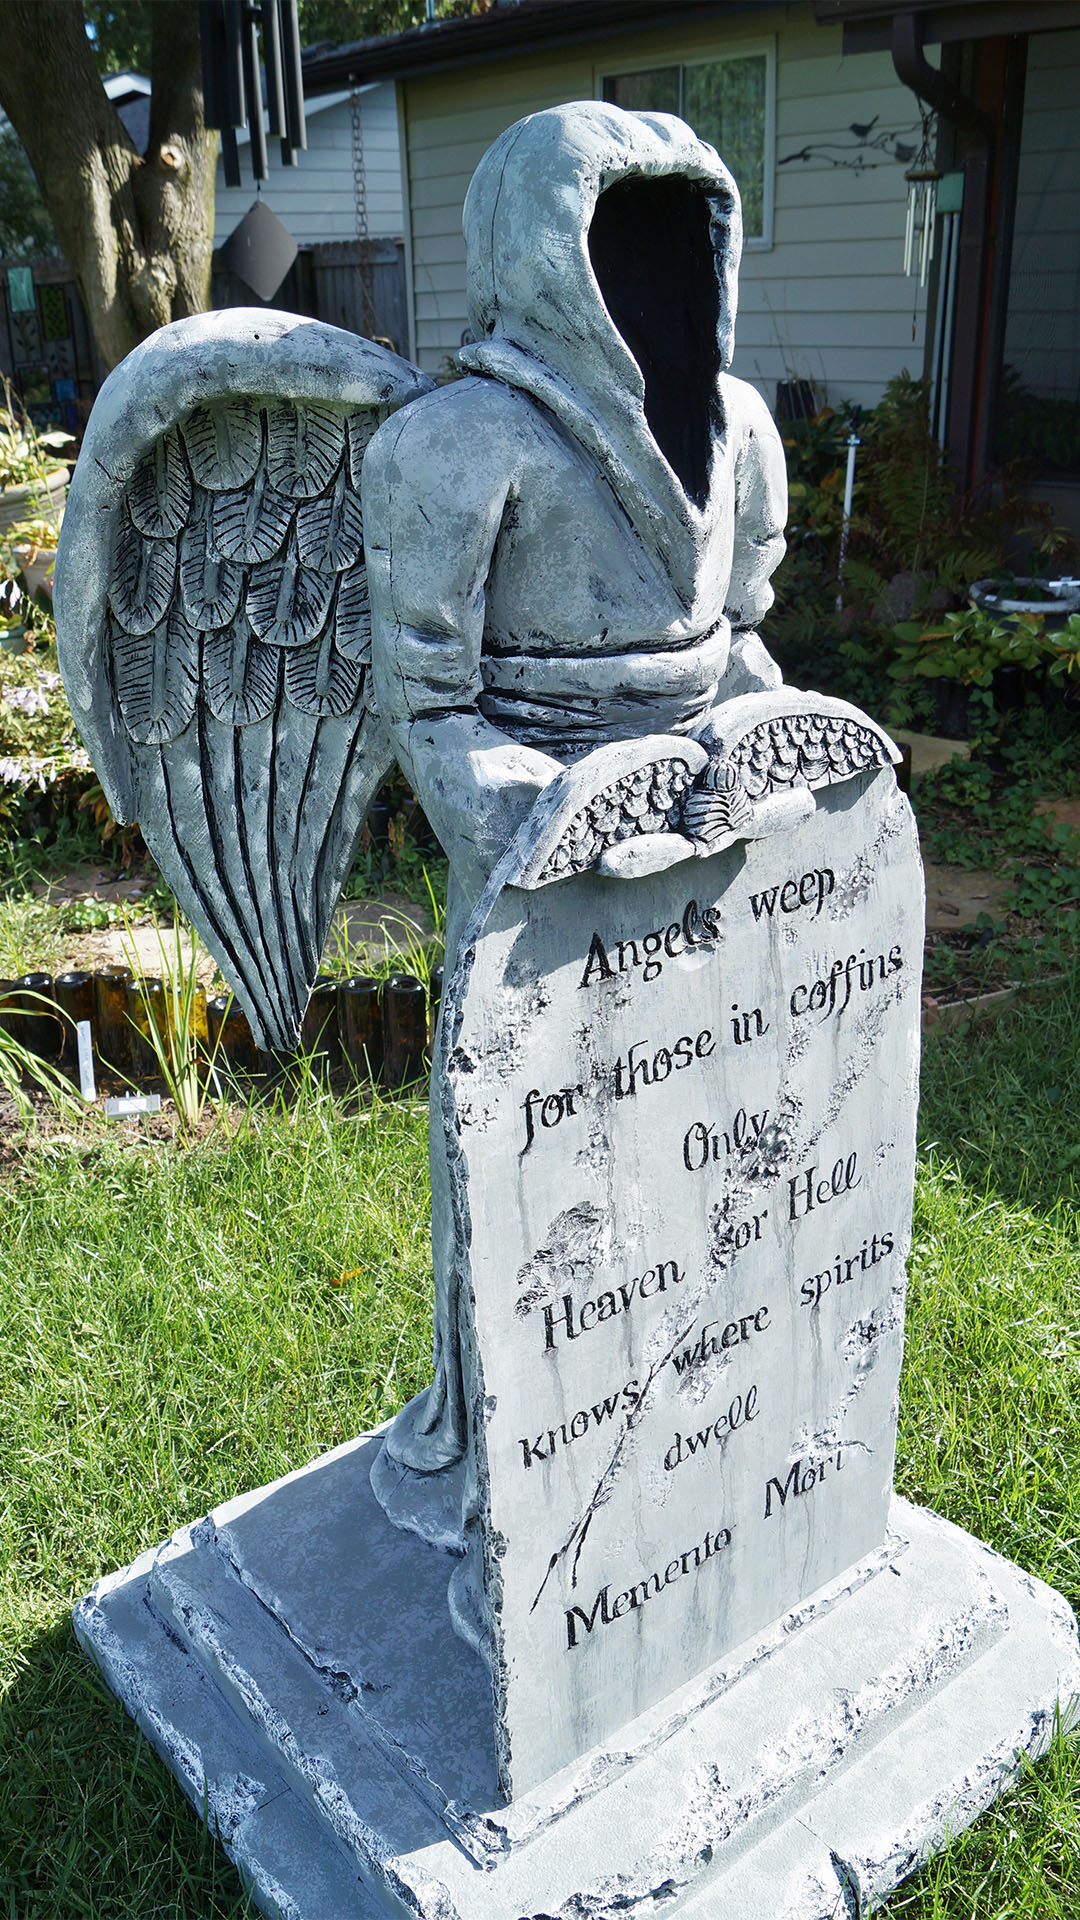
“To finish the piece, the edges were highlighted with white. This gives some depth and definition to the piece. Finally, black and dark brown washes were added to give the look of age.”