Raven Tombstone
Terra
www.halloweenforum.com/blogs/terra
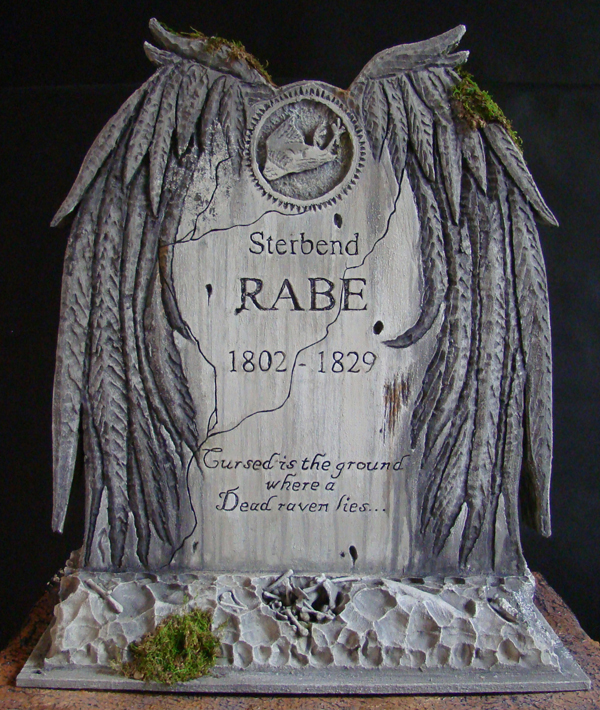
I offered the prize of a custom-made tombstone for the Hauntcast Resurrection. Mike P. won it and he picked “dead raven” as the theme. It’s the name of his cemetery for his haunt. The following photos show just a few of the steps and photos that went into making this tombstone – a full build tutorial with more pictures can be found at https://www.halloweenforum.com/blogs/terra/1181-raven-tombstone-tutorial.html
A video showing highlights of the build is found at the bottom of the page.
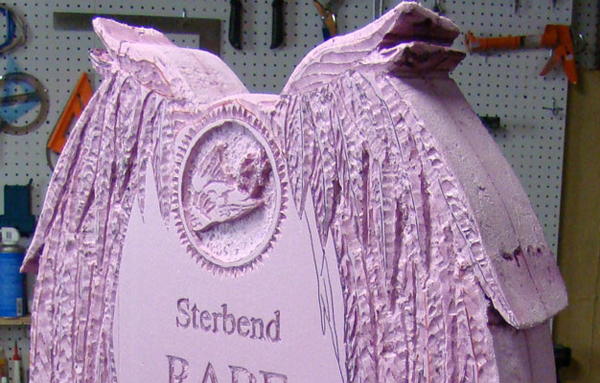
Carve out epitaph using the Engraver tool if you wish. It allows much thinner fonts and is fast work. Use the 4″ blade on the Industrial Knife to carve the edge of the feathers so the tombstones has a nice ‘feathered’ look to it.
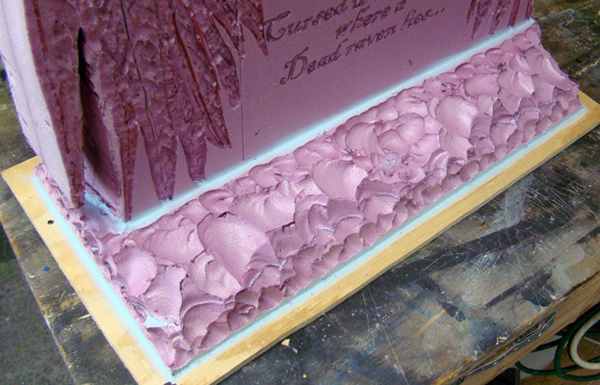
Carve Rocky Base: Use different sized shapeable blades for the Industrial Knife to carve out notches in the foam like you are giving the look of chipped stone. You can first use a smaller shapeable blade to give you a good overall chipped look then use a larger one to help make it look more random and natural. Carve away a deeper ‘bowl’ to hold the bird bones that you will add later.
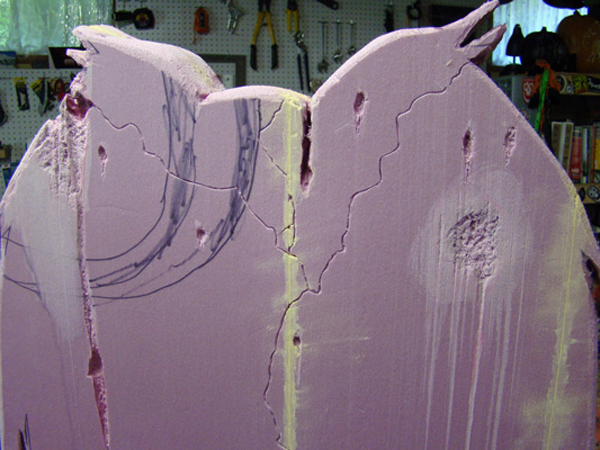 Cut in Cracks: Never been happy with the cracks on my old stones. Spent some time examining actual cracks in cement and realized that they are very thin instead of large like I’ve been making them before. First draw out a shaky line with a Sharpie. Cut over that line with an eXacto knife ever so slightly angled. Make a matching cut on the other side and chip out with the point of the knife. Don’t worry about random bits bunching up in the crack – makes it look more realistic.
Acetone & Scratch: New technique here to have the acetone step make more authentic-looking erosion spots. After the acetone step, scratch the areas with a thin wire brush or wire pottery tool. If it’s a spot erosion area then scratch only the bottom half like it has eroded from dripping rain over the years. Scratch the entire surface of surface abrasions.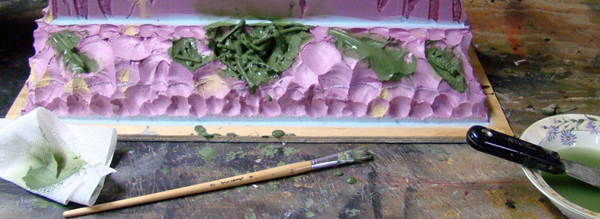 Monster Mud Bones: Wow, was this step a dilemma. What would one use for the bones of dead birds that met their demise by the curse of the stone? Well, bird bones right – you can get them anywhere. Ah… no. Darn, now I was stuck… until a fellow haunter gave me an AHA! idea. Why not use chicken bones? A raven is a large bird… actually similar in size to a chicken. So, hubby had roasted chicken that night and the next day boiled the heck out of the bones. Next step is to bleach the bones for an hour to sanitize them and let dry overnight.
Place random collections of bones around the base of the tombstone and pile them up in the well you created. You are telling the story that birds die near this stone if they venture by. It has happened so many times that their bones petrify and become part of the stone. Monster mud them in place and monster mud a duck feather to help drive home the point.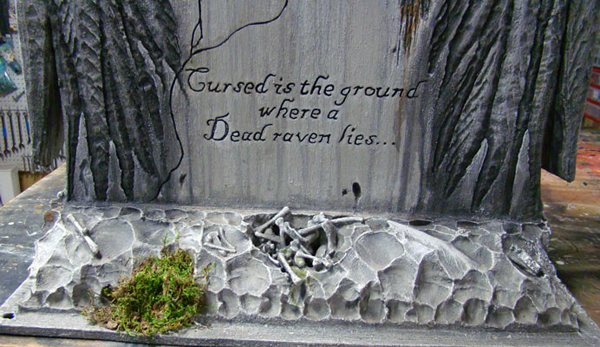
Paint & Detail: Use thinned black paint instead of the usual dark gray on the cracks and epitaph to help the smaller font be easily readable. Also dab in a few very small pin points in some of the faults on the stone to help make the holes look even deeper. Follow with tea staining, detail shading, dry-brushing and detail color work to bring out the authentic stone look.
Finish with Moss: Glue in some moss and you are done! This picture also helps to show the magic that the detail shading can give you. It adds to the drama of the wings.
