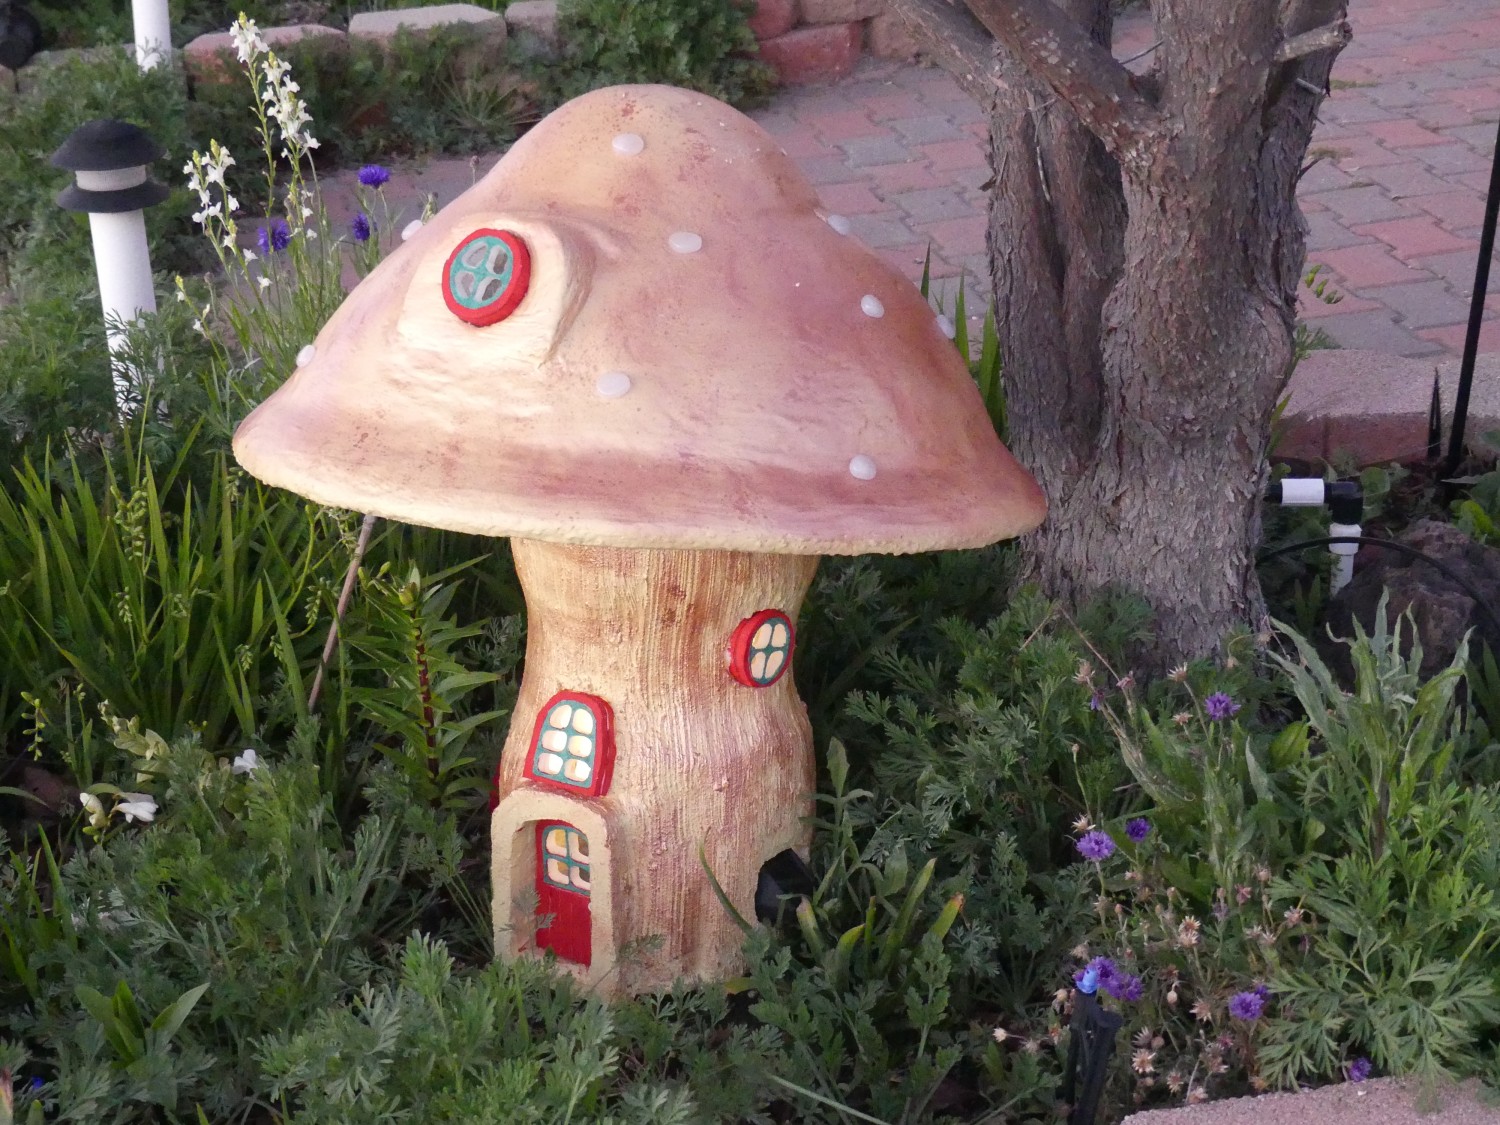
Mushroom Fairy Houses
By Dave Natal
Learn several useful foam sculpting techniques while building your own DIY fairy house.
 To make the stems I started out with a hollow foam column (that I was lucky to find) and 2 inch thick EPS foam insulation board.
The hollow column was used for the large mushroom.
For the small one I did this:
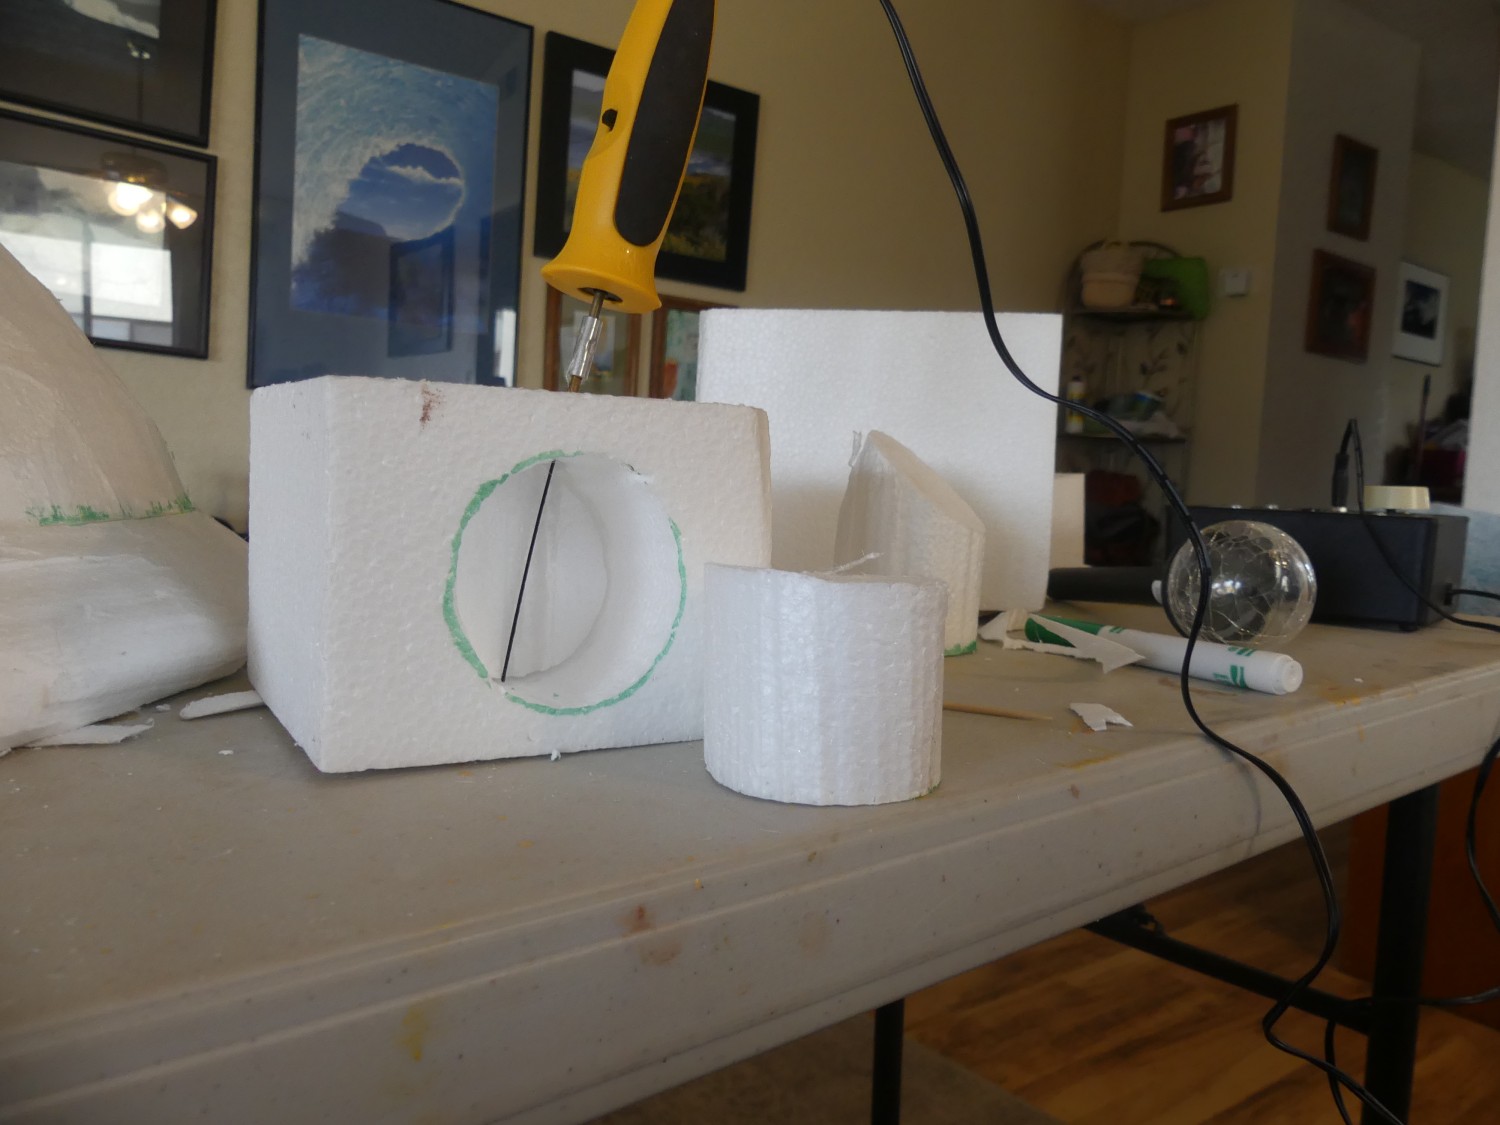
1. Cut 6 x 6 inch squares from the sheet of 2 inch thick foam using the 3-Inch Hot Knife
2. Stacked 5 of the squares of 2 inch foam to make a 10 inch tall stem
3. Skewered them together with toothpicks
4. Carved the outside so it looked like a mushroom stem using the Sculpting Tool
5. Removed the skewers and carved the inside of each of the 5 pieces, so the stem would be hollow
6. Glued the pieces together with Foam Fusion glue
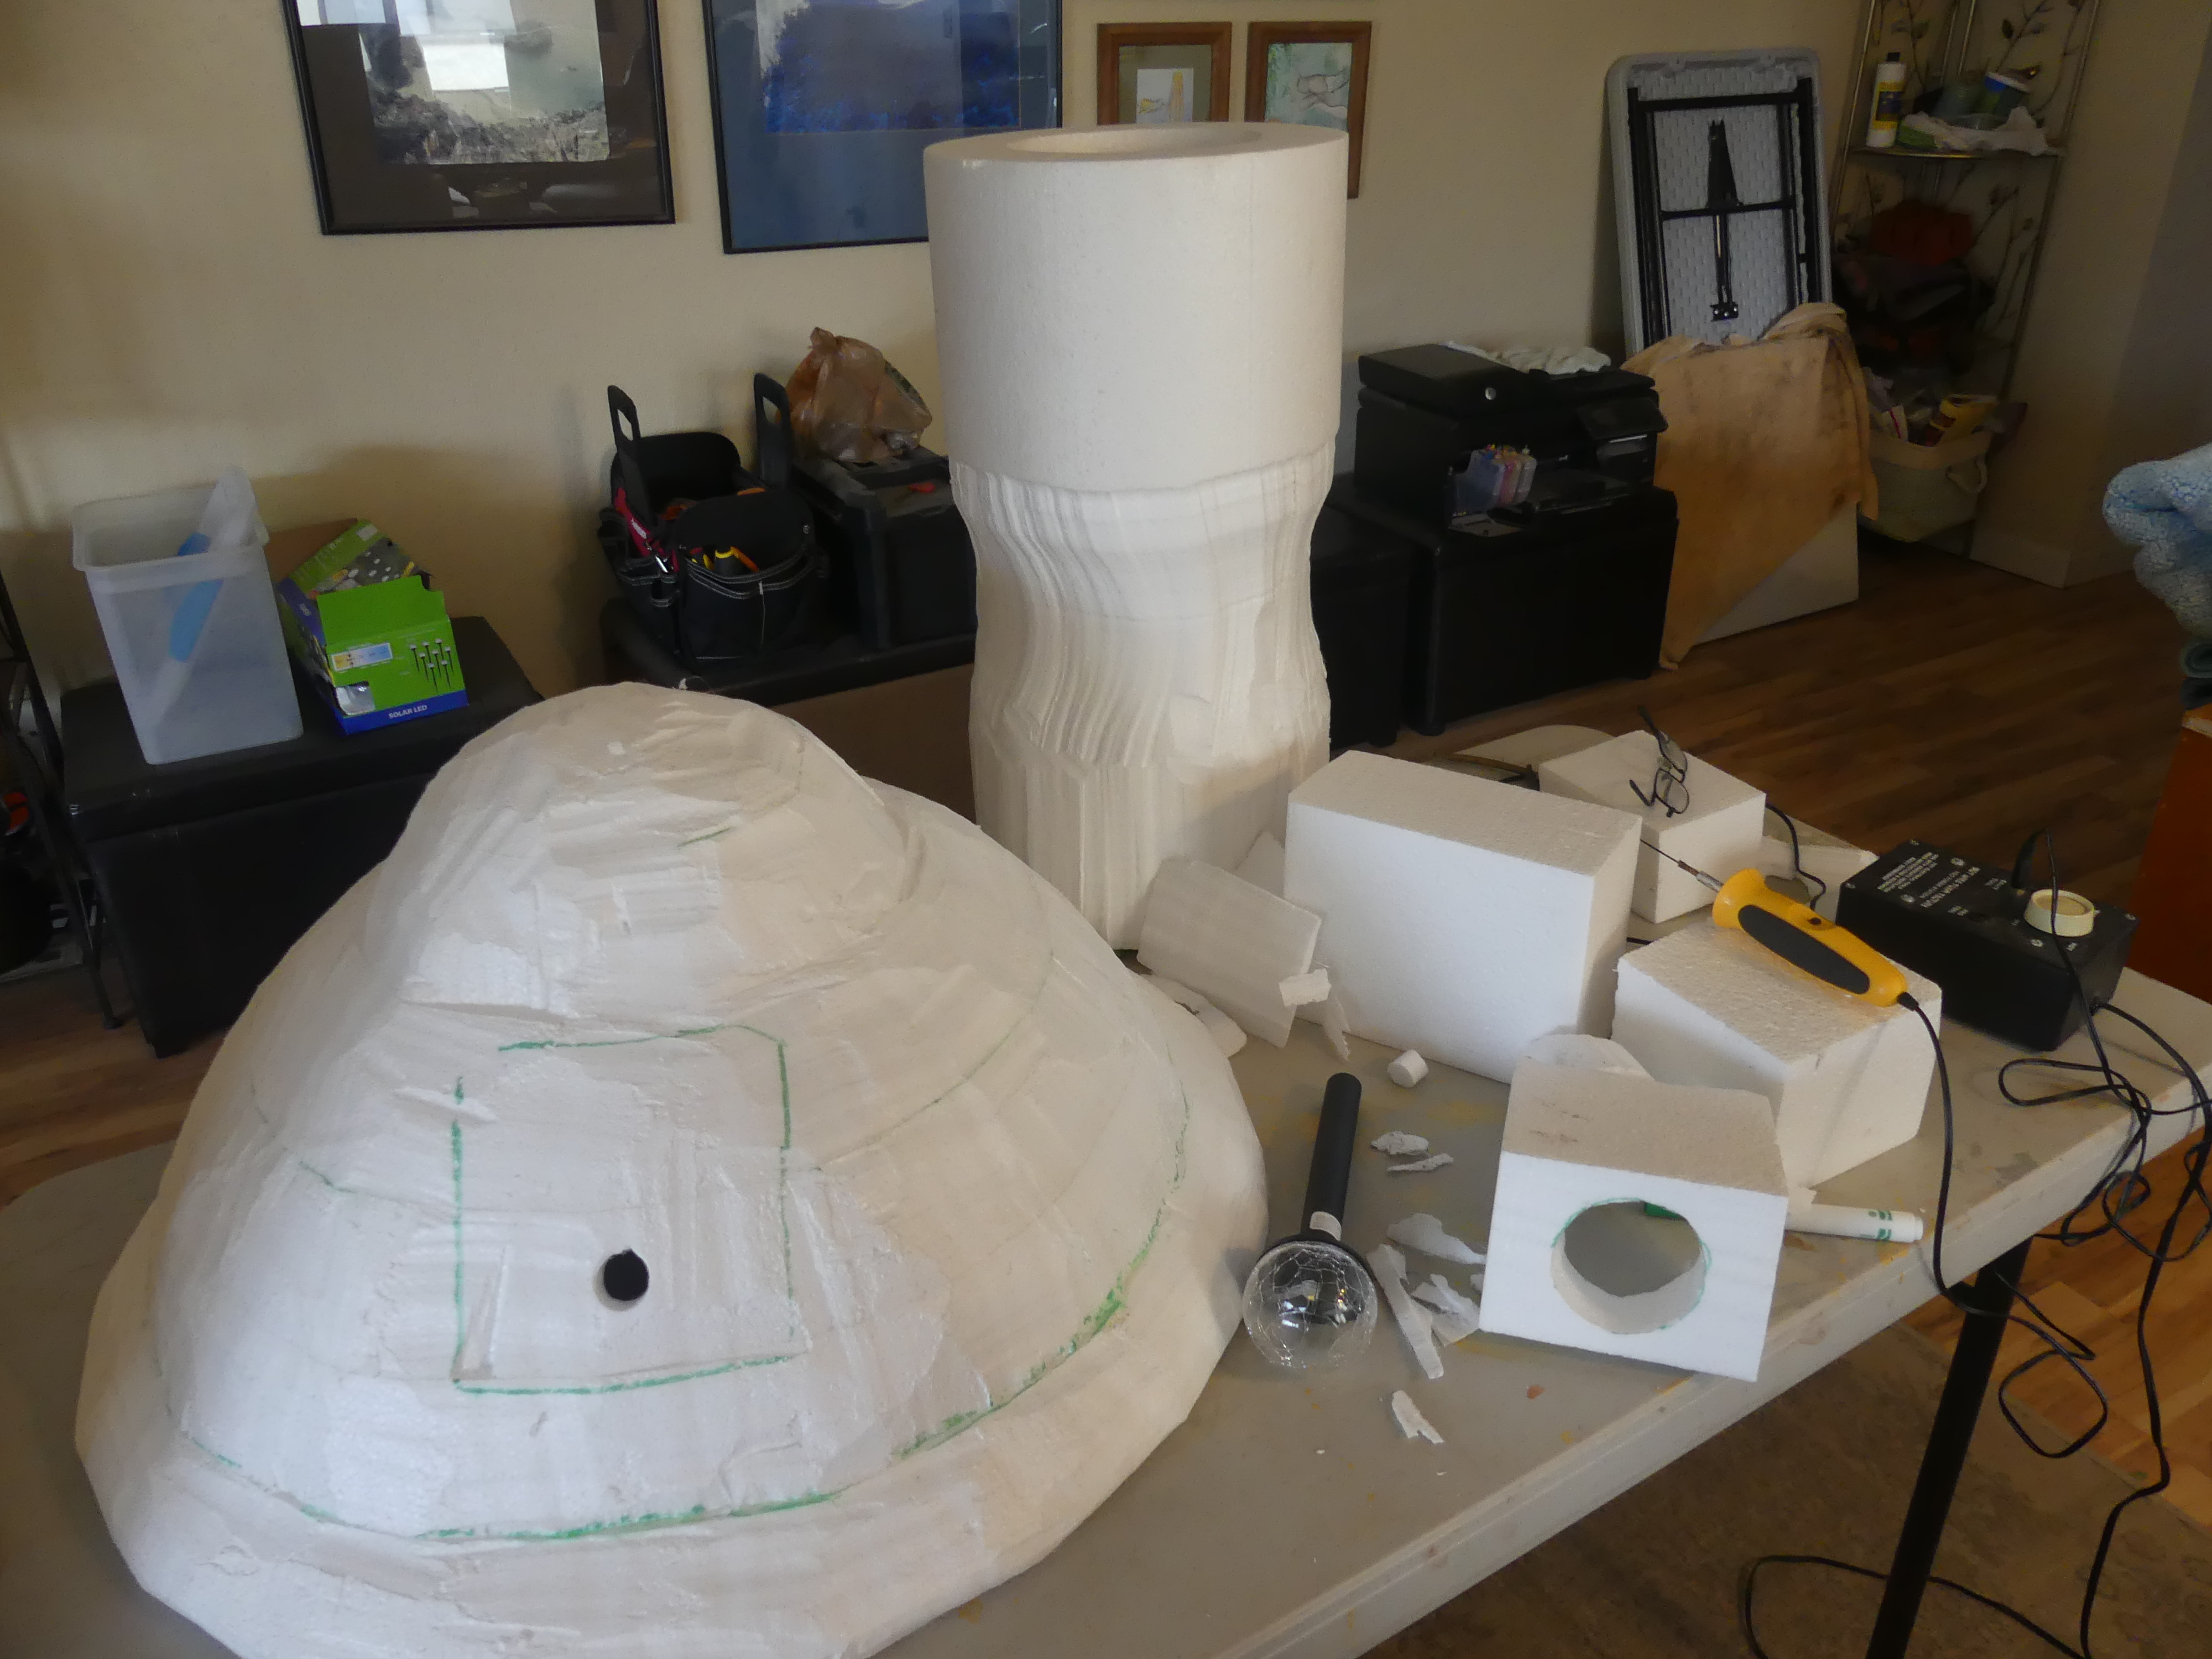
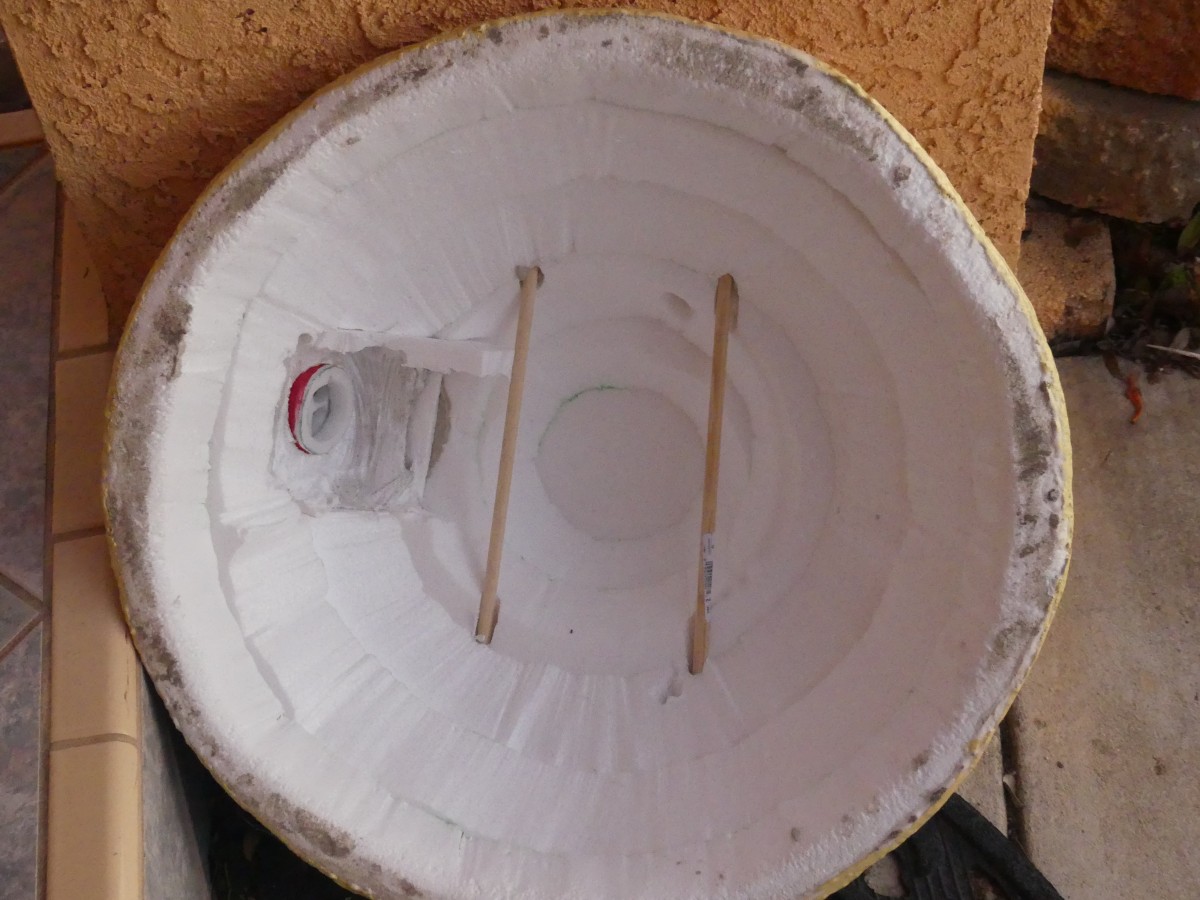
To shape the large column into a stem I mounted the Freehand Router onto the Sled Guide and shaped the cutting wire into a gentle outward curve. I then slide the Sled around the column to rout out a curved indent.

This video shows you how to make the mushroom cap out of a single 2 x 24 x 24 inch slice of foam! This method will be handy for lots of other foam projects. It’s much easier and more economical than carving it out of a big foam block.
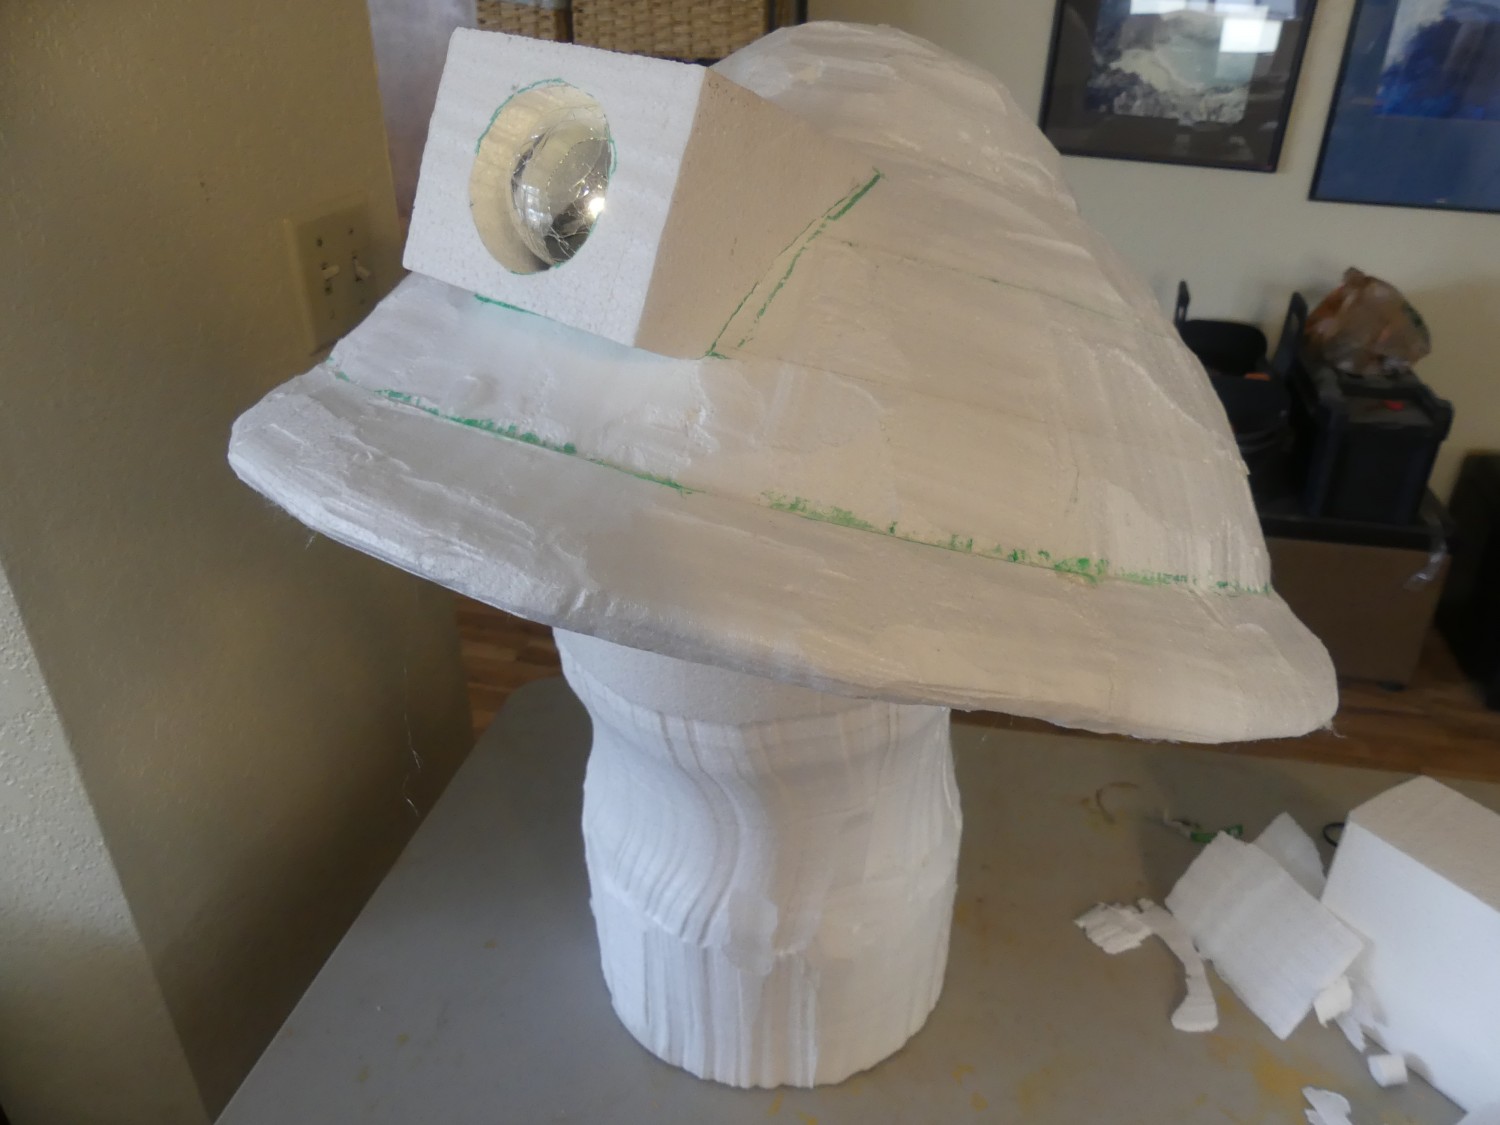
I wanted to make a bay window with the solar light shining outward, so I:
1. Cut a hole into the mushroom cap to insert the base of the solar light.
2. Drew a rectangle where I wanted to insert the bay window.
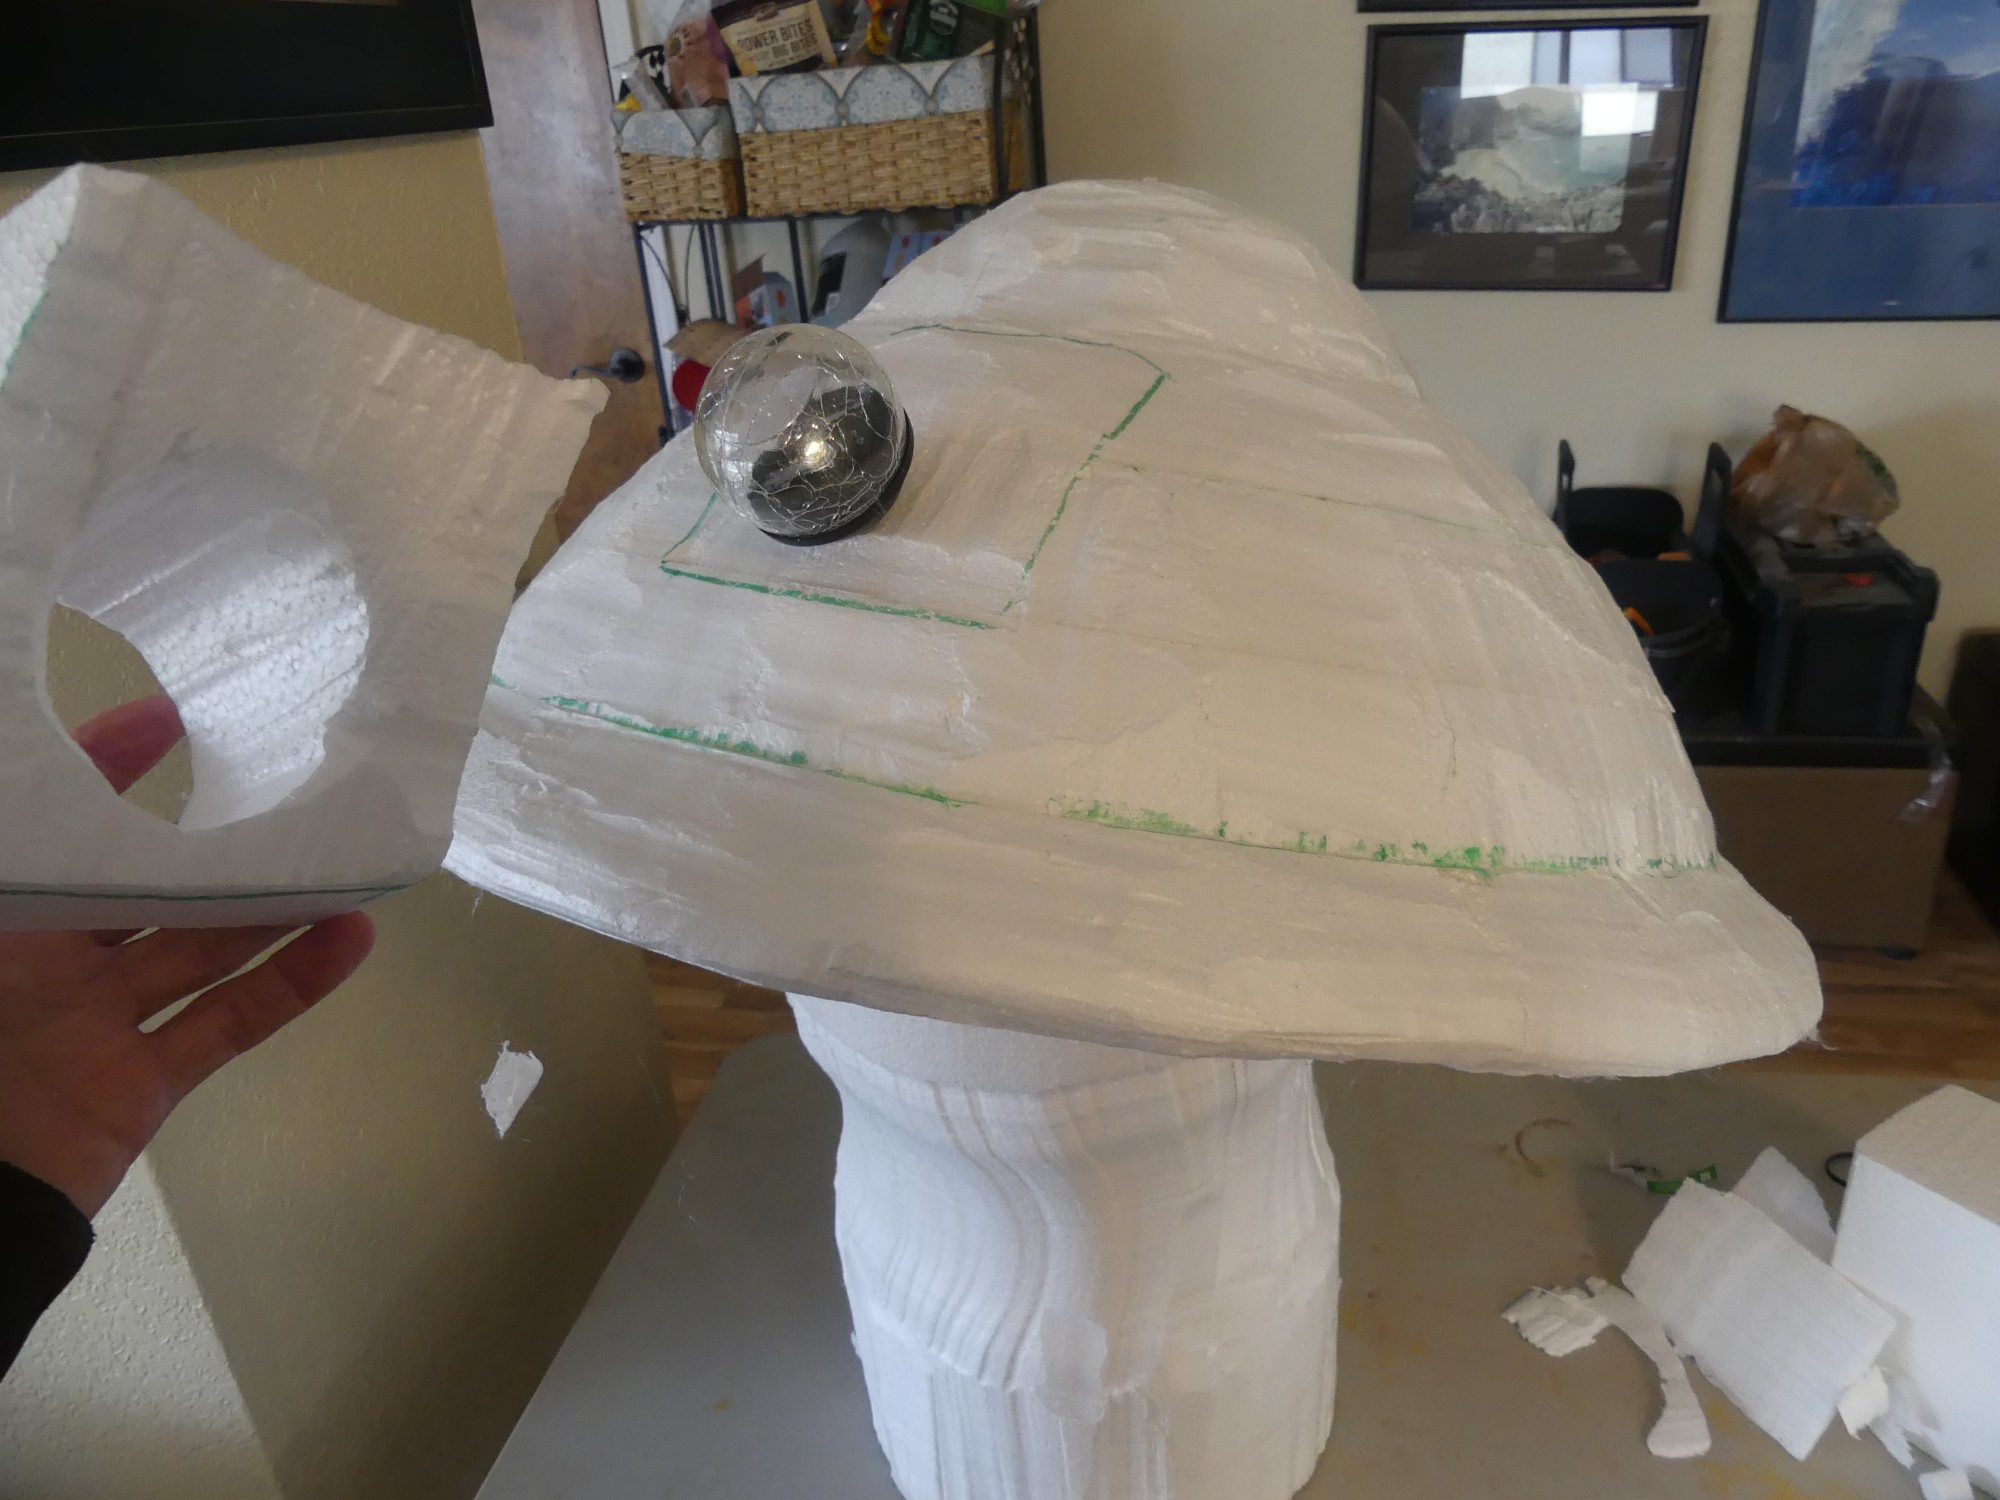 To carve the block for the bay window I:
1. Cut out 2 equal size rectangles from 2 pieces of my 2 inch thick foam
2. Glued them together with Foam Fusion (which can be easily cut through)
3. Cut a 3″ deep circle into the foam, for the window/solar light
4. Inserted the Hot Knife into a side of the foam and made a sweeping cut to release the foam plug
5. Using the Sculpting Tool with the Wire Tensioner I cut a curve in the back of the foam block to fit the contour of the mushroom cap.
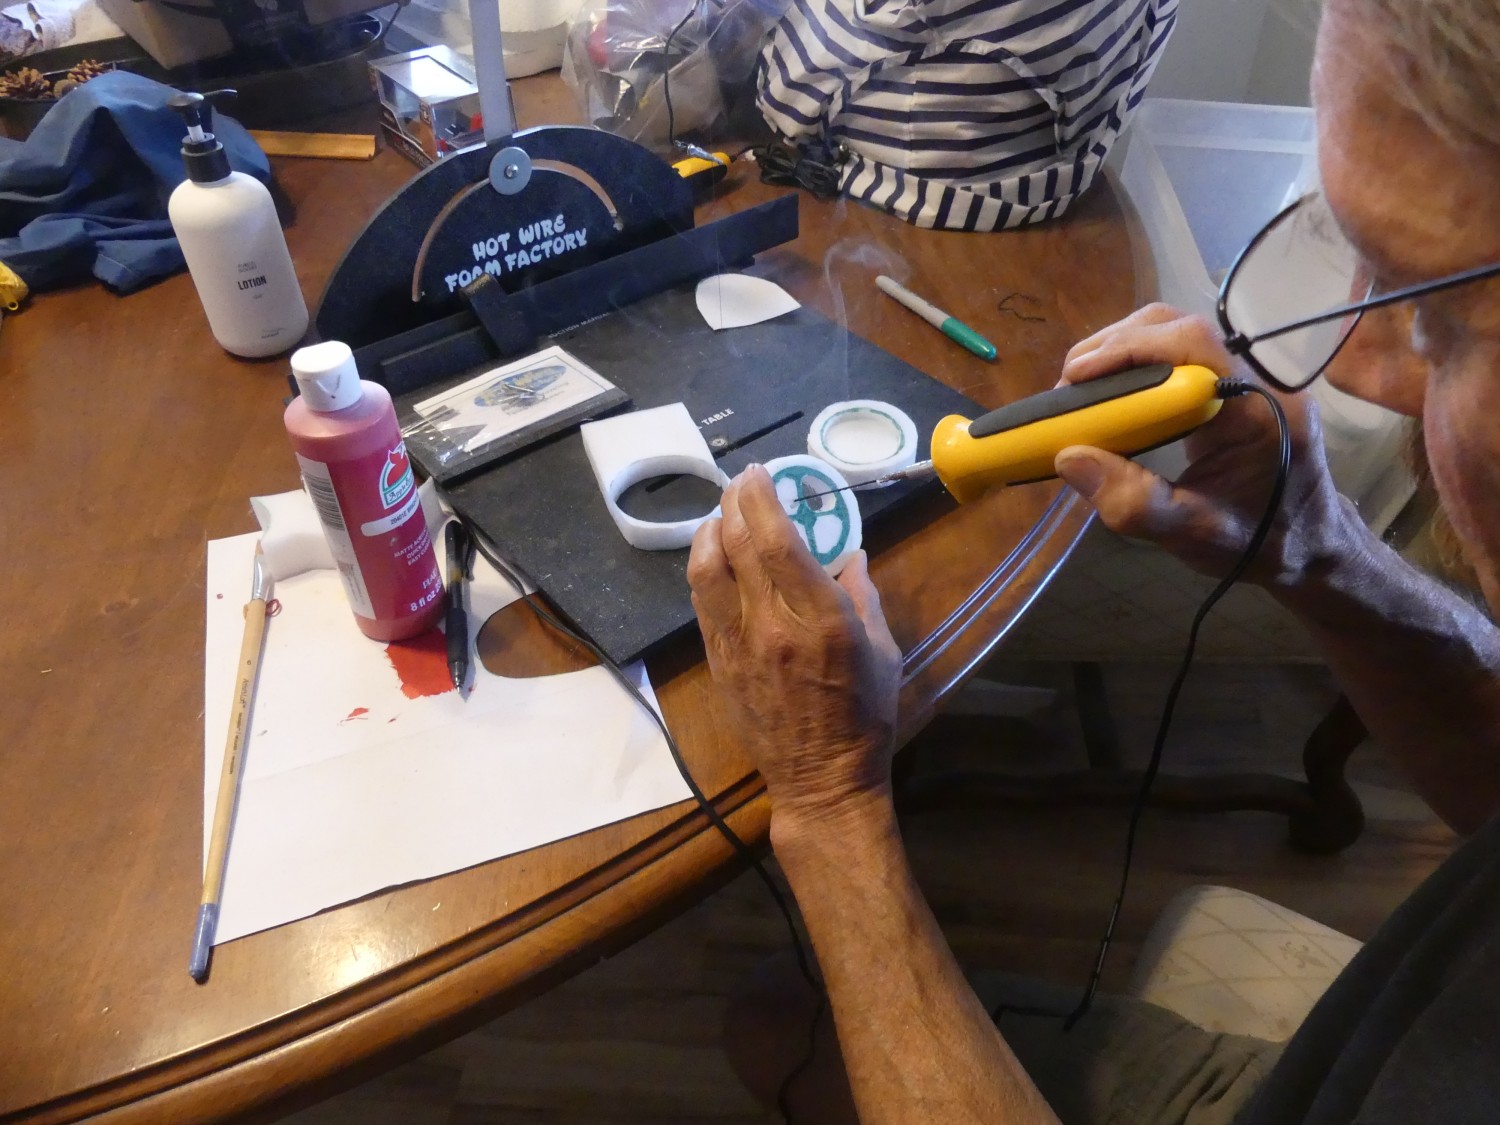
To make windows I:
1. Sliced some pieces of 2 inch foam down to 1/2 inch thick using the Original Scroll Table
2. Cut circles out for the windows
3. Carved some fancy holes for window panes
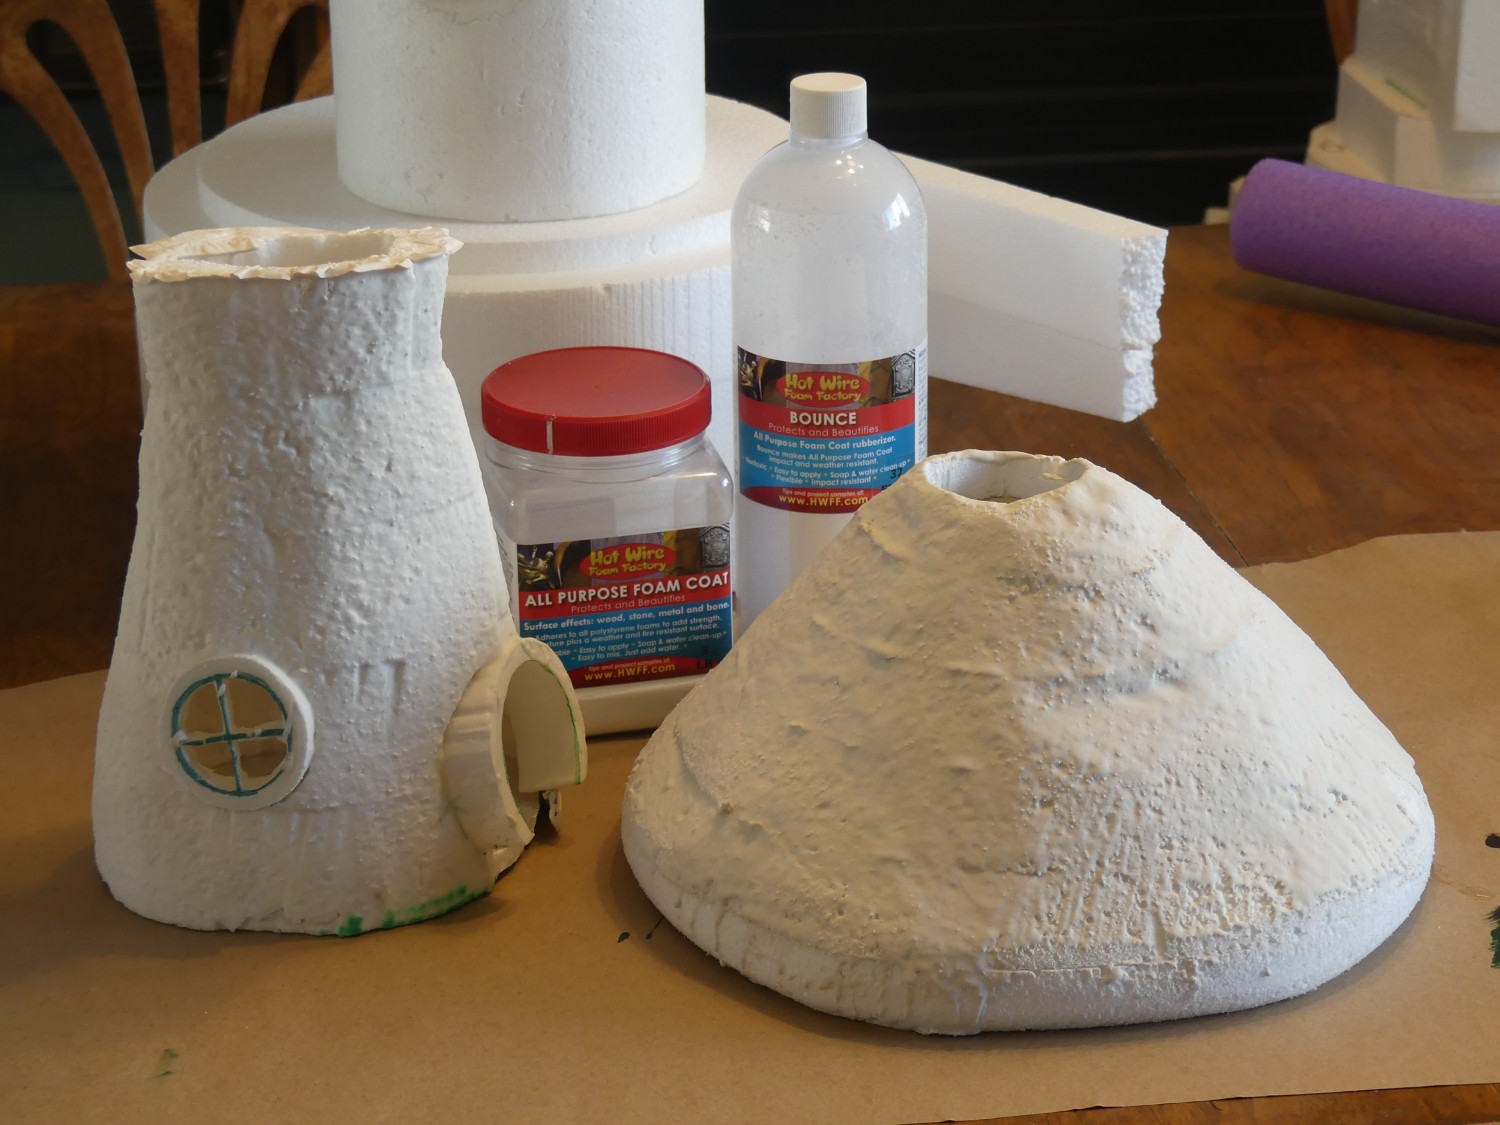
I wanted a coating that would retain detail, could be textured to look like a mushroom, would be light, and be weatherproof. After trying different proportions of All Purpose Foam Coat and undiluted Bounce I settled for a 50/50 mix. Where I needed more detail I thinned it with a bit more Bounce. Where I needed a thicker layer that I could texture I thickened the mixture with more Foam Coat.
When I told Loulou that I made a fairy house she replied in a sad but stern voice, “Uncle Dave, there’s no such thing as fairies.” After a thoughtful pause she added, “Well, there are tooth fairies.”
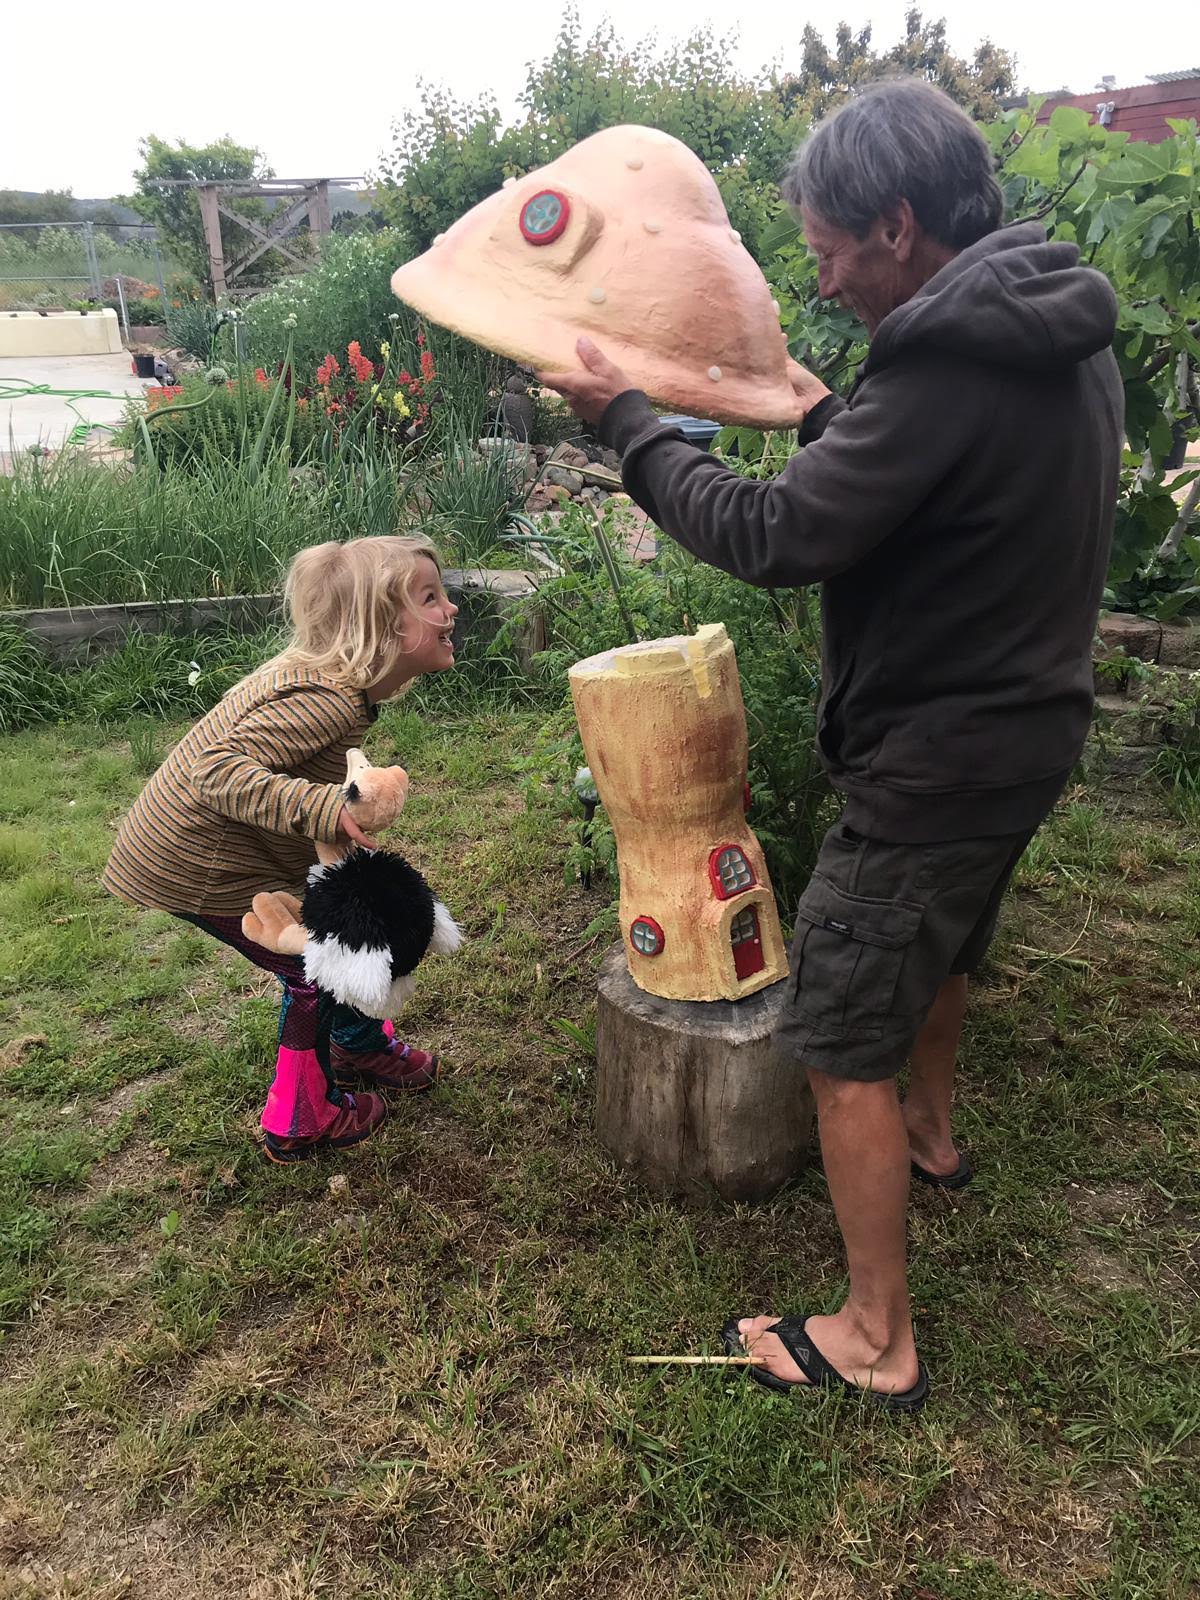
I nixed the light and made it into an upstairs bay window. It might have looked better on a lighthouse fairy house. Both mushrooms have internal lights that the tooth fairies turn on at night.